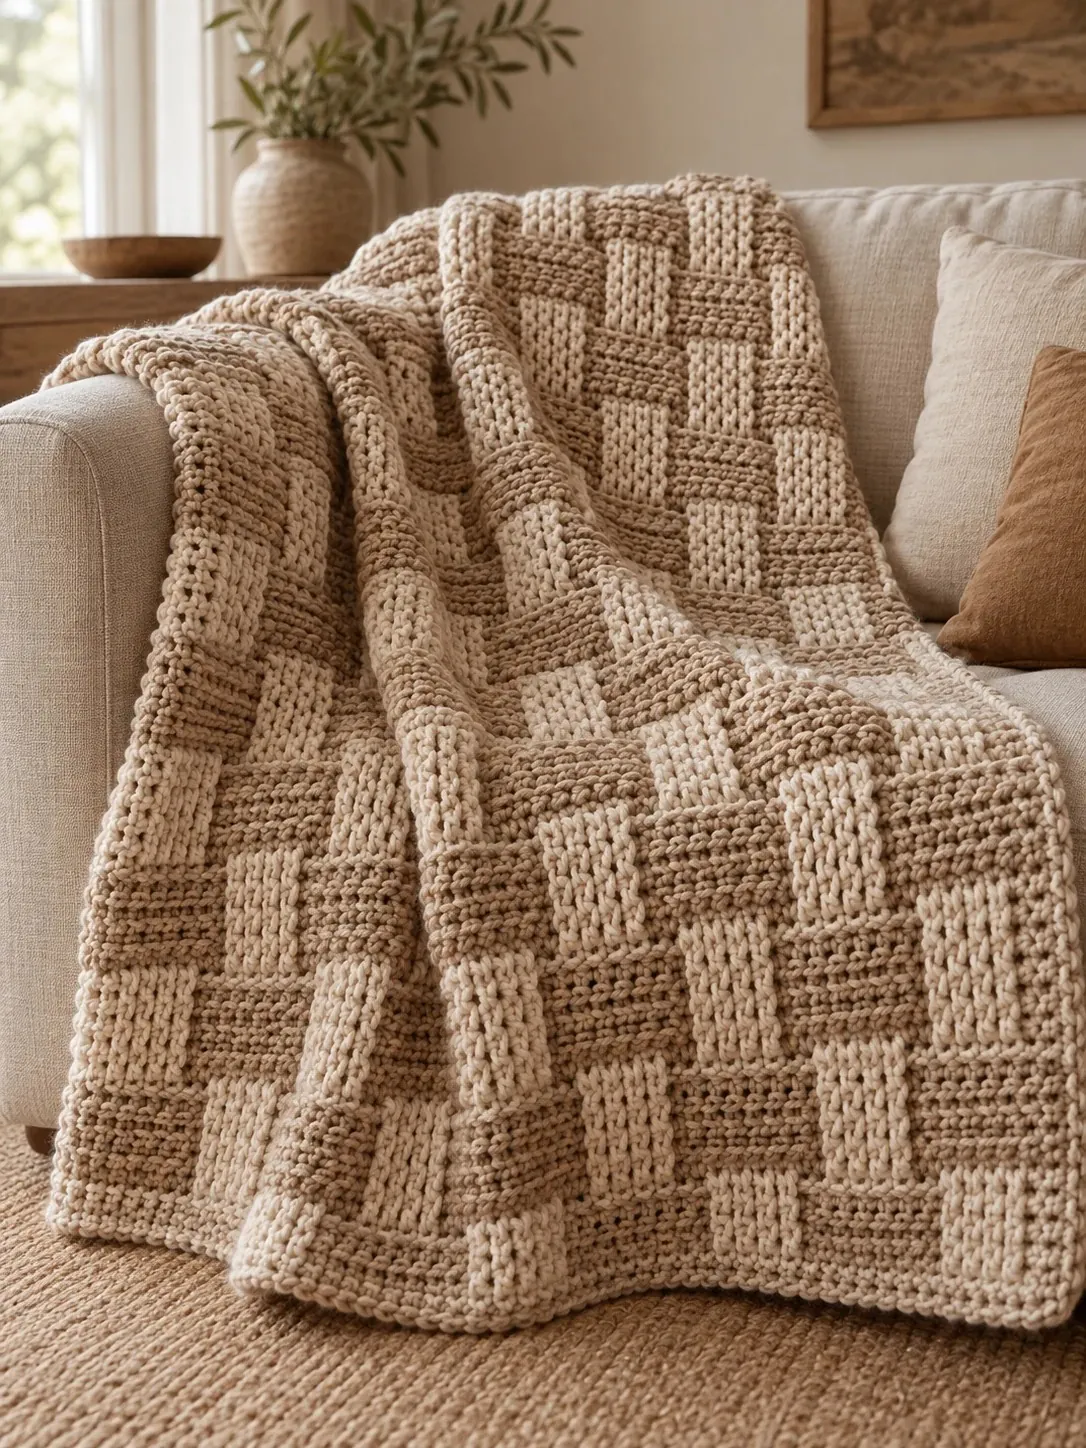
The colors for this one came from my kitchen shelf, where a stack of linen napkins sits next to a cream pitcher. Side by side, they look like the inside of an old picnic basket. This basketweave crochet blanket turns that into yarn: linen squares and cream squares set out like a checkerboard, with their ridges running in opposite directions so the whole throw looks woven.
Here’s the part I like best. Every one of the 63 squares is made the same way. You work 18 rows of single crochet in the back loops, add one round around the edge, and that’s a square. The weave only shows up when you lay them out and turn each cream square on its side. The pattern card makes a throw of about 49 × 62 in (124 × 157 cm), and the size list below runs from a 35-square lap blanket to a twin.
Is this basketweave crochet blanket a good project after your first rows?
If you can work a chain and a single crochet, you can make every square. Two small techniques will be new, and each takes a minute to learn.
The first is working in the back loop only, written BLO. The top of every stitch has two loops that form a sideways V. The front loop is the one closer to you, and the back loop is the one farther away. From Row 2 on, you slide your hook under the back loop alone. The front loop stays behind as a little ridge, and those ridges, one on every second row, give each square its direction.
The second is the whipstitch you’ll use to join the squares. Hold two squares together, push a yarn needle through a stitch on each one, bring the yarn over the top edge and go into the next pair of stitches. It’s sewing in a spiral, nothing more. The rounds close with a slip stitch, a stitch with no height: hook in, catch the yarn, and draw it through everything on your hook at once.
I call it Easy rather than Beginner because of the assembly. Making one square is simple. Making 63 that match, then joining them in the right order, asks for a bit of patience and a habit of counting.
The pattern card uses short forms like sc BLO and rep from *. If those look cryptic, the Beginner Guide shows you how to read a crochet pattern line by line. And if squares turn out to be your thing, the Green Mountain throw works its squares in rounds instead of rows.
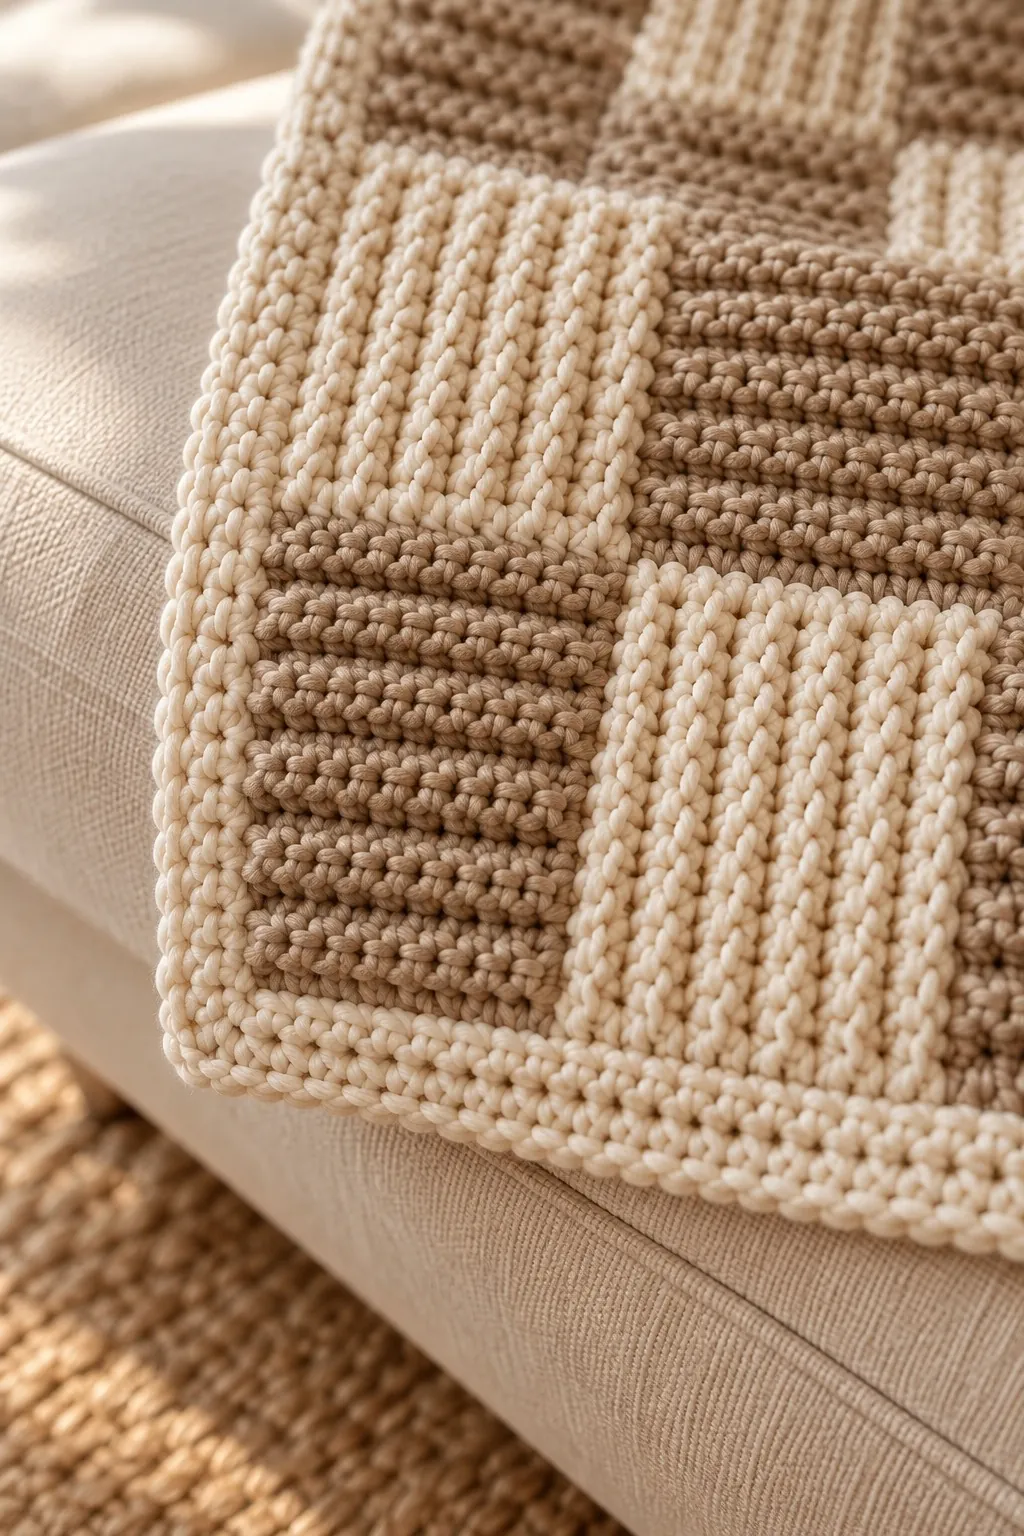
Bulky yarn that keeps 63 squares the same size
Look for a 5 on the label, the bulky symbol, and pair it with a 6.5 mm (US K-10½) hook. Back-loop single crochet makes a dense, springy fabric, and staying at the small end of the bulky hook range keeps the ridges standing up instead of flattening out.
A smooth, plied yarn shows those ridges best. For a blanket that takes about 2,450 yd (2,240 m), I’d choose acrylic or an acrylic and wool blend: soft, washable and kind to your budget. Leave brushed, bouclé and chenille yarns for another project. Their fuzz fills the gaps between ridges, and the weave turns into a plain checkerboard. Pure cotton isn’t a good match either, since it’s heavy in bulky weight and 63 squares of it would drag on the seams.
Buy every skein of each color at once and check the dye lot on the labels, cream included. A dye lot is the batch the yarn was colored in, and two batches of the same shade can differ enough to show on a pale square. If you switch brands, keep the same fiber and a similar yardage per skein weight, or your squares won’t come out the same size.
Your gauge swatch is your first square. Before the edging round, it should measure 6 × 6 in (15 × 15 cm). If it’s wider, go down a hook size. If it’s narrower, go up one. Then check the height. Back-loop rows often pack a little tighter than the stitches across, so if your square is shorter than it is wide, add a row or two and do the same on every square. Fix it now: a quarter inch off on each square adds up to almost 2 in across the throw.
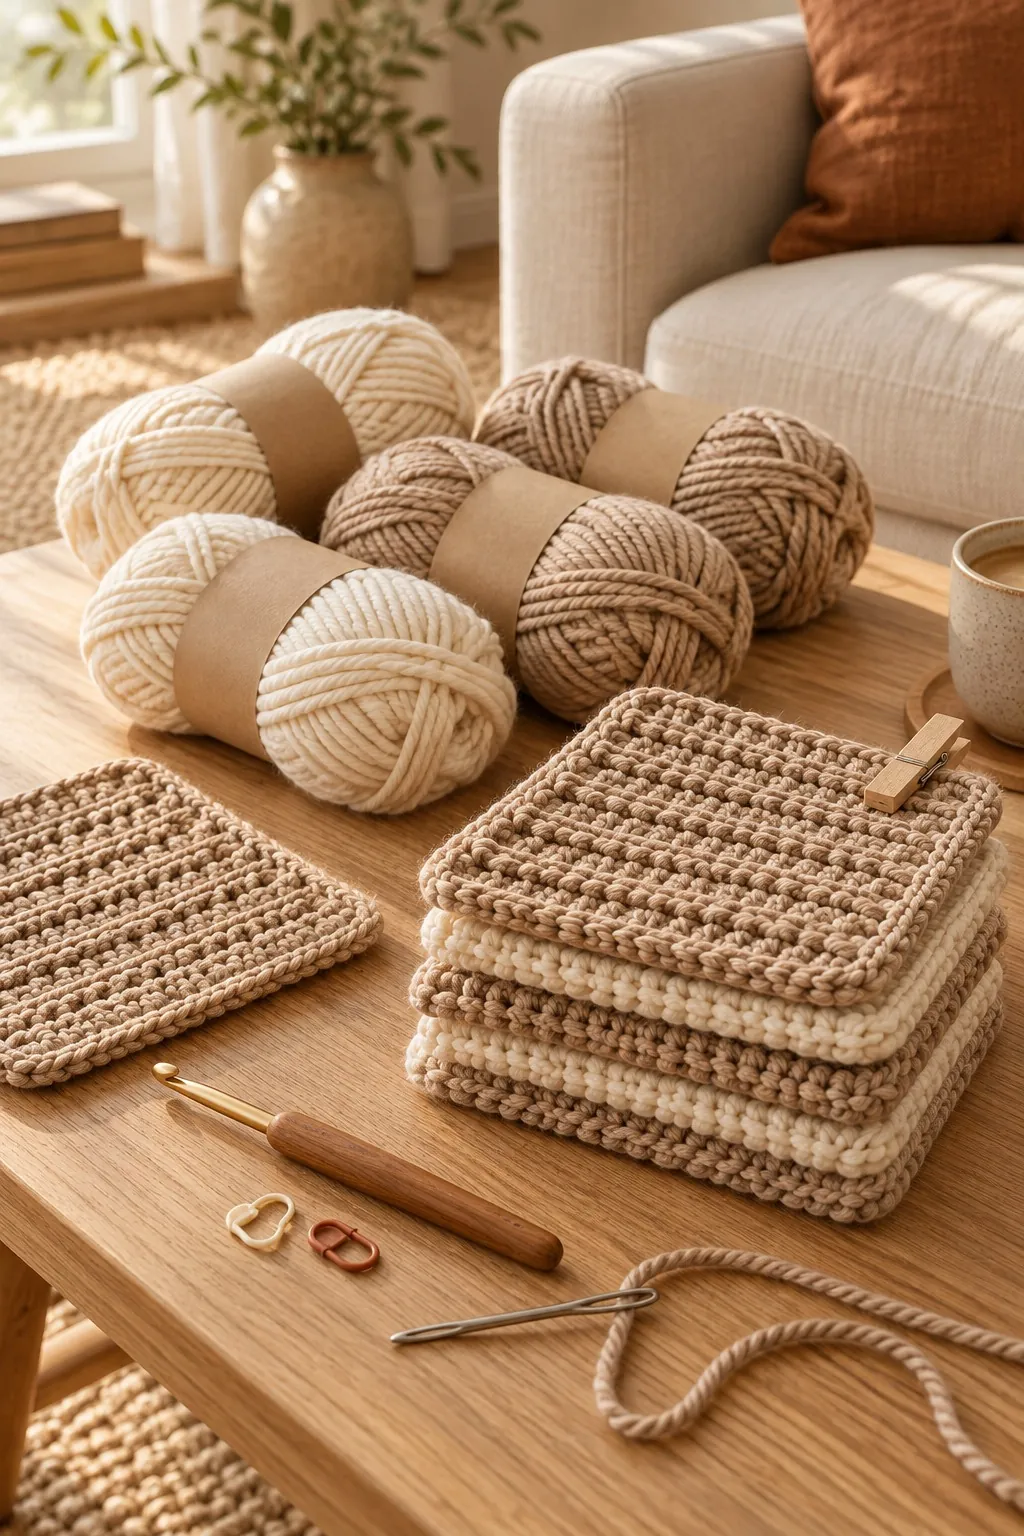
Linen, cream and other pairs that read as woven
Each color has a job. Cream takes the squares whose ridges run up and down, plus the border. Linen fills the squares whose ridges run side to side, and it does all the joining too, so the seams sink into the darker shade.
The weave shows best when the two colors share the same warmth but differ in value, meaning one is clearly lighter than the other. With too little difference the checkerboard fades. With too much, like black and white, it starts to look like a game board instead of a basket.
Pairs I’d happily make:
- Fresh linen: taupe and cream, as in the photo.
- Sage porch: soft sage green and cream.
- Wet slate: charcoal gray and pale dove gray.
- Cider press: honey gold and oatmeal.
- Old denim: faded blue and natural white.
Before you buy, set the two skeins side by side and take a photo with your phone in black and white mode. If you can still tell them apart at a glance, the weave will show.
Linen Basketweave sizes, from 35 squares up to 117
Every size uses the same 18-stitch square, about 6⅔ in (17 cm) once its edging is on, and the same three cream border rounds. The layout always has an odd number of squares each way, so all four corners are linen, which keeps them from blending into the cream border. The pattern card is written for the throw. Yardage is an estimate with about 10% extra, rounded up to the next 50 yd.
- Lap, about 35 × 49 in (90 × 124 cm): 5 × 7 squares (17 cream, 18 linen); border rounds of 484, 492 and 500 sc; about 750 yd (686 m) cream and 700 yd (640 m) linen.
- Throw, about 49 × 62 in (124 × 157 cm): 7 × 9 squares (31 cream, 32 linen); border rounds of 644, 652 and 660 sc; about 1,250 yd (1,143 m) cream and 1,200 yd (1,097 m) linen.
- Large throw, about 62 × 75 in (157 × 191 cm): 9 × 11 squares (49 cream, 50 linen); border rounds of 804, 812 and 820 sc; about 1,900 yd (1,737 m) cream and 1,900 yd (1,737 m) linen.
- Twin, about 62 × 89 in (157 × 225 cm): 9 × 13 squares (58 cream, 59 linen); border rounds of 884, 892 and 900 sc; about 2,200 yd (2,012 m) cream and 2,250 yd (2,057 m) linen.
One square takes about 31 yd (28 m), so a 150 yd (137 m) skein gives you four squares with a little left over. For a layout of your own, multiply the number of squares across by 20 and subtract 2. That’s how many sc go on each short side in border Round 1, between the corners. Do the same with the squares down for the long sides, and add 2 sc per side in each later round.
Keeping 63 squares square and the weave lined up
- Count to 18 on every row. The last stitch of a back-loop row tucks itself under the turning chain and looks like part of the edge. For your first few squares, clip a stitch marker into that last stitch so you can’t skip it.
- Leave the ch 1 alone. It lifts you to the height of the next row but doesn’t count as a stitch, so never work into it.
- Work in color batches. Make the cream squares, then the linen ones, and stack them in piles of ten with a clothespin. Hold every fifth square against your first one; if it’s drifting larger or smaller, you’ll catch it early.
- Lay everything out before you sew. Use a bed or the floor, cream squares with ridges vertical, linen with ridges horizontal. Snap a photo: a square turned the wrong way jumps out on the screen much faster than it does in the room.
- Sew strips first, with relaxed tension. Join each row of 7 into a strip, then join the strips. Match corner to corner, and lay each seam flat after a few inches. If it puckers, your whipstitch is too tight.
- Don’t skip stitches at the seams on the border. Where two squares meet, work into both corner stitches, one on each side of the seam. Skipping them makes the edge pull in at every join.
US crochet terms
The pattern
Materials
- Bulky weight (#5) yarn, smooth acrylic or acrylic and wool blend, about 2,450 yd (2,240 m) in total (estimate):
- Linen (taupe): about 1,200 yd (1,097 m), or 8 skeins of 150 yd (137 m)
- Cream: about 1,250 yd (1,143 m), or 9 skeins of 150 yd (137 m)
- 6.5 mm (US K-10½) crochet hook
- Yarn needle
- Stitch markers
- Scissors and tape measure
Gauge
12 sts and 12 rows = 4 in (10 cm) in sc worked in the back loop only. One square measures 6 × 6 in (15 × 15 cm) after Row 18, before the edging round.
Finished size
About 49 × 62 in (124 × 157 cm) with the border, before blocking. Each square measures about 6⅔ in (17 cm) with its edging. The blanket is 7 squares wide and 9 squares long (63 squares).
Abbreviations
- BLO back loop only
- ch chain
- rep repeat
- RS right side
- sc single crochet
- sl st slip stitch
- st(s) stitch(es)
Notes
- The ch 1 at the start of each row and round does not count as a stitch.
- Row 1 is worked into the chain. From Row 2 on, every sc goes into the back loop only. Work the edging round and the border under both loops.
- All 63 squares are worked exactly the same way. The weave comes from the layout: Cream squares are turned so their ridges run up and down, Linen squares so their ridges run side to side.
- The side facing you while you work the edging round is the RS of the square.
- Your first square is your gauge swatch. If it is wider than 6 in (15 cm), use a smaller hook; if narrower, use a larger hook. If it is shorter than it is wide, add rows until it is square, and work the same number of rows on every square. Keep 16 sc on each side of the edging round, spacing them evenly along the row ends.
- Leave a 6 in (15 cm) tail at the start and end of each square and weave it into the edging round of the same color.
- Joining is done with Linen; the border is worked in Cream.
- Yardage is an estimate and includes about 10% extra.
Instructions
Squares (make 31 in Cream and 32 in Linen)
- Foundation: Ch 19.
- Row 1: Sc in 2nd ch from hook and in each ch across. (18 sc)
- Rows 2–18: Ch 1, turn, sc BLO in each st across. (18 sc)
Square edging (same color, continue without fastening off)
- Round 1: Ch 1, do not turn. 2 sc in last st of Row 18 (first corner begun); working down the side, sc in the end of Rows 17 through 2 (16 sc); working across the opposite side of the foundation ch, 3 sc in first ch, sc in each of next 16 ch, 3 sc in next ch; working up the other side, sc in the end of Rows 2 through 17 (16 sc); 3 sc in first st of Row 18, sc in each of next 16 sts, sc in same st as first 2 sc (first corner completed); sl st to first sc. Fasten off. (76 sc: 16 sc on each side and 3 sc at each corner)
Layout
- Grid: Lay out the squares RS up in 9 rows of 7, alternating colors like a checkerboard, with a Linen square at each corner. Turn every Cream square so its ridges run up and down, and every Linen square so its ridges run side to side.
- Layout rows 1, 3, 5, 7 and 9: Linen, Cream, Linen, Cream, Linen, Cream, Linen.
- Layout rows 2, 4, 6 and 8: Cream, Linen, Cream, Linen, Cream, Linen, Cream.
Joining (Linen)
- Strips: Hold 2 neighboring squares with RS together. With Linen and the yarn needle, whipstitch through the back loops only of each matching pair of sts, from the center sc of one corner to the center sc of the next (20 sts per side). Join the 7 squares of each layout row this way. (9 strips)
- Long seams: Join the strips in order the same way, matching corners and seams, in one seam across all 7 squares. (8 seams of 140 sts)
Border (Cream)
- Round 1: With RS facing, join Cream with a sl st in the center sc of any corner of the blanket, ch 1, 3 sc in same st; *sc in each st to center sc of next blanket corner, working 1 sc in each corner sc on both sides of every seam, 3 sc in center sc; rep from * twice more; sc in each st to end, sl st to first sc. (644 sc: 138 sc on each short side, 178 sc on each long side, 3 sc at each corner)
- Rounds 2–3: Sl st in next st (center sc of the corner), ch 1, 3 sc in same st; *sc in each st to center sc of next corner, 3 sc in center sc; rep from * twice more; sc in each st to end, sl st to first sc. (Round 2: 652 sc; Round 3: 660 sc)
- Finishing: Fasten off and weave in all remaining ends.
Washing a two-color throw with a cream border
Follow the yarn label first. For acrylic, a cold, gentle machine cycle and a low tumble dry are fine; wash the blanket on its own so the drum doesn’t twist the long seams. For a wool blend, use cold water on a wool or hand-wash setting, press the water out in a towel, and dry it flat. Hanging a wet blanket this size stretches the seams.
Before the first wash, soak a spare linen swatch in water and press it onto a white paper towel. If any color comes off, wash the whole blanket in cold water with a color-catcher sheet, so the cream doesn’t pick up a tan cast.
Between seasons, fold the throw along its seam lines and store it on a shelf or in a cotton bag. It keeps its shape better folded than draped over a hanger.
Your questions about turning, joining and counting squares
Can a total beginner make a basketweave crochet blanket like this one?
Yes, if you’re comfortable with chains and single crochet. The back-loop stitch and the whipstitch are the only new skills, and you’ll have both down after a square or two. If you’d like a smaller first goal, start with the lap size: 35 squares instead of 63.
Do I really have to weave in all the ends before joining?
It’s much easier that way. Once the squares are sewn, the tails sit right at the seams and are hard to tuck away neatly. Weaving them into the edging round of their own square also keeps cream and linen ends in the right color.
Can I join the squares with a crochet hook instead of a needle?
You can. A slip stitch or single crochet join worked through the back loops holds just as well, but it leaves a raised line on the front and uses more yarn than the whipstitch. If you go that way, buy an extra skein of linen.
Will it still look woven in a single color?
It will, more quietly. The basketweave effect comes from the ridges changing direction, so a one-color version shows it as texture rather than a checkerboard. You’d need about 2,450 yd (2,240 m) of one color for the throw.
Quick recap
- Make one square with a 6.5 mm (US K-10½) hook and check that it measures 6 × 6 in before the edging.
- Work 31 Cream and 32 Linen squares: ch 19, 18 rows of sc (BLO from Row 2), then one edging round of 76 sc.
- Lay them out 7 across and 9 down, checkerboard style, Cream ridges vertical and Linen ridges horizontal.
- Whipstitch with Linen into 9 strips, then join the strips with 8 long seams.
- Work 3 border rounds of sc in Cream (644, 652 and 660 sc) and weave in the ends.
I hope this basketweave crochet blanket ends up on the back of your couch, folded the way you’d leave a good linen napkin on the table. If a square won’t come out square, or you want a layout that isn’t listed, send me a note and we’ll figure it out together.