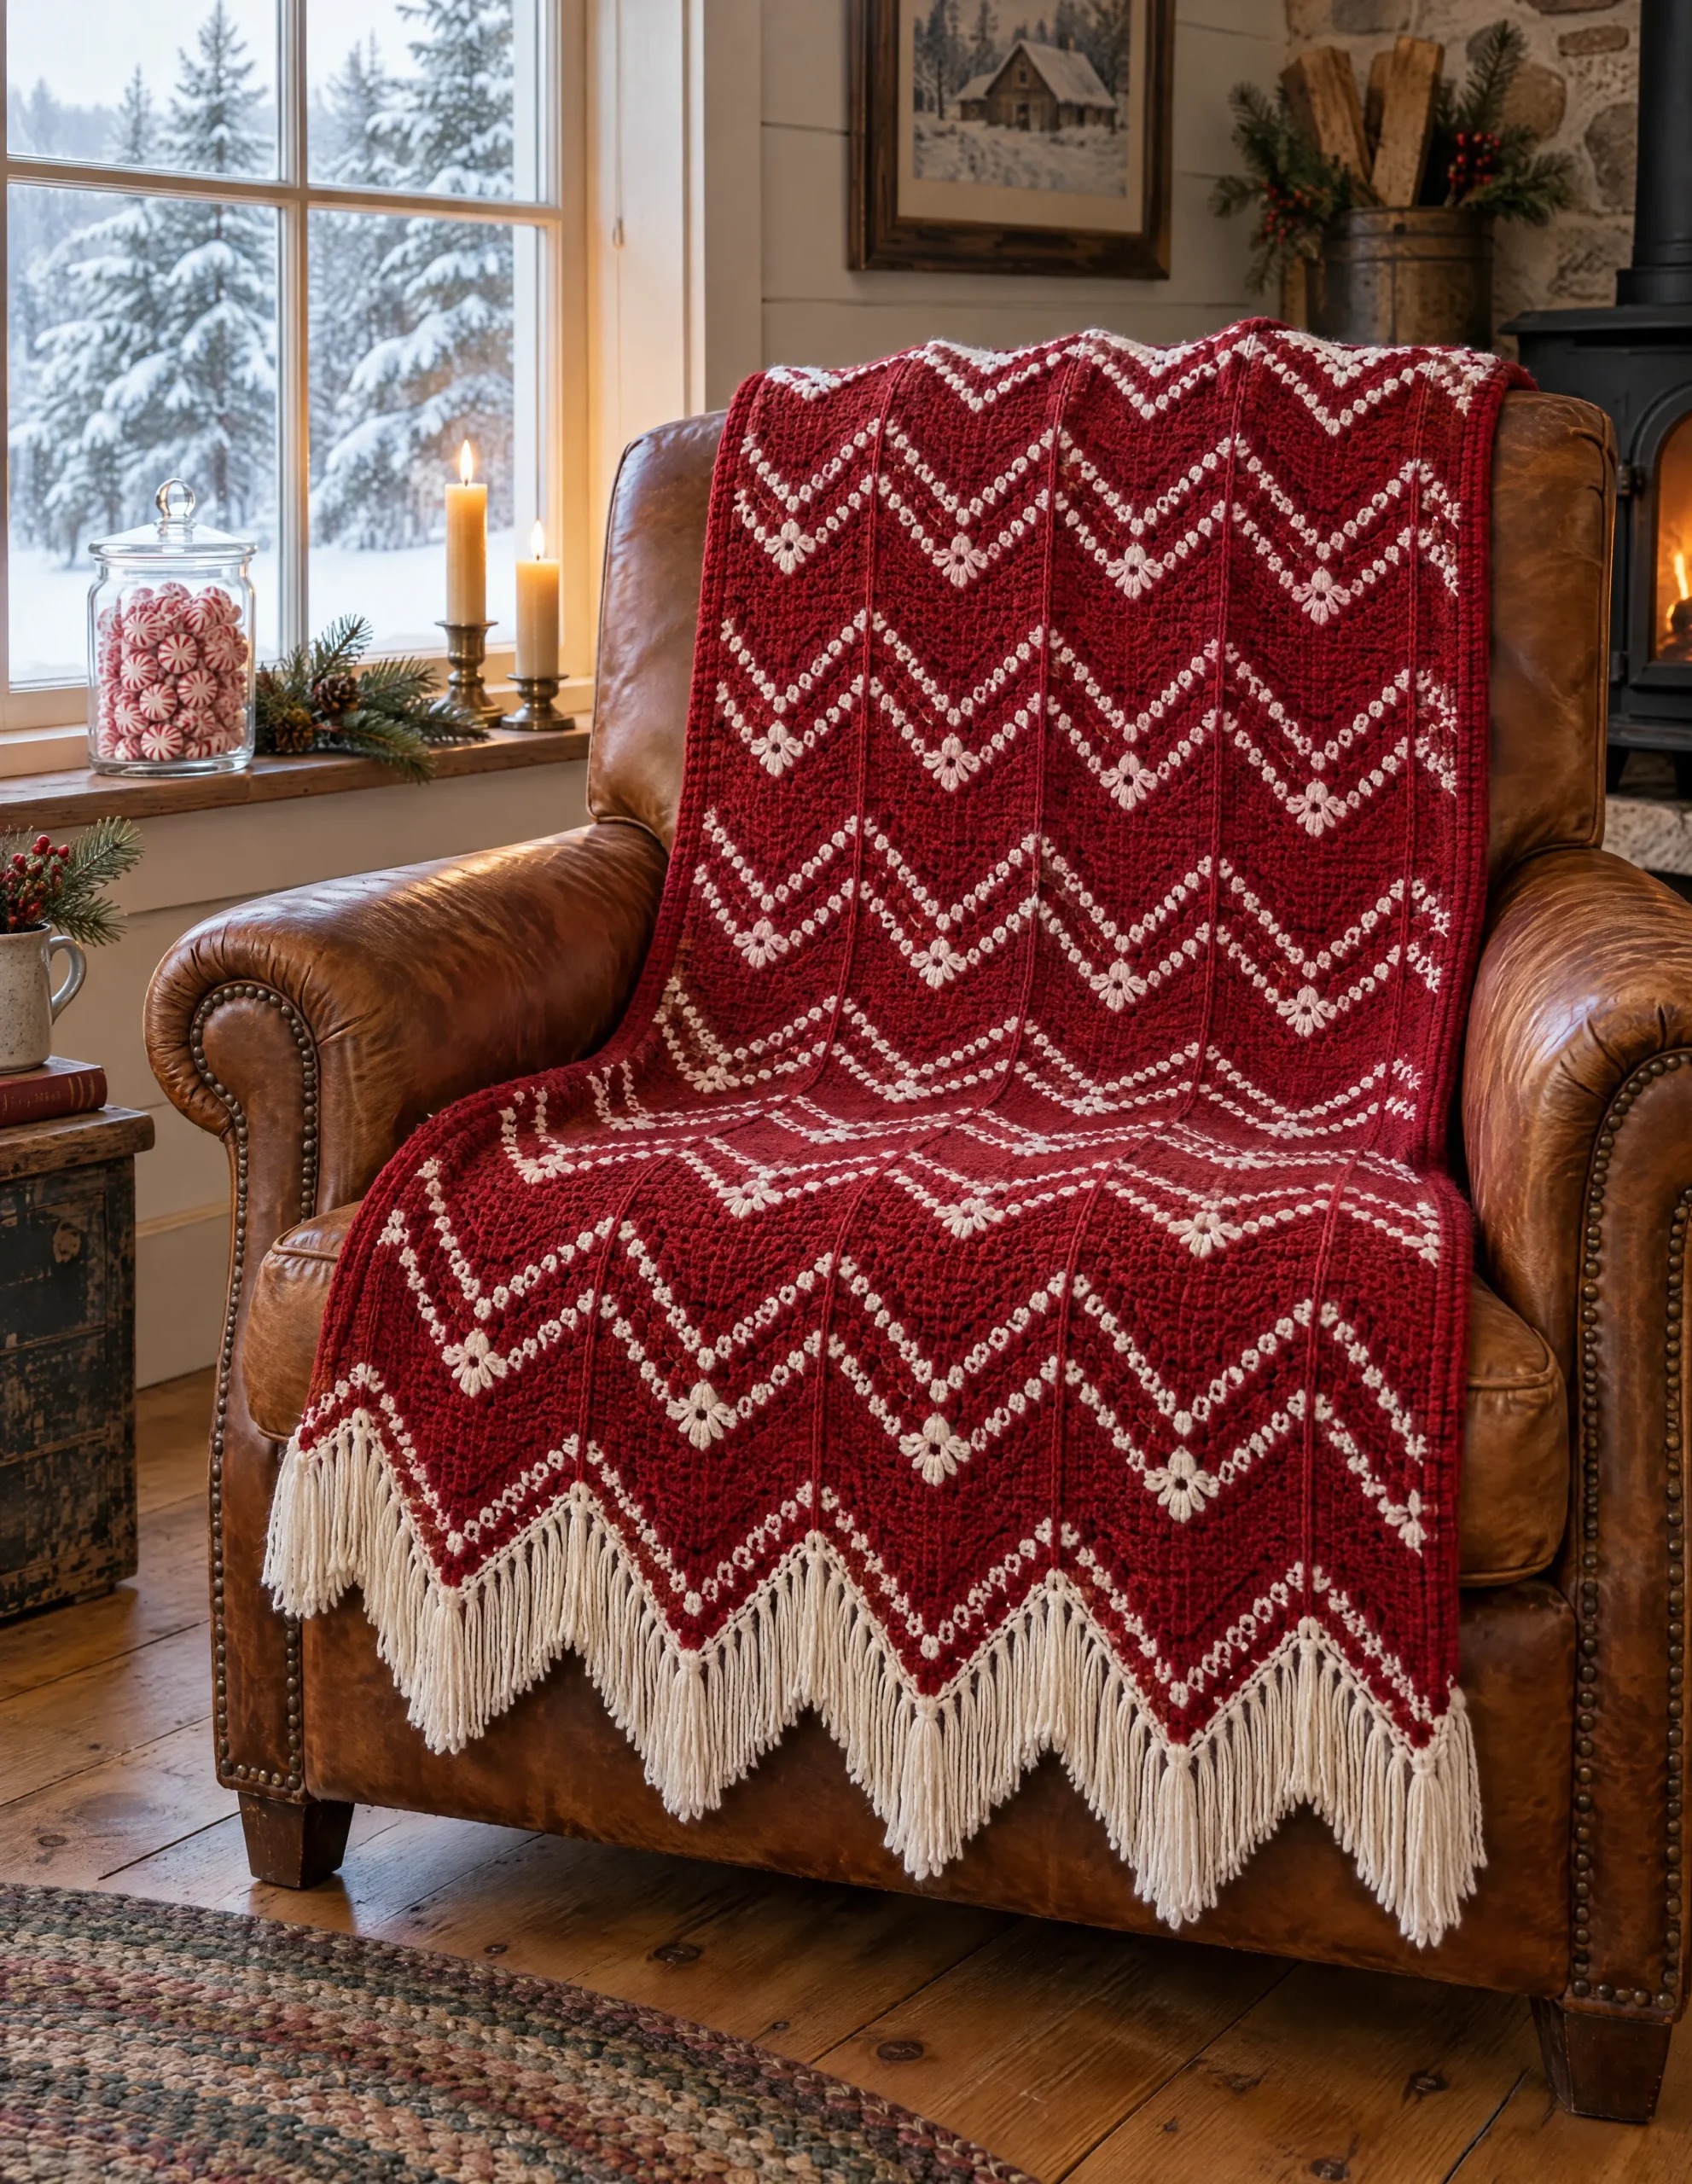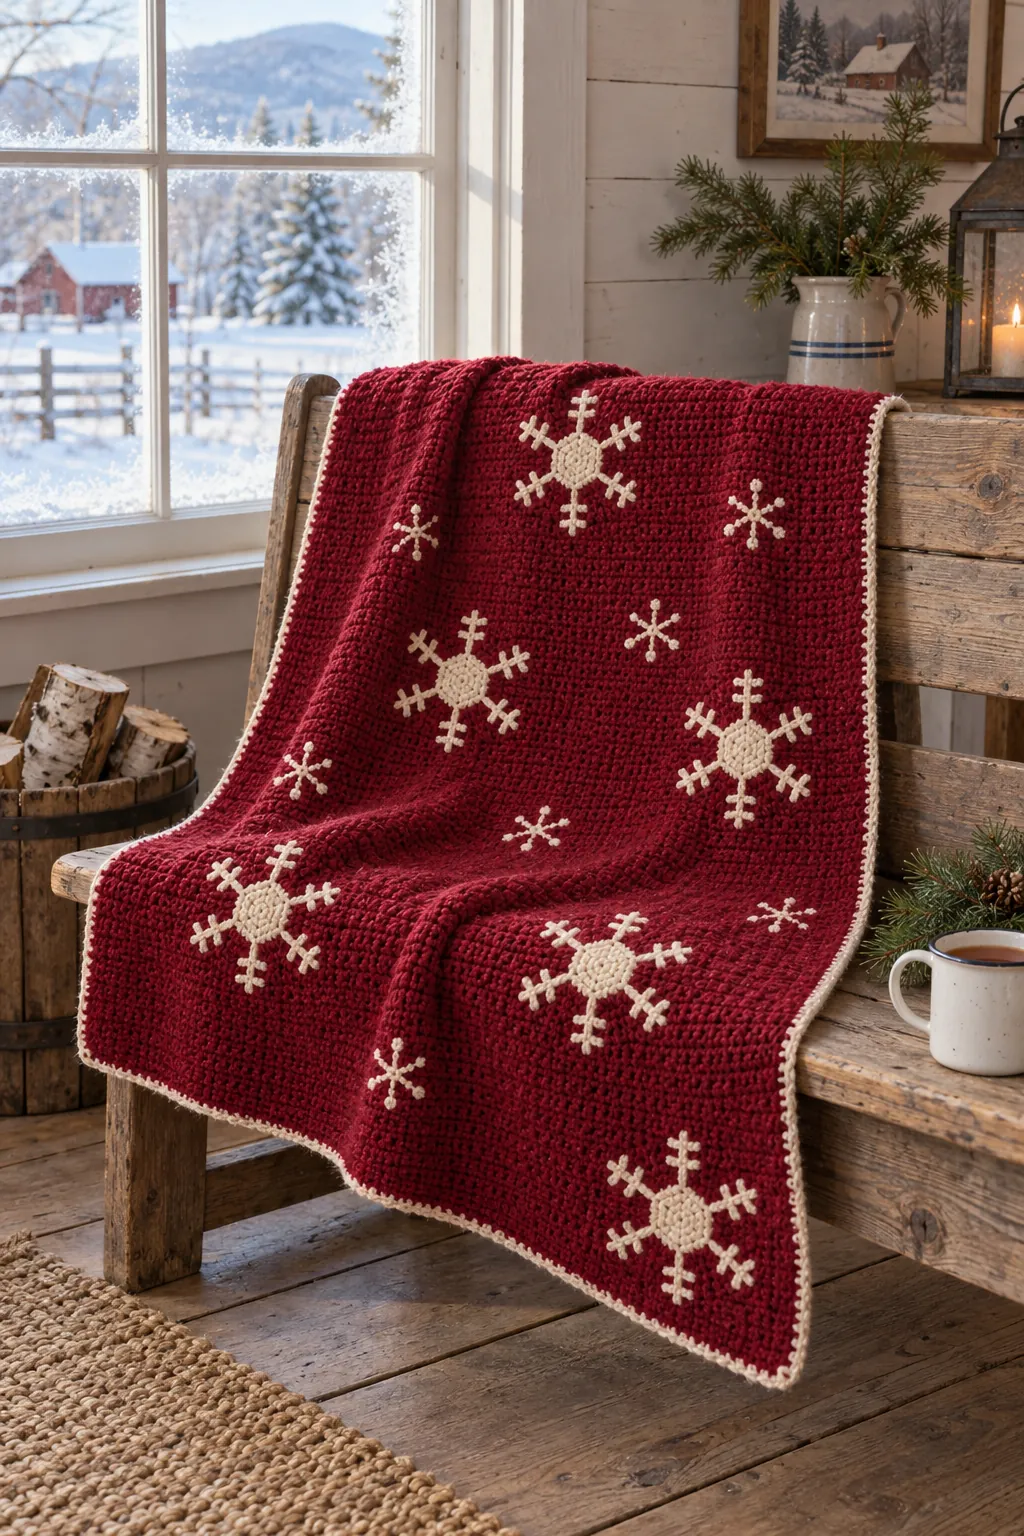
Picture the first real snow of December coming down past the kitchen window, and a deep cranberry afghan over your knees with cream flakes drifting across it. This snowflake crochet blanket gives you exactly that, and the base is the gentlest kind of crochet there is: single crochet, row after row, worked in the front loop so a soft rib forms on its own.
The flakes come last. Small cream hexagons, each only two rounds, are slip stitched onto the finished blanket, then you draw six spokes and little crossbars with a crochet hook, the way you’d sketch with a pencil. Star snowflakes and French knots fill the gaps. The afghan is written in worsted weight yarn for a throw, a twin and a queen, and it reads as Nordic Christmas in December and plain winter coziness right through March.
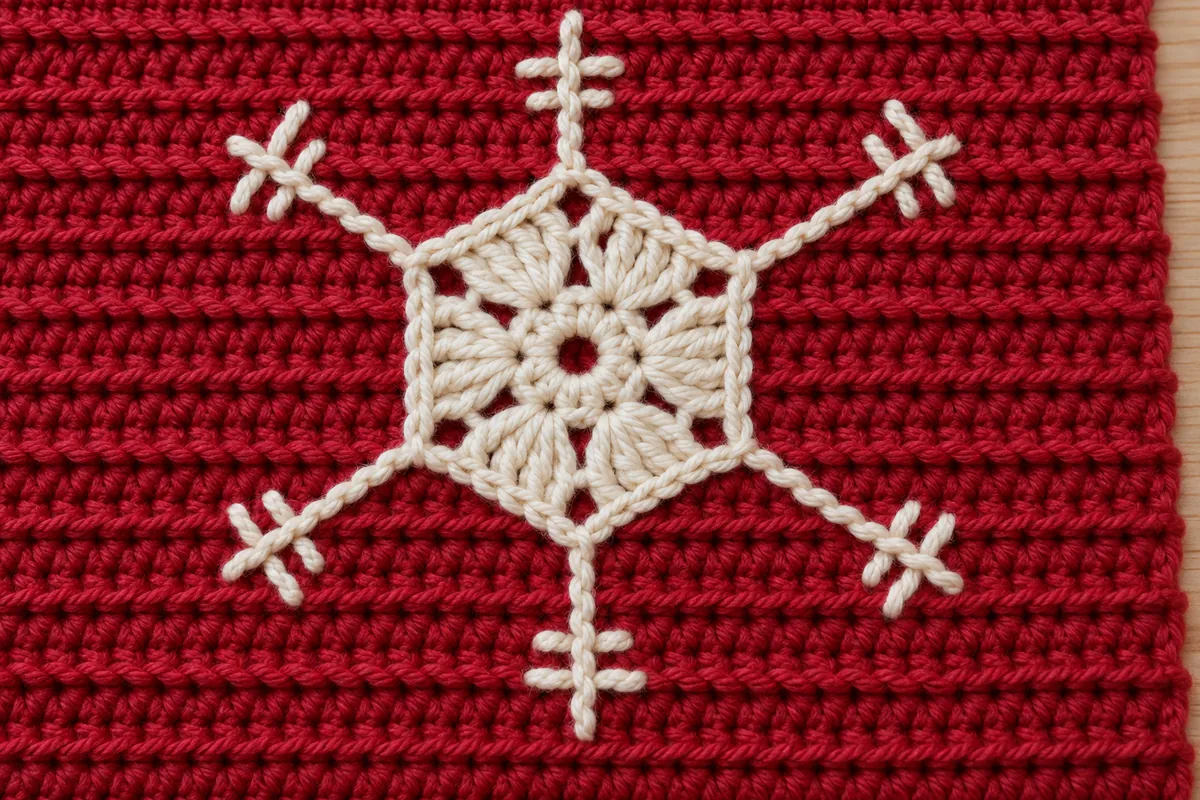
Is this snowflake crochet blanket a good next step after your first afghan?
If you can work a chain and a single crochet, the body holds no surprises. The only twist is where the hook goes: from Row 2 on, every stitch is worked under the front loop only, the loop nearest you. The unworked back loops line up into a thin ridge every two rows, on both faces, so the fabric looks ribbed without any extra effort.
The snowflake motifs use the double crochet, and the border adds one round of treble crochet, a stitch with two yarn overs before the hook goes in. The rest is finishing work, and it’s the reason this pattern is rated Intermediate rather than Easy. Surface slip stitch means working slip stitches through the fabric of the finished blanket, with the hook on top and the yarn held underneath, so a neat chain line sits on the surface. You’ll also make French knots with a yarn needle. Both are explained step by step in the pattern notes. If the abbreviations look like code, the guide to reading a pattern walks through them.
Picking a worsted yarn that suits ribbed rows and fine snowflake lines
Look for the number 4 on the label: worsted, sometimes called afghan or aran. The gauge here is 14 stitches and 12 rows to 4 inches with a 6 mm hook, which sits at the loose end of the worsted range. That looseness matters, because front loop rows pull tighter than you’d expect, and a firmer hook would turn a throw into a board.
A soft acrylic or an acrylic and wool blend works well for the cranberry body. It washes easily and holds the rib. For the cream, choose a smooth, tightly twisted yarn rather than a splitty or loosely plied one. Every spoke and crossbar is a line of slip stitches pulled up through the blanket, and a yarn that splits will snag on the hook and leave fuzzy, uneven lines.
Buy all the cranberry at once, from a single dye lot. A slight shade change across a solid field this size shows up as a band you can’t hide. Crochet the gauge swatch before you start: chain 15, work 12 rows exactly like the body, and check that it measures 4 inches square. Measure it flat, without stretching it.
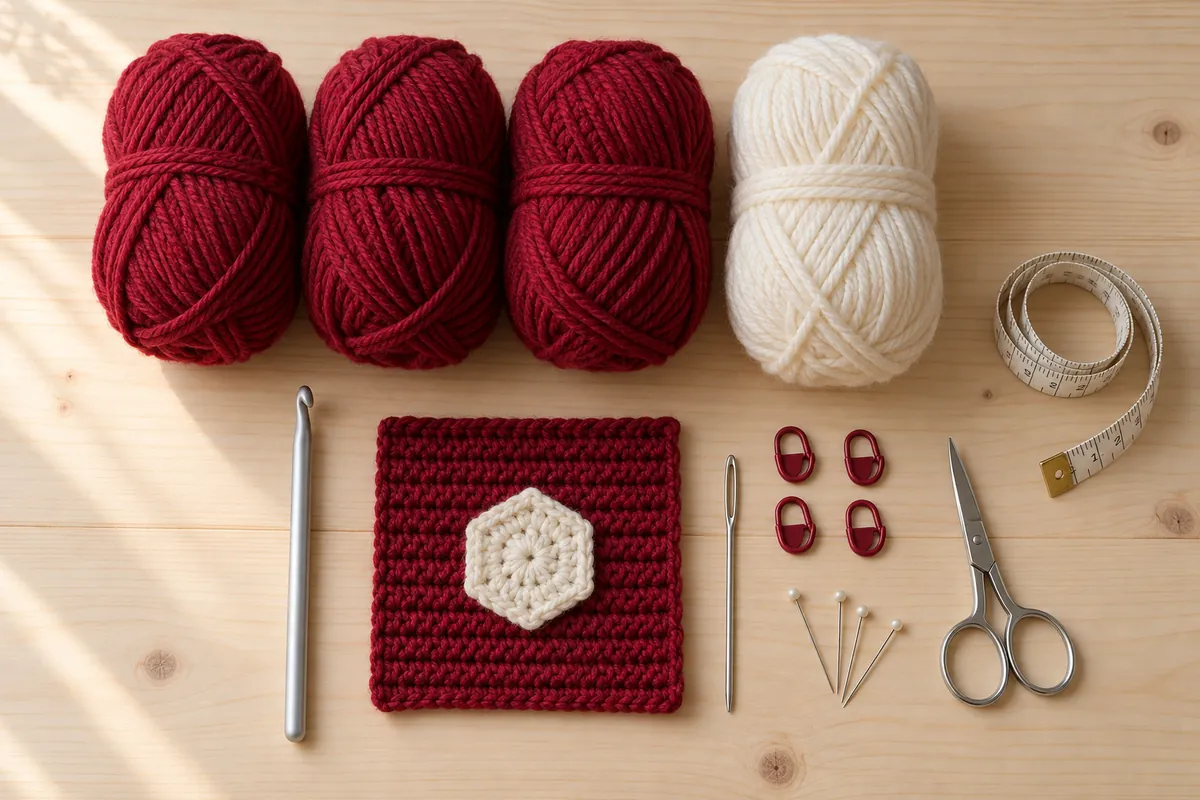
Cranberry and cream, and other pairings for the flakes
The cranberry does the heavy lifting: the body plus the first two border rounds. The cream appears only where light would catch: the last border round, the hexagons, the spokes, the stars and the knots. Keep that split if you change colors. A dark ground with a pale accent is what makes the flakes readable from across the room.
- Cranberry Flurry (the card): cranberry body, cream flakes and edge.
- Spruce Lodge: deep spruce green with oatmeal flakes.
- Midnight Pond: navy with ivory, crisp and cold.
- Woodstove Ash: charcoal gray with natural white.
- Mulled Plum: dark plum with cream, a softer holiday note.
One practical point: cream next to a deep red can pick up dye in the wash. Before you commit, wet a short length of each color, twist them together, and press them in a white paper towel. If the red stains the towel, plan on a color catcher for the first washes.
If you love a holiday palette, the granny-square coverlet in holly reds uses a similar red and cream contrast, and the throw with a pair of intarsia evergreens brings the forest in.
Three sizes, from couch throw to queen bed
Each size keeps the same stitch and the same border; only the stitch and row counts change. The card below is written for the throw, with the twin and queen in brackets. Yardage is an estimate, calculated from the original designer’s yarn amounts and scaled to each size, with a 15% margin.
- Throw, about 50 × 60 in (127 × 152 cm): ch 167, 166 sts, 173 rows. Border rounds of 682, 698 and 706 sts. Cranberry about 2,496 yd (2,281 m), cream about 300 yd (275 m). 18 hexagon snowflakes.
- Twin, about 66 × 90 in (168 × 229 cm): ch 225, 224 sts, 265 rows. Border rounds of 982, 998 and 1,006 sts. Cranberry about 4,979 yd (4,551 m), cream about 599 yd (547 m). 36 hexagon snowflakes.
- Queen, about 90 × 100 in (229 × 254 cm): ch 310, 309 sts, 295 rows. Border rounds of 1,212, 1,228 and 1,236 sts. Cranberry about 7,516 yd (6,870 m), cream about 903 yd (826 m). 59 hexagon snowflakes.
Since the body is plain single crochet, there’s no stitch multiple: any number of chains works. To make your own size, chain one more than the stitches you need and keep an odd number of rows, so the last row is a right side row.
Where the snowflakes go on each size
The original pattern leaves the placement to you, and you can scatter the flakes freely. If you’d rather have a plan, this offset layout spaces the hexagons evenly, like a quincunx: long rows and short rows alternate, and each short row sits halfway between the hexagons of the rows above and below. Measure from the edge of the body, inside the border, to the center of the outer hexagons of a long row.
| Size | Rows of hexagons | Hexagons | Center to center | Row to row | First center from side / from top and bottom | Star snowflakes |
|---|---|---|---|---|---|---|
| Throw | 5 rows: 4, 3, 4, 3, 4 | 18 | 11¾ in (30 cm) | 10¼ in (26 cm) | 5¾ in (14.5 cm) / 8 in (20 cm) | 4 |
| Twin | 8 rows: 5, 4, 5, 4, 5, 4, 5, 4 | 36 | 11¾ in (30 cm) | 10¼ in (26 cm) | 8 in (20 cm) / 7¾ in (19.5 cm) | 8 |
| Queen | 9 rows: 7, 6, 7, 6, 7, 6, 7, 6, 7 | 59 | 11¾ in (30 cm) | 10¼ in (26 cm) | 8 in (20.5 cm) / 7½ in (19 cm) | 8 |
Put one star snowflake at each end of every short row, centered between the side of the body and the first hexagon of that row. Add more stars wherever the blanket still looks bare.
Tips for straight ribs and flakes that lie flat
- Mark the first and last stitch. The last stitch of a front loop row hides right under the turning chain. Clip a marker into the first and last stitch for the first dozen rows, and count to 166 every few rows until your edges stay straight.
- Watch the corners of Round 1. Each side gets one stitch per row end plus a single extra stitch at the corner. That extra stitch is where Round 2 puts its 5 treble crochet, so a missed one leaves a corner with nowhere to turn.
- Block before the flakes go on. Wash or steam the finished, bordered blanket and let it dry flat first. Placement measurements only hold on fabric that has settled.
- Pin everything, then step back. Pin all the hexagons, hang the blanket over a door or snap a photo, and move any flake that looks crowded before a single stitch goes in.
- Keep surface slip stitches relaxed. Each loop should lie flat on the rib. If the fabric dimples under a spoke, pull out that line and redo it with longer loops.
- Try a fuzzy yarn for the flakes. A mohair blend or a metallic yarn gives frosty, glittering snowflakes. Expect a heavier yarn to make each hexagon noticeably bigger, so check the spacing with one motif pinned in place before making the rest.
- Make a matching pillow. Two 16 in (41 cm) squares use up leftover cranberry: ch 58, work 57 sts for 49 rows exactly like the body, then add one hexagon or a couple of stars to the front and seam the squares around a pillow form.
US crochet terms
The pattern
Materials
- Worsted weight yarn (CYC #4), acrylic or acrylic and wool blend, in skeins of about 364 yd (333 m); yardage is an estimate:
- Color A, cranberry: about 2,496 [4,979, 7,516] yd (2,281 [4,551, 6,870] m), 7 [14, 21] skeins
- Color B, cream: about 300 [599, 903] yd (275 [547, 826] m), 1 [2, 3] skeins
- Hook: 6 mm / J-10
- Yarn needle, stitch markers, rustproof pins, measuring tape, washable fabric marker (optional)
Gauge
14 sts and 12 rows = 4 in (10 cm) in sc FLO. To check: with A, ch 15, work Row 1 and then 11 rows of sc FLO as for the body (14 sts); the swatch should measure 4 in (10 cm) square, lying flat.
Finished size
About 50 × 60 [66 × 90, 90 × 100] in (127 × 152 [168 × 229, 229 × 254] cm), border included, after blocking. Sizes are estimates based on the gauge.
Abbreviations
- ch chain
- ch-sp chain space
- dc double crochet
- FLO front loop only
- sc single crochet
- sl st slip stitch
- sp(s) space(s)
- st(s) stitch(es)
- tr treble crochet
- yo yarn over
Notes
- Instructions are for the throw, with the twin and queen in brackets: throw [twin, queen].
- Foundation chain: any number of chains. Body stitches = chain – 1. Keep an odd number of rows so the last row is a right side row.
- Body: Row 1 is worked into the back bumps of the chain. The turning chain (ch 1 at the start of every later row) does not count as a st; work the first sc FLO into the last st of the row below and never into the ch 1. The stitch count never changes.
- sc FLO: insert the hook under the front loop only of the st (the loop nearer to you), yo, pull up a loop, yo, pull through both loops on the hook.
- tr (US treble crochet): yo twice, insert the hook in the st, yo, pull up a loop (4 loops on the hook), [yo, pull through 2 loops] 3 times.
- Border: Round 1 places one extra sc at each corner; Round 2 turns the corners with 5 tr worked into those extra sc. The ch 4 at the start of Round 2 counts as a tr.
- Hexagon snowflakes: the ch 3 at the start of Round 2 counts as a dc. The chain ring leaves a small hole at the center of each flake.
- Surface sl st: worked through the finished blanket, hook on the right side, yarn held behind. To start, make a slip knot without putting it on the hook and hold it behind the blanket; insert the hook from the right side to the wrong side at the starting point, place the slip knot on the hook and draw it to the right side. For each stitch, insert the hook from the right side to the wrong side at the next point of the line, about one st or one row away (about ¼ in / 6 mm), yo with the yarn held behind and draw a loop through the fabric and through the loop on the hook. To end a line, draw up a loop on the right side and enlarge it, remove the hook, insert it from the wrong side to the right side at the end point, catch the loop and draw it to the wrong side; cut the yarn, pull the tail through the loop and tighten. Keep each loop flat: tight loops pucker the blanket. When a line crosses another, insert the hook on either side of the first line, not through it.
- French knot: thread B on a yarn needle and secure the end on the wrong side under a few sts (no knot). Bring the needle up to the right side through the yarn of a st, wrap the yarn 2 times around the needle, insert the needle back right next to where it came up (not in the same hole), hold the wraps with your thumb and pull through slowly so the knot sits on the surface. Secure under a few sts on the wrong side.
- Spoke and star lengths are guides: work every line to fit, by eye, and keep the same lengths on every flake.
Instructions
Body
- Foundation: with A, ch 167 [225, 310].
- Row 1 (right side): sc in the back bump of the 2nd ch from the hook and in the back bump of each ch across. (166 [224, 309] sts)
- Rows 2–173 [2–265, 2–295]: ch 1, turn, sc FLO in each st across. (166 [224, 309] sts)
- The body has 173 [265, 295] rows and ends with a right side row. Do not fasten off and do not turn.
Border
- Round 1 (A, right side facing): rotate the blanket to work down the left side. Sc in the end of each row (173 [265, 295] sc), then 1 more sc in the end of the last row: this extra sc is a corner st. Rotate to work along the bottom: sc in each free loop of the foundation chain (166 [224, 309] sc), then 1 more sc in the last free loop (corner st). Rotate to work up the right side: sc in the end of each row (173 [265, 295] sc), then 1 more sc in the end of the last row (corner st). Rotate to work along the top: sc in each st across (166 [224, 309] sc), then 1 more sc in the last st worked (corner st). Join with a sl st in the first sc. (682 [982, 1212] sts: 174 [266, 296] on each side edge and 167 [225, 310] on the top and on the bottom, corner sts included)
- Round 2 (A): ch 4 (counts as tr), tr in the next 172 [264, 294] sc, 5 tr in the next sc (corner), tr in the next 166 [224, 309] sc, 5 tr in the next sc, tr in the next 173 [265, 295] sc, 5 tr in the next sc, tr in the next 166 [224, 309] sc, 5 tr in the next sc; join with a sl st in the top of the beginning ch-4. (698 [998, 1228] sts: 173 [265, 295] tr along each side edge and 166 [224, 309] tr along the top and the bottom, plus 4 corner groups of 5 tr) Fasten off A.
- Round 3 (B, right side facing): join B with a sl st in the center tr of the corner group at the top left corner (the last group made in Round 2). 3 sc in the same st, sc in the next 177 [269, 299] tr, 3 sc in the next tr, sc in the next 170 [228, 313] tr, 3 sc in the next tr, sc in the next 177 [269, 299] tr, 3 sc in the next tr, sc in the next 170 [228, 313] tr; join with a sl st in the first sc. (706 [1006, 1236] sts) Fasten off.
- Weave in all ends. Block the blanket and let it dry flat before adding the snowflakes.
Hexagon snowflakes (B, make 18 [36, 59])
- Ring: ch 4, join with a sl st in the first ch to form a ring.
- Round 1: ch 1 (does not count), 6 sc in the ring; join with a sl st in the first sc. (6 sts)
- Round 2: ch 3 (counts as dc), 2 dc in the same st, [ch 3, 3 dc in the next sc] 5 times, ch 3; join with a sl st in the top of the beginning ch-3. (18 dc, 6 ch-3 sps) Fasten off and weave in the ends. Block the hexagons flat.
Placing the snowflakes
- Lay the blanket flat, right side up. The placement is free; for an even layout, place the hexagons in offset rows, 11¾ in (30 cm) from center to center within a row and 10¼ in (26 cm) from row to row, each short row centered between the rows above and below it.
- Throw: 5 rows of 4, 3, 4, 3, 4 hexagons (18). Outer centers of the long rows 5¾ in (14.5 cm) from the sides of the body and 8 in (20 cm) from its top and bottom. 4 star snowflakes.
- Twin: 8 rows of 5, 4, 5, 4, 5, 4, 5, 4 hexagons (36). Outer centers 8 in (20 cm) from the sides and 7¾ in (19.5 cm) from the top and bottom. 8 star snowflakes.
- Queen: 9 rows of 7, 6, 7, 6, 7, 6, 7, 6, 7 hexagons (59). Outer centers 8 in (20.5 cm) from the sides and 7½ in (19 cm) from the top and bottom. 8 star snowflakes.
- Measure from the edge of the body, inside the border. Place one star snowflake at each end of every short row, centered between the side of the body and the first hexagon. Add more stars anywhere you like.
- Pin each hexagon at its center and at each of its 6 corners.
Finishing
- Attaching each hexagon: with B, start a surface sl st in the top of the beginning ch-3 of Round 2, inserting the hook through the hexagon and through the blanket below it. Work 1 surface sl st through both layers in the top of each dc and in each ch of Round 2, all the way around. (36 surface sl st) End the line as in the notes and weave in the ends on the wrong side.
- Spokes: with B, work a line of surface sl st straight out from each ch-3 corner of the hexagon, about 2 in (5 cm) long. (6 spokes) Across the outer end of each spoke, work 2 shorter lines of surface sl st, about 1 in (2.5 cm) long, parallel to each other and each crossing the spoke.
- Star snowflakes: with B, work 3 lines of surface sl st of different lengths, about 3 to 5 in (7.5 to 12.5 cm), crossing at their centers to make a 6-pointed star. Work 3 French knots close to the center, one in every other gap between the spokes.
- Weave in all remaining ends on the wrong side.
Washing a cranberry afghan with cream snowflakes
Machine wash on a gentle cycle in cold water, inside a large mesh bag if your machine allows it, so the spokes and crossbars don’t catch on anything. Add a color catcher for the first few washes, since deep reds can release a little dye onto the cream. Skip bleach entirely.
Dry the afghan flat or tumble it on low, and pull it out while it’s still slightly damp. Smooth each hexagon and spoke with your hand, then let it finish drying flat. Fold it with the snowflakes on the inside for storage, which keeps the raised lines from flattening under the weight of other blankets.
Cranberry Flurry questions about flakes, spokes and front loop rows
How many motifs does this snowflake crochet blanket need in each size?
The plan in the card uses 18 hexagons for the throw, 36 for the twin and 59 for the queen, with 4, 8 and 8 star snowflakes. Those numbers keep the same spacing on every size. You can always use fewer flakes for a quieter look, or add stars until the blanket feels full.
Will the surface slip stitches show on the back of the afghan?
Yes, each spoke and each attaching round leaves a short dashed line of cream on the wrong side, because the yarn travels behind the fabric. On a sc FLO ground it reads as part of the design. Keep the tension even and weave every tail along the back of its own line, so nothing loose hangs underneath.
Why does Round 1 add only one extra stitch at each corner?
In this border, Round 1 doesn’t turn the corner by itself. It sets up a single corner stitch, and Round 2 does the real turning with 5 treble crochet worked into that stitch. Round 3 then adds 3 sc in the center treble of each group. If you put 3 sc at the corners of Round 1 out of habit, the counts in the card won’t match.
Can I use a soft mohair or metallic yarn for the snowflakes?
You can, and the flakes take on a frosty shimmer. A thicker or fluffier yarn makes each hexagon larger, though, so crochet one motif, pin it in place and adjust the spacing before you make the rest. Smooth cream is still easier for the spokes.
Quick recap
- Chain 167 [225, 310], work Row 1 into the back bumps, then sc FLO rows to 173 [265, 295] rows.
- Work the three border rounds: sc with one extra corner stitch, tr with 5-tr corners, then a cream sc round with 3-sc corners.
- Block the blanket and crochet 18 [36, 59] cream hexagons.
- Pin the hexagons in offset rows and attach each one with 36 surface slip stitches.
- Draw six spokes with crossbars on every hexagon, then add star snowflakes with French knots.
Once the last knot is in, spread your snowflake crochet blanket over the sofa and let it carry you from the holidays straight through the coldest weeks of the year. If you have a question about the flakes or the border, the Contact page is always open.