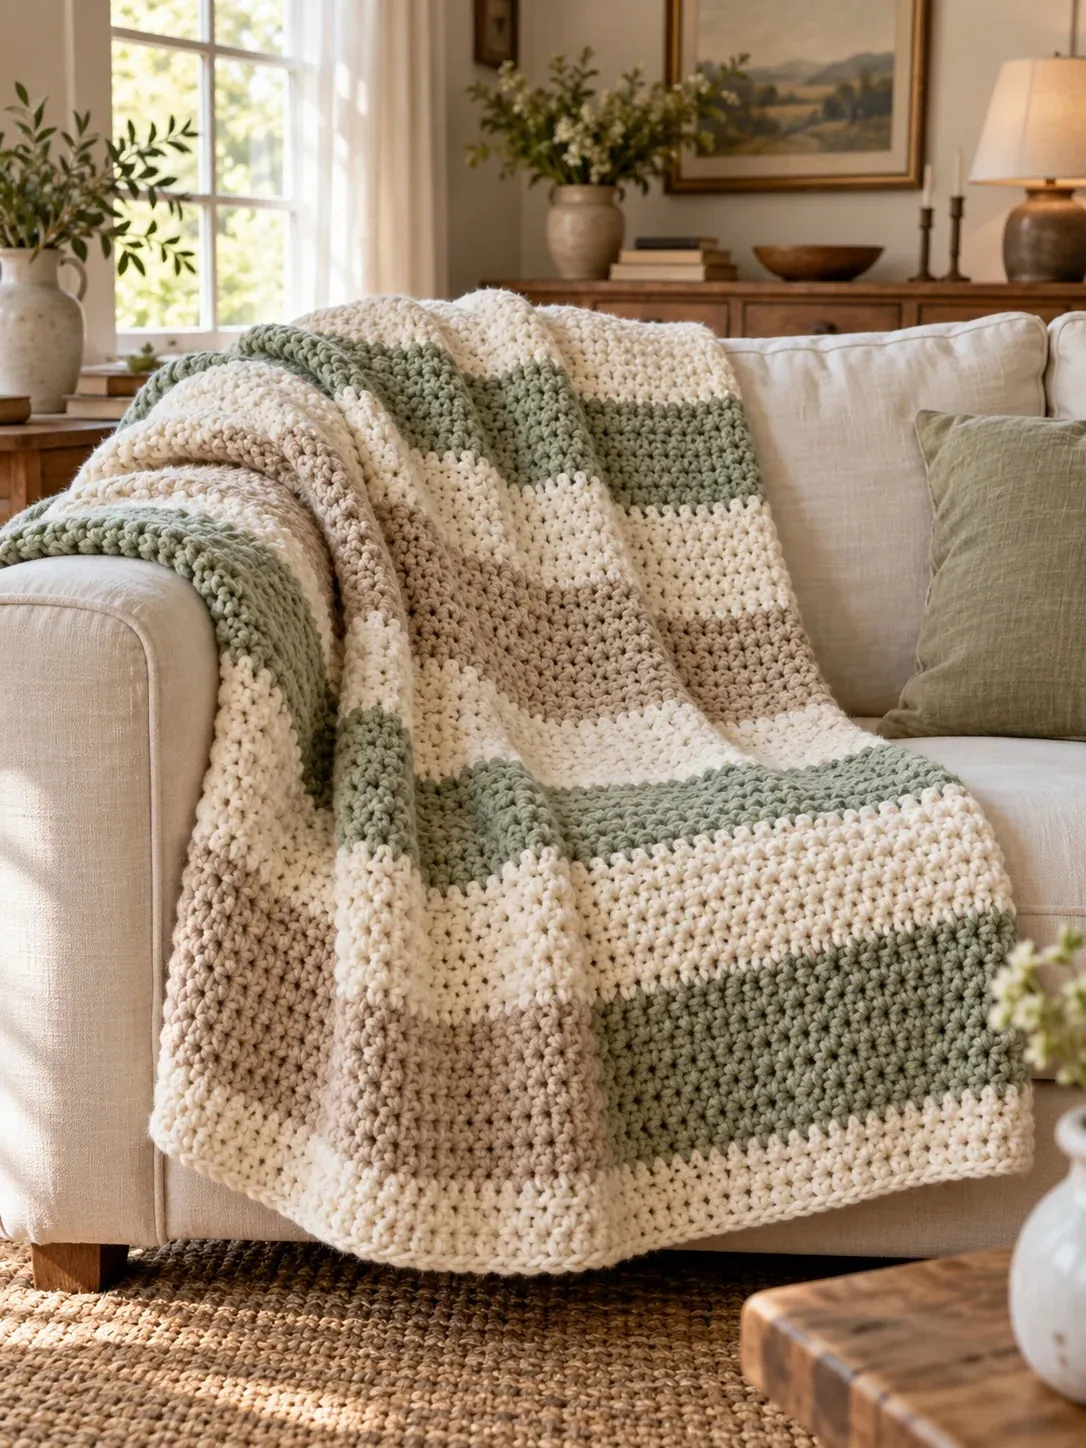
Some blankets are for show. This one lives on my couch, usually half tangled around my feet while the coffee cools. The Sunday Morning Throw is an easy striped crochet blanket made of one stitch only, half double crochet, in wide bands of cream, sage and taupe.
Each stripe is 9 rows of bulky yarn, so you see real progress every evening. By the time you’re bored of one color, it’s time to switch.
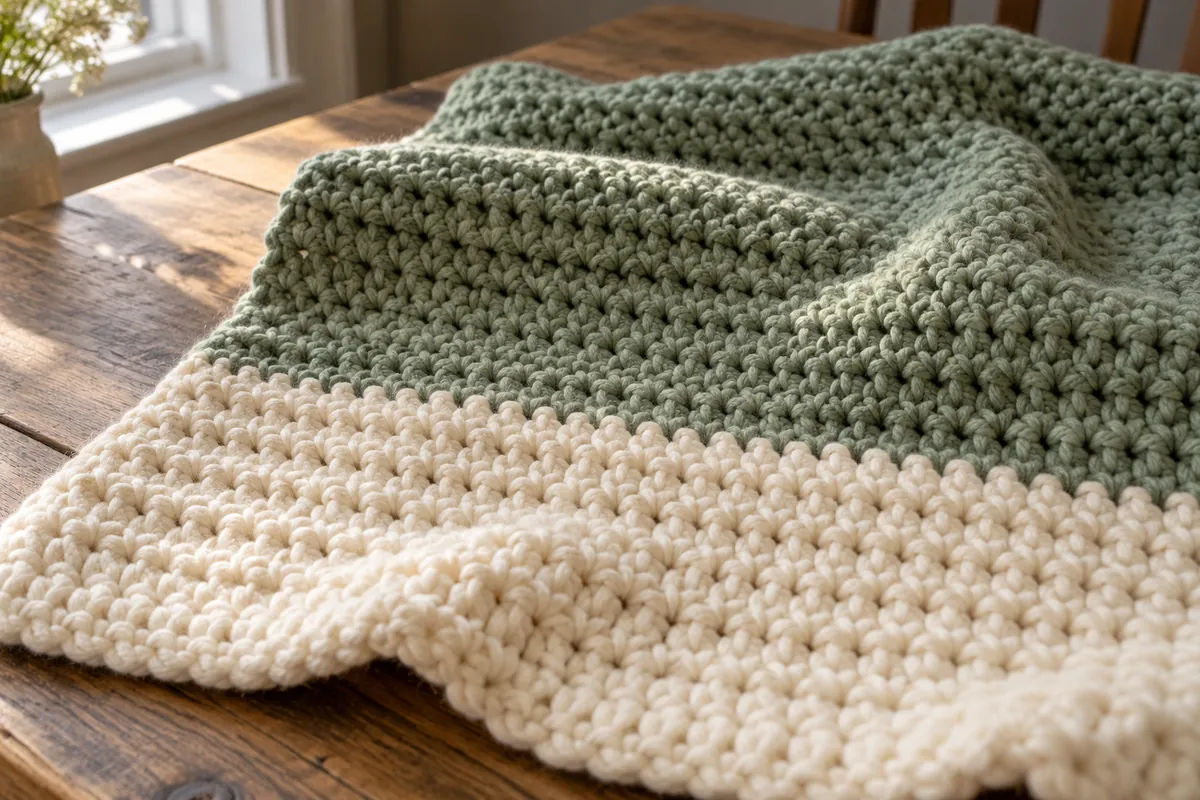
Is this easy striped crochet blanket right for a first project?
If you can chain and make a half double crochet, yes. The body never changes: 120 stitches, row after row, from the first stripe to the last. The border at the end is plain single crochet.
Here’s what you’ll use, with a link to each stitch in the Stitch Library:
- the chain, for the foundation row;
- the half double crochet, for every row of the body;
- the single crochet, for the border.
New to pattern shorthand like “hdc” or “rep”? The section on reading a pattern in the Beginner Guide explains every abbreviation you’ll meet here.
The one skill that might be new is the color change. You’ll do it 12 times, always at the very end of a row, and after the second or third time your hands will know it by heart.
Choosing a bulky yarn for the Sunday Morning stripes
The throw is written for bulky yarn, weight 5 on the label. What matters most here is that all three colors come from the same yarn line. Two different brands of “bulky” can be surprisingly different in thickness, and a thinner sage stripe would pull the edges in.
Buy all your cream at once. Color A makes up more than half the blanket, and skeins from different dye lots can be a shade apart. On a light cream, you’d see the difference in the middle of a stripe.
For a blanket that lives on the couch and gets dragged around, I reach for a soft acrylic or acrylic blend that can go in the washing machine. A wool blend feels lovely in winter but often needs hand washing, which is a lot to ask of a 50 × 60 in throw.
No bulky yarn at your local store? Two strands of worsted weight held together work well. Crochet a 4 in square first and compare it with the gauge in the pattern before you commit.
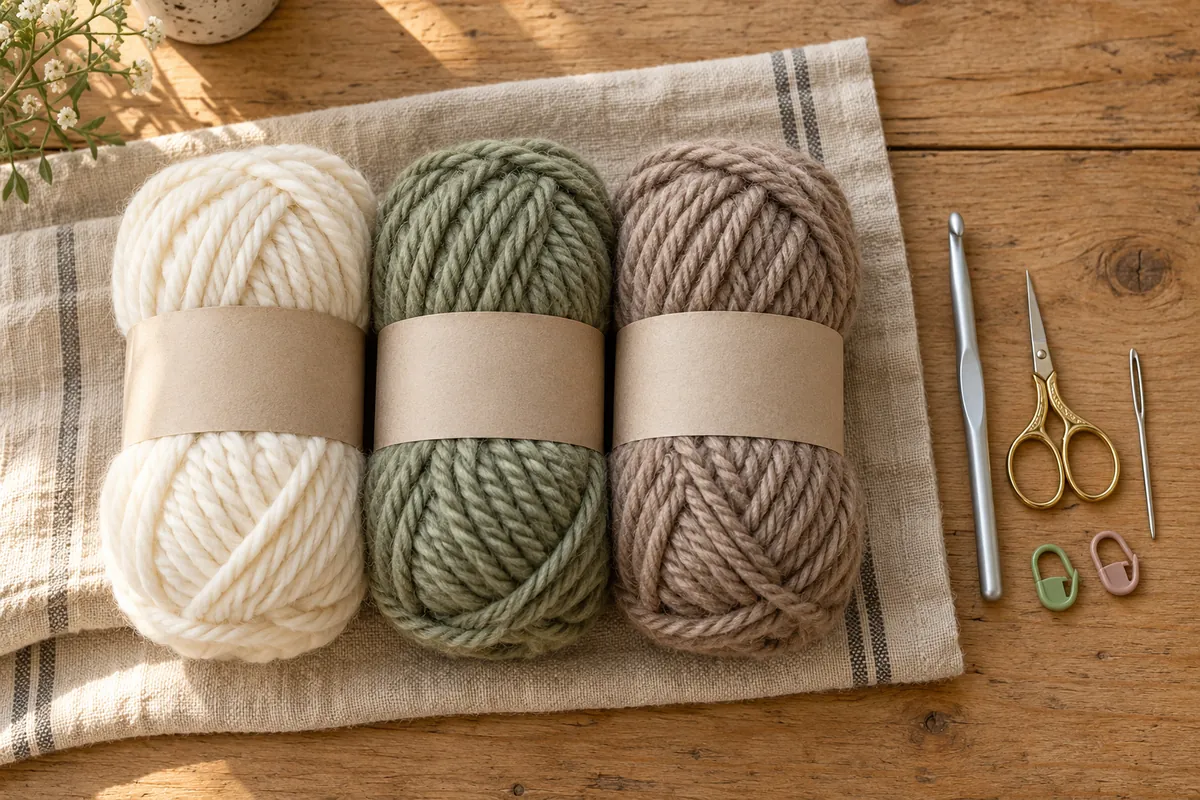
Picking your own three stripe colors
The stripes follow a simple order: A, B, A, C, and repeat. Color A shows up in 7 of the 13 stripes, so it sets the mood of the whole blanket. I’d keep it the lightest of your three, so the accent colors pop against it.
A few combinations that work with this stripe order:
- Farmhouse: cream, sage green and taupe, like the one in the photos.
- Cabin weekend: oatmeal, rust and deep forest green.
- Lake house: white, soft denim blue and sandy beige.
- Rose garden: warm white, dusty pink and light gray.
- Quiet modern: ivory, oatmeal and charcoal.
Before you buy, lay the three skeins side by side in daylight. If B and C look almost the same, the pattern of the stripes gets lost.
Sizing the throw for a crib, a couch or a bed
The pattern is written for the throw, but the stripe order stays the same in every size. Change the chain count and the number of stripes, and always finish with a Color A stripe. Each stripe stays 9 rows tall.
- Baby, about 30 × 34 in (76 × 86 cm): ch 72 (70 hdc), 7 stripes (63 rows). Border Round 1: 336 sc. Yarn: Color A about 375 yd (345 m), Color B about 150 yd (140 m), Color C about 100 yd (90 m).
- Throw, about 50 × 60 in (127 × 152 cm): ch 122 (120 hdc), 13 stripes (117 rows). Border Round 1: 598 sc. Yarn: Color A about 1,000 yd (915 m), Color B about 400 yd (365 m), Color C about 400 yd (365 m). This is the size in the pattern below.
- Twin, about 66 × 88 in (168 × 224 cm): ch 162 (160 hdc), 19 stripes (171 rows). Border Round 1: 840 sc. Yarn: Color A about 1,800 yd (1,650 m), Color B about 800 yd (730 m), Color C about 650 yd (595 m).
- Queen, about 90 × 88 in (229 × 224 cm): ch 222 (220 hdc), 19 stripes (171 rows). Border Round 1: 960 sc. Yarn: Color A about 2,400 yd (2,195 m), Color B about 1,100 yd (1,005 m), Color C about 900 yd (825 m).
In every size, Rounds 2 and 3 of the border each add 8 stitches, 2 in each corner. The yarn amounts are estimates with some extra built in. For the twin and queen sizes, an extra skein of each color is a good idea.
If you’d like something smaller and softer for a nursery, the Maple Lane baby blanket uses the same striped idea in single crochet.
Keeping 120 stitches and straight edges, row after row
Wobbly edges are the most common worry with a first blanket, and almost always the cause is a stitch lost or gained at the ends of a row. A few habits keep this throw neat:
- Clip a marker into the first and last stitch of every row. The first hdc goes right at the base of the ch 2. The last one goes into the stitch the marker was in.
- Count to 120 at the end of each row, at least for the first stripe. Once the rhythm settles, counting every few rows is enough.
- Measure after Row 6. The blanket should be about 48 in wide. If it’s 50 in or 45 in, change your hook size now rather than at Row 80.
- Make your foundation chain loose. A tight chain makes the bottom edge narrower than the rest. Chaining with a 7 mm hook, then switching to 6.5 mm for Row 1, fixes it.
- Weave in tails at the end of each stripe. There are 26 in total. Doing two at a time feels like nothing; doing all 26 at the end feels like a chore.
Would you rather skip the color changes completely? The Fireside throw is worked in one color of super bulky yarn and grows even faster.
US crochet terms
The pattern
Materials
- Bulky weight yarn (weight 5) in 3 colors, in a soft, washable acrylic or acrylic blend:
- Color A (cream): about 1,000 yd (915 m)
- Color B (sage green): about 400 yd (365 m)
- Color C (taupe): about 400 yd (365 m)
- Yardage is an estimate with a little extra built in. Yarns vary, so buy one extra skein of Color A if you can.
- 6.5 mm (K-10.5) crochet hook
- Scissors
- Yarn needle
- 2 stitch markers
Gauge
10 hdc and 8 rows = 4 in (10 cm) in half double crochet.
Gauge isn’t critical for a throw, but it changes the finished size and how much yarn you’ll use. If your square has more stitches than this, try a bigger hook. If it has fewer, try a smaller hook.
Finished size
About 50 × 60 in (127 × 152 cm), including the border. The body measures about 48 × 58 in before the border. Baby, twin and queen sizes are listed in the online version of this pattern at easycrochetblanket.com.
Abbreviations
- ch chain
- hdc half double crochet
- sc single crochet
- sl st slip stitch
- st(s) stitch(es)
- rep repeat
Notes
- The ch 2 at the beginning of each row does not count as a stitch. Work your first hdc into the very first stitch of the row.
- Place a stitch marker in the first and last stitch of each row, and check that you have 120 hdc at the end of every row.
- To change colors: work the last hdc of the row until you have 3 loops on your hook. Pick up the new color, yarn over and pull it through all 3 loops. Cut the old color, leaving a 6 in (15 cm) tail.
- Weave in the tails as you go, or crochet over them on the next row. With 26 tails in total, your future self will thank you.
- Want a different width? Chain any number you like, plus 2. Every 10 hdc adds about 4 in (10 cm).
Instructions
Body
- Foundation: With Color A, ch 122.
- Row 1 (A): Hdc in the 3rd ch from the hook and in each ch across. Turn. (120 hdc)
- Row 2 (A): Ch 2 (does not count as a stitch), hdc in each st across. Turn. (120 hdc)
- Rows 3–9 (A): Rep Row 2. At the end of Row 9, change to Color B. (120 hdc)
- Rows 10–18 (B): Rep Row 2. At the end of Row 18, change to Color A. (120 hdc)
- Rows 19–27 (A): Rep Row 2. At the end of Row 27, change to Color C. (120 hdc)
- Rows 28–36 (C): Rep Row 2. At the end of Row 36, change to Color A. (120 hdc)
- Rows 37–45 (A): Rep Row 2. At the end of Row 45, change to Color B. (120 hdc)
- Rows 46–54 (B): Rep Row 2. At the end of Row 54, change to Color A. (120 hdc)
- Rows 55–63 (A): Rep Row 2. At the end of Row 63, change to Color C. (120 hdc)
- Rows 64–72 (C): Rep Row 2. At the end of Row 72, change to Color A. (120 hdc)
- Rows 73–81 (A): Rep Row 2. At the end of Row 81, change to Color B. (120 hdc)
- Rows 82–90 (B): Rep Row 2. At the end of Row 90, change to Color A. (120 hdc)
- Rows 91–99 (A): Rep Row 2. At the end of Row 99, change to Color C. (120 hdc)
- Rows 100–108 (C): Rep Row 2. At the end of Row 108, change to Color A. (120 hdc)
- Rows 109–117 (A): Rep Row 2. Do not fasten off. (120 hdc)
Border
The border is worked in Color A, in rounds, straight after Row 117.
- Round 1: Ch 1, turn. 3 sc in the first st (corner), sc in each st across to the last st, 3 sc in the last st (corner). Working down the side, *sc in the next row-end, 2 sc in the next row-end; rep from * to the last row-end, sc in the last row-end (175 sc along the side). Working along the opposite side of the foundation chain, into the base of the Row 1 stitches: 3 sc in the base of the first stitch (corner), sc in the base of each of the next 118 stitches, 3 sc in the base of the last stitch (corner). The 2 skipped chains at the end of the foundation chain are not worked. Working up the other side, work the row-ends exactly as for the first side (175 sc along the side). Sl st in the first sc to join. (598 sc)
- Round 2: Ch 1 (does not count as a stitch), sc in the first st, 3 sc in the next st (the center of the corner), *sc in each st to the next corner center, 3 sc in the corner center; rep from * 2 more times, sc in each remaining st. Sl st in the first sc to join. (606 sc)
- Round 3: Ch 1, sc in the first 2 sts, 3 sc in the next st (the center of the corner), *sc in each st to the next corner center, 3 sc in the corner center; rep from * 2 more times, sc in each remaining st. Sl st in the first sc to join. (614 sc)
Finishing
- Finishing: Fasten off and weave in all remaining ends with your yarn needle.
- Blocking (optional): Wash the throw following the yarn label and let it dry flat. It helps the stripes and edges lie nice and even.
Washing a throw with cream and colored stripes
Cream sitting right next to sage and taupe means the first wash deserves a little care. Wash the finished throw on its own, in cold water on a gentle cycle, and toss in a color catcher sheet if you have one. If any dye is going to run, it happens in that first wash.
After that, follow your yarn label. Most acrylics are happy in the machine and can tumble dry on low. A throw this size takes a while to dry flat, so if your label allows the dryer, low heat is your friend. Fold it rather than hanging it over a door: the weight of 117 rows can stretch the stitches over time.
Sunday Morning Throw FAQ
Can I make this easy striped crochet blanket with worsted weight yarn?
You can, but with the same stitch count it will come out noticeably smaller, since worsted stitches are thinner. Use a 5.5 mm hook, make a gauge square, and add stitches to your foundation chain until it measures about 48 in. Or hold two strands of worsted together and follow the pattern as written.
Why does my blanket get wider as I go?
An extra stitch at the start or end of a row is the usual cause. The ch 2 at the beginning doesn’t count, so if you also work a stitch into the top of it on the next row, you gain one. Markers in the first and last stitches solve this quickly.
Can I carry the yarn up the side instead of cutting it?
Not easily with this stripe order. Each stripe is 9 rows, an odd number, so the color changes happen on alternating sides of the blanket. The cream would also have to travel 9 rows between stripes, which leaves long, loose strands on the edge. Cutting and weaving in gives a much tidier border.
How long does the throw take?
Most people finish the throw in 3 to 4 weekends, depending on how much time they have. The baby size is a nice project for one or two weekends.
Can I make it in one color?
Yes. Work all 117 rows in a single color and skip the color changes. You’ll need about 1,800 yd (1,650 m) for the throw, roughly the three colors added together.
Quick recap
- Chain 122 with Color A and work Row 1 in half double crochet: 120 stitches.
- Repeat Row 2 for every row of the body, counting 120 stitches each time.
- Change color every 9 rows, in the order A, B, A, C, for 13 stripes in total.
- Finish with 3 rounds of single crochet in Color A, with 3 stitches in each corner.
- Weave in your 26 tails and give the throw its first gentle wash on its own.
I hope this easy striped crochet blanket ends up on your couch, too. If you have a question along the way, you can always reach me through the Contact page.