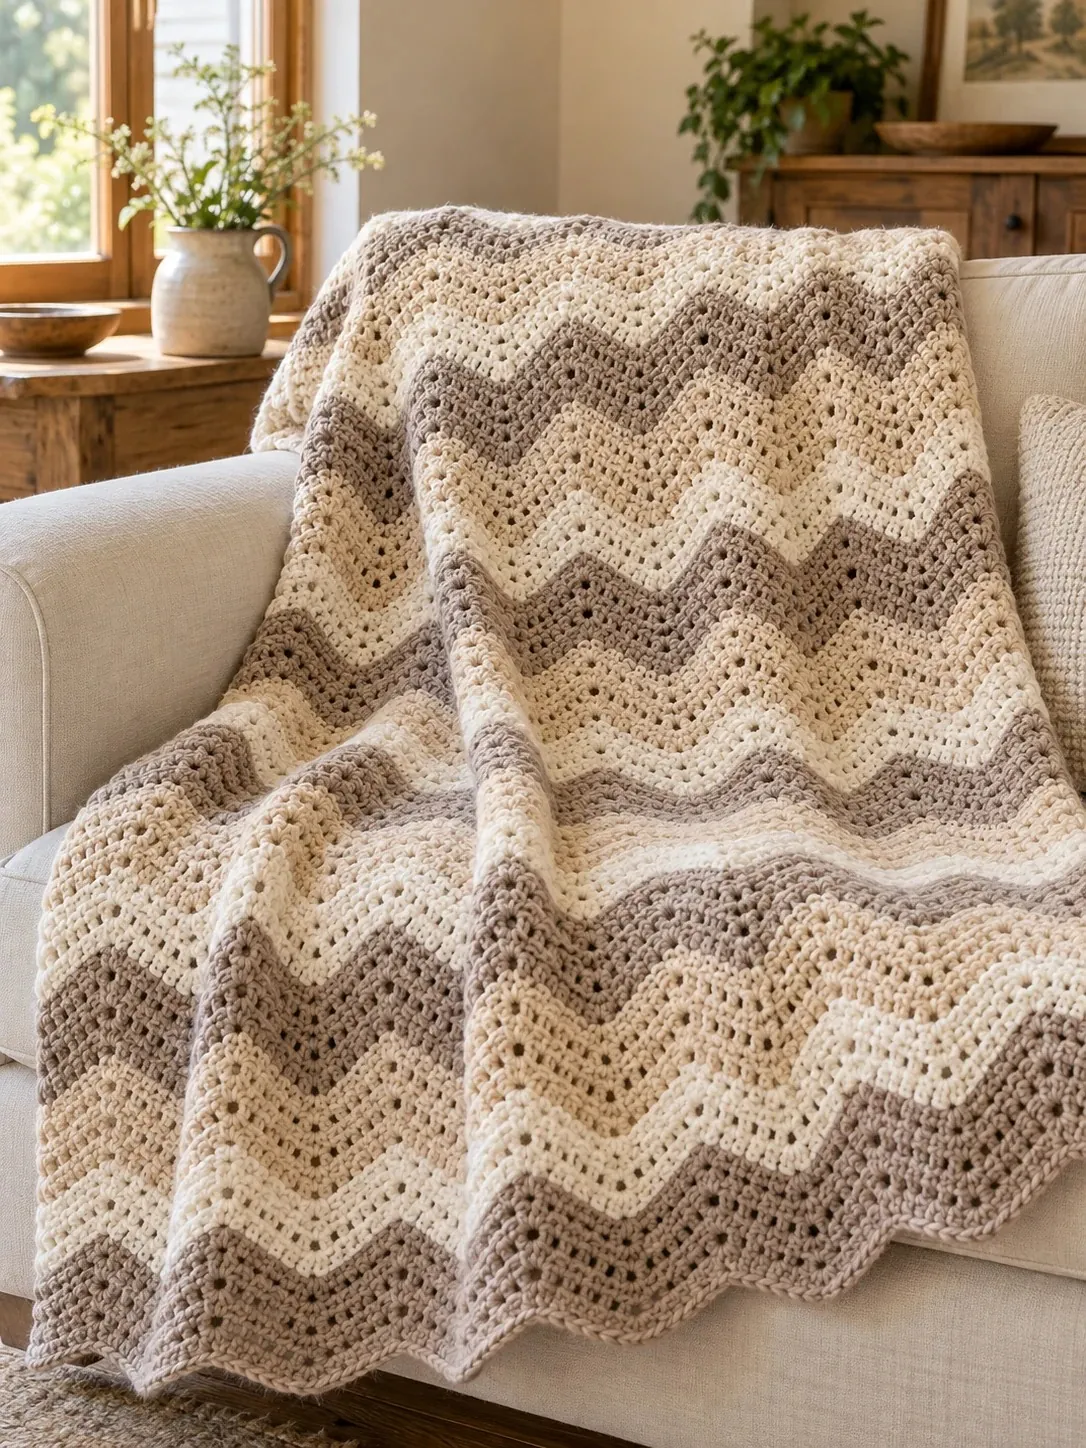
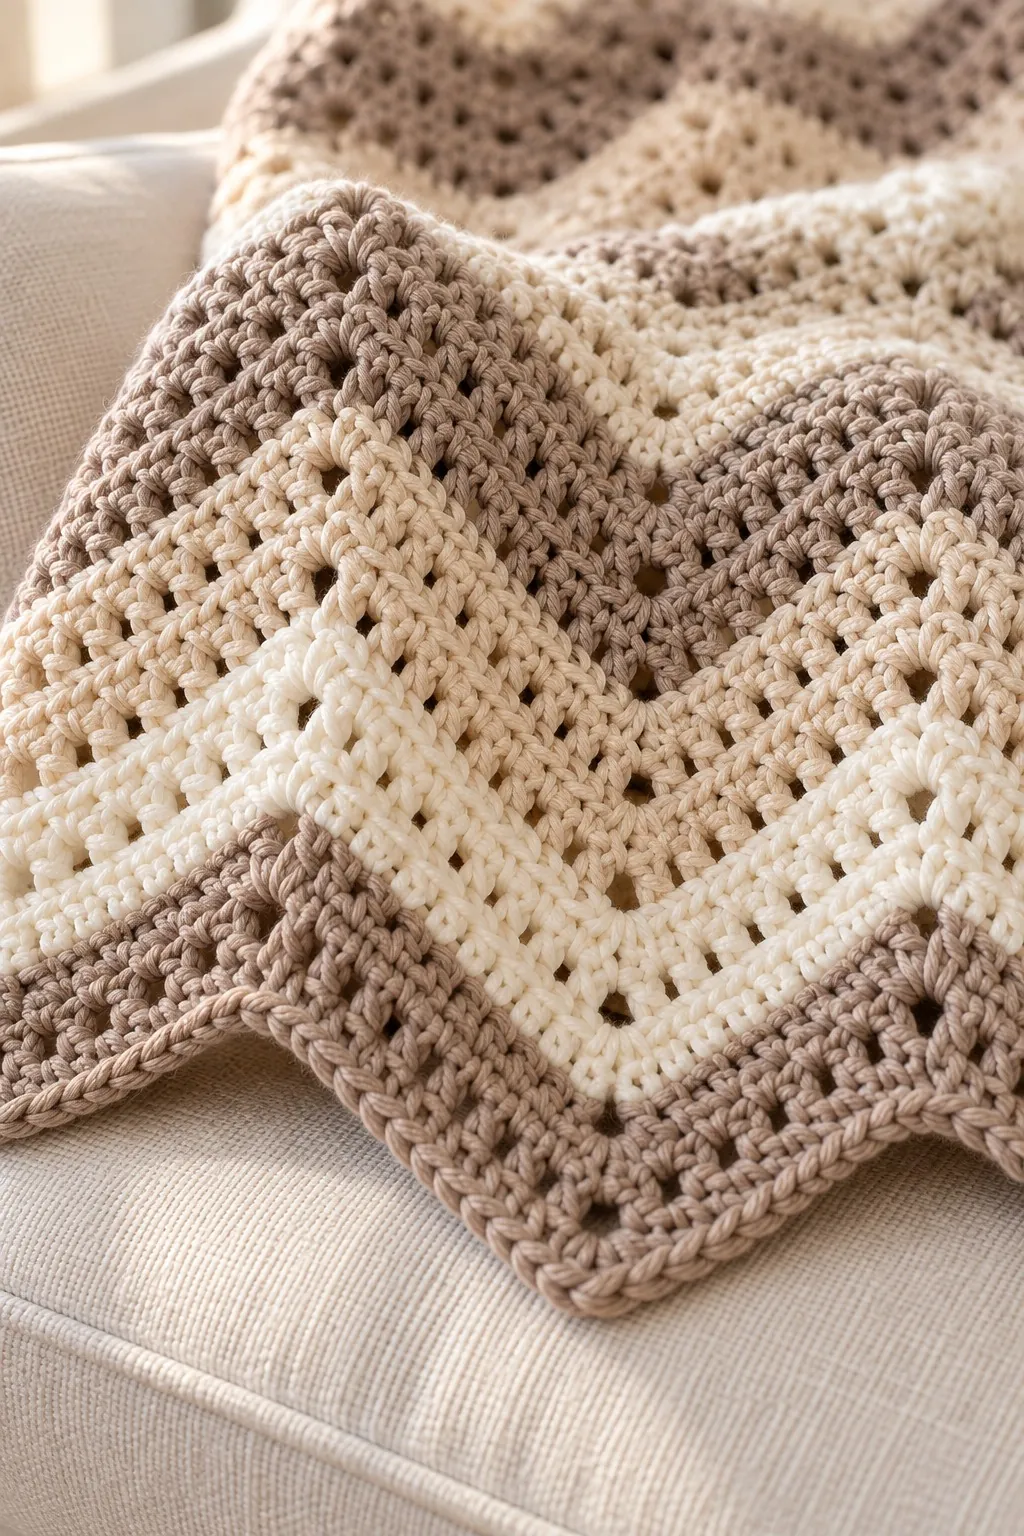
Most mornings my coffee gets a splash of oat milk, and there’s a moment before I stir it when the cup is all soft browns and cream. That’s where this blanket got its colors and its name. The Oat Milk Ripple Blanket is a crochet ripple blanket in three quiet shades, taupe, oat and cream, worked in bulky yarn so the zigzags grow fast and the finished throw has real weight on your lap.
The whole thing is double crochet. Each row climbs to a peak and dips into a valley, and after four rows you switch to the next color. The pattern is written for a throw of about 50 × 58 in (127 × 148 cm), with a baby size, a lap size and an oversized version below.
Is this crochet ripple blanket a good next step after your first one?
It is, if you’ve already made one plain blanket and feel at home with a chain and a double crochet. The edging is one round of single crochet, closed with a slip stitch: insert your hook, yarn over, and pull the loop through the stitch and the loop on your hook in one motion.
Two moves make the waves. A peak is 3 double crochet worked into one stitch. A valley is a double crochet three together (dc3tog): you start a double crochet in each of the next 3 stitches, stopping each one with 2 loops left on the hook, then pull through all 4 loops at once, so three stitches become one. Between them sit 9 plain double crochet. The row grows by 2 at every peak and shrinks by 2 at every valley, so the count stays at 155 from bottom to top.
That’s why I’d call it easy rather than beginner. Nothing is hard, but you do need to count to 9 and notice where you are. Patterns mark the start of the repeat with an asterisk and close it with rep from *. If that shorthand still trips you up, the Beginner Guide shows you how to read a crochet pattern, and Row 2 will make sense after that.
Bulky yarn for ripples with crisp points
Look for the number 5 on the label. Bulky yarn with a 6.5 mm (US K-10.5) hook gives a double crochet fabric that’s thick enough to keep you warm but still bends over the arm of a sofa. Ripples need that drape. A stiff fabric makes the points stick out like little cardboard corners.
Smooth, plied yarn works best. Acrylic is affordable and washable, an acrylic and wool blend feels warmer, and superwash wool is lovely if you don’t mind the price for 1,600 yards. I’d stay away from plush or velvet yarns here. Their pile hides the stitches, and a dc3tog you can’t see is a dc3tog you’ll miscount.
Choose all three colors from the same yarn line. Different brands can have different thicknesses even with the same number on the label, and a slightly thinner cream would make every third stripe narrower. Buy each color in one dye lot, because two lots of oat side by side can show up as two different stripes.
Bulky skeins range a lot in length, so compare yards, not skeins. Then make the swatch from the pattern card before you chain 157. If you get 12 stitches over 4 in instead of 11, each wave shrinks and the throw comes out about 3 in narrower. If you’d rather practice with bulky yarn on something with no counting at all, my one-color throw in moss stitch uses the same yarn weight.
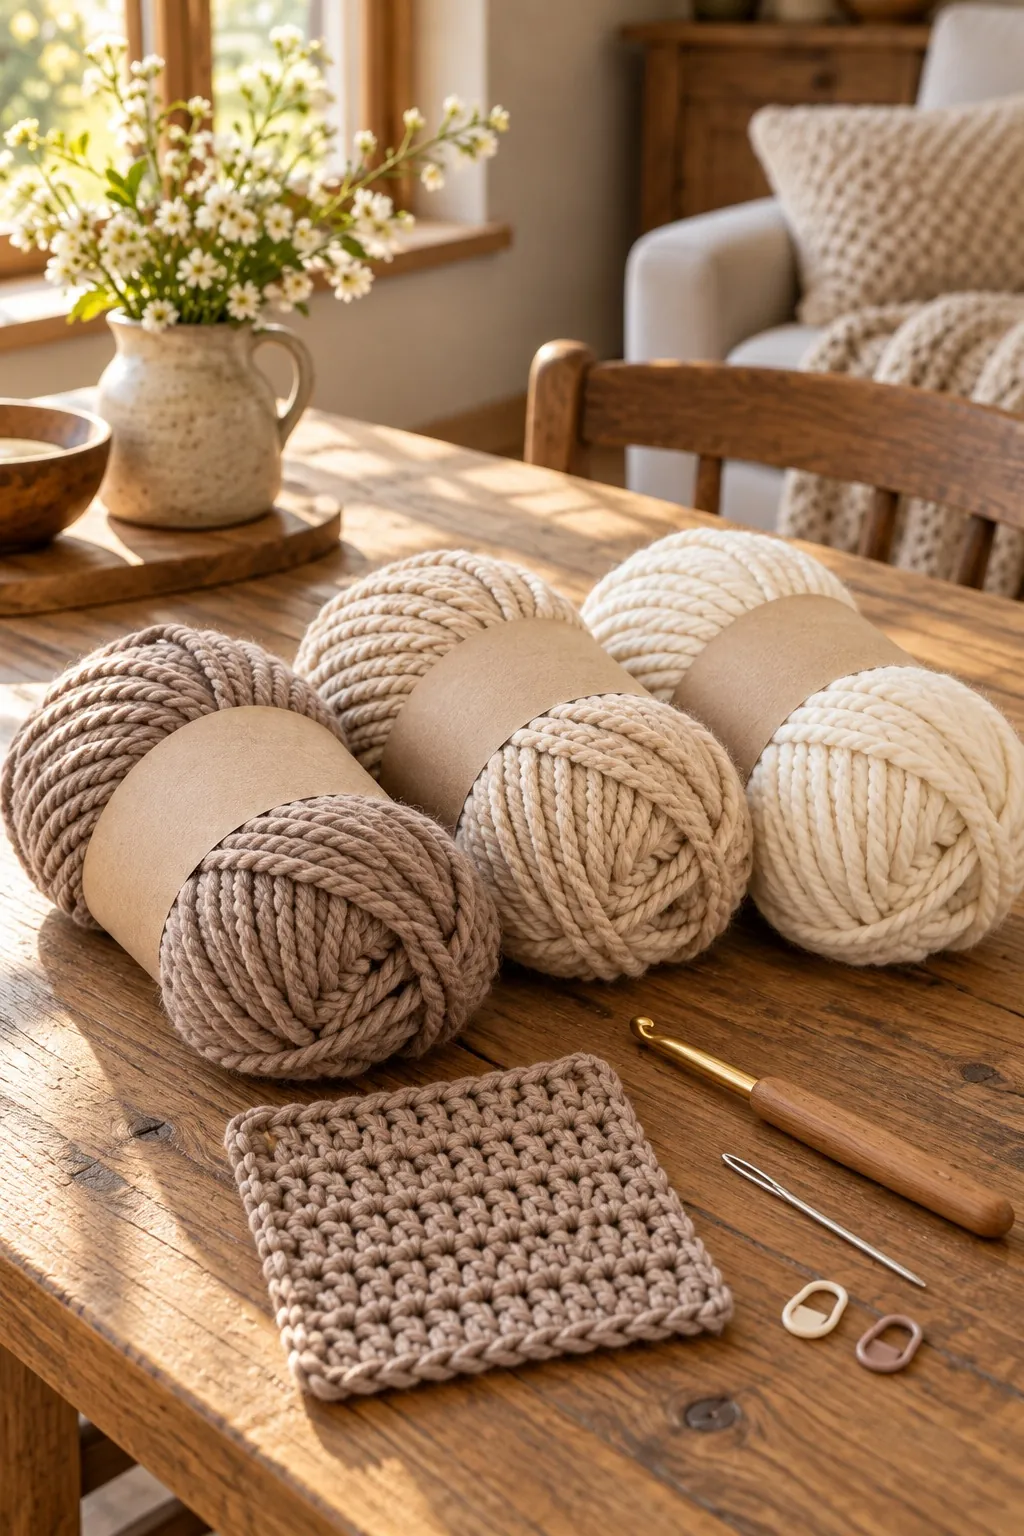
Taupe, oat and cream: stripe order is the whole trick
The three colors go in a fixed order: taupe (A), oat (B), cream (C), then back to taupe. Taupe is the darkest, so it outlines the blanket: it opens the first stripe, closes the last one and makes the border. Oat sits in the middle, and cream gives the light band that makes each chevron pop. Because the order always goes dark, middle, light, your eye reads the waves as one long gradient that resets every 12 rows.
A few other trios that would work the same way:
- Oat Milk: taupe, oat and cream, as in the photo.
- Maple sugar: cinnamon, honey and ivory, for a warmer fall throw.
- Lake morning: slate blue, misty blue and white.
- Sage and stone: deep sage, pale gray and cream.
- Cocoa rose: cocoa brown, dusty pink and natural.
Here’s the practical part. Lay your three skeins side by side and take a black and white photo with your phone. If the middle and light colors turn into the same gray, the ripple will look muddy from across the room. Swap one of them for a shade that’s clearly lighter or darker.
Oat Milk sizes, from a baby blanket to an oversized throw
Every size uses the same gauge, the same 22-stitch wave and the same 4-row stripes. The chain is always 22 × the number of waves + 3, and the number of stripes is always one more than a multiple of 3, so the blanket starts and ends with taupe. The pattern card is written for the throw. Yardage is an estimate with a small margin, rounded up to the next 50 yd.
- Baby, about 36 × 40 in (91 × 102 cm): ch 113, 111 sts (5 waves), 52 rows (13 stripes); border 436 sc; about 350 yd (320 m) taupe, 250 yd (229 m) oat and 250 yd (229 m) cream.
- Lap, about 43 × 49 in (109 × 125 cm): ch 135, 133 sts (6 waves), 64 rows (16 stripes); border 528 sc; about 450 yd (411 m) taupe, 350 yd (320 m) oat and 350 yd (320 m) cream.
- Throw, about 50 × 58 in (127 × 148 cm): ch 157, 155 sts (7 waves), 76 rows (19 stripes); border 620 sc; about 600 yd (549 m) taupe, 500 yd (457 m) oat and 500 yd (457 m) cream.
- Oversized, about 64 × 77 in (162 × 195 cm): ch 201, 199 sts (9 waves), 100 rows (25 stripes); border 804 sc; about 1,000 yd (914 m) taupe, 850 yd (777 m) oat and 850 yd (777 m) cream.
The oversized one covers the top of a twin bed with a little to spare. The baby size is for stroller rides and supervised floor time; babies under 12 months shouldn’t sleep with a loose blanket. If you want a smaller baby gift without any shaping, my peach and cream striped baby blanket in plain single crochet is a gentler place to start.
Keeping 7 valleys and 6 peaks lined up, row after row
- Chain loosely. Row 1 pulls the chain into zigzags, and a tight chain makes the bottom edge pucker. If your chains run small, make them with an 8 mm (US L-11) hook.
- Mark the first peak. Clip a stitch marker into the center dc of the first peak on Row 1 and move it up every row or two. If your next peak doesn’t land right above it, stop and count back to the last valley.
- Count in nines. Every stretch between a peak and a valley is 9 dc. Counting to 9 over and over is much easier than counting to 155.
- Find the valley by its middle. The middle leg of each dc3tog goes into the top of the dc3tog below it, which looks like a small knot where three stitches meet.
- Ignore the ch 2. It doesn’t count, so never work into it. Your first 2 dc go into the very first stitch, right at the base of the chain.
- Change colors on the same side. Every stripe is 4 rows, so each new color starts at the same edge, and all your tails end up on one side.
- Measure after 8 rows. One wave should be about 7 in (18 cm) from peak to peak. That’s your best early warning if your gauge has drifted.
US crochet terms
The pattern
Materials
- Yarn: bulky weight (#5) yarn in acrylic, an acrylic-wool blend or superwash wool, about 1,600 yd (1,463 m) in total
- Color A, taupe: about 600 yd (549 m), one dye lot (for example, 5 skeins of about 150 yd / 137 m each)
- Color B, oat: about 500 yd (457 m), one dye lot (for example, 4 skeins of about 150 yd / 137 m each)
- Color C, cream: about 500 yd (457 m), one dye lot (for example, 4 skeins of about 150 yd / 137 m each)
- Hook: 6.5 mm (US K-10.5)
- Optional: 8 mm (US L-11) hook for the foundation chain
- Yarn needle, 2 stitch markers, scissors, measuring tape
Gauge
- 11 sts and 6 rows = 4 in (10 cm) in dc
- Swatch: ch 15. Dc in 3rd ch from hook and in each ch across (13 dc). Ch 2 (does not count), turn, dc in each st across. Work 8 rows in all and measure 4 in (10 cm) across the middle.
- In the ripple: one 22-st wave measures about 7 in (18 cm) from peak to peak, and 4 rows measure about 3 in (7.5 cm) straight up.
- Too many sts per 4 in: try a larger hook. Too few: try a smaller one.
Finished size
- About 50 × 58 in (127 × 148 cm) with the border, before blocking, length measured straight up the blanket
- Body before the border: about 49¼ × 57¾ in (125 × 147 cm)
Abbreviations
- ch chain
- dc double crochet
- dc3tog double crochet 3 together
- sc single crochet
- sc3tog single crochet 3 together
- sl st slip stitch
- st(s) stitch(es)
- yo yarn over
- rep repeat
Notes
- dc3tog: [yo, insert hook in next st, yo, pull up a loop, yo, draw through 2 loops] 3 times, yo, draw through all 4 loops on hook. Counts as 1 st.
- sc3tog: [insert hook in next st or loop, yo, pull up a loop] 3 times, yo, draw through all 4 loops on hook. Counts as 1 st.
- The ch 2 at the start of each row does not count as a st. Never work into it.
- Every row has 155 sts: 7 valleys (dc3tog) and 6 peaks (3 dc in one st), with 9 dc between each peak and valley, and 2 dc in the first and last st.
- Peaks sit above peaks: work the 3 dc into the center dc of the peak below. Valleys sit above valleys: the middle leg of each dc3tog goes into the dc3tog below.
- Stripes: 4 rows of each color in the order A, B, C. You’ll work 7 stripes in A and 6 each in B and C.
- To change color, work the last dc of the row until 2 loops remain on the hook, drop the old color, yo with the new color and pull through. Cut the old color, leaving a 6 in (15 cm) tail. All color changes fall on the same side edge.
- The border uses 3 sc at the top corners, which come to a point, and 2 sc at the bottom corners, which are shallow.
- To change the size, chain 22 × the number of waves + 3, and work 4 × (a multiple of 3, plus 1) rows. The border then has 22 × waves + 3 sc across the top, 22 × waves + 5 sc across the bottom, and 2 sc per row on each side.
Instructions
Body
- Foundation: With A, loosely ch 157.
- Row 1: 2 dc in 3rd ch from hook, *dc in next 9 ch, dc3tog over next 3 ch, dc in next 9 ch, 3 dc in next ch; rep from * 5 more times, dc in next 9 ch, dc3tog over next 3 ch, dc in next 9 ch, 2 dc in last ch. (155 sts: 7 valleys and 6 peaks)
- Row 2: Ch 2 (does not count as a st), turn. 2 dc in first st, *dc in next 9 sts, dc3tog over next 3 sts, dc in next 9 sts, 3 dc in next st; rep from * 5 more times, dc in next 9 sts, dc3tog over next 3 sts, dc in next 9 sts, 2 dc in last st. (155 sts)
- Rows 3–4: Rep Row 2. At the end of Row 4, change to B. (155 sts)
- Rows 5–76: Rep Row 2, working 4 rows of each color in this order: B, C, A. Change color at the end of every 4th row. Work this 12-row sequence 6 times in all, ending with 4 rows of A. Do not fasten off. (76 rows, 155 sts)
Border
- Round 1: With A, ch 1, turn. Working across Row 76: 3 sc in first st (corner), sc in next 9 sts, sc3tog over next 3 sts, *sc in next 9 sts, 3 sc in next st, sc in next 9 sts, sc3tog over next 3 sts; rep from * 5 more times, sc in next 9 sts, 3 sc in last st (corner). (157 sc across the top) Working down the side: 2 sc in the side of each row (152 sc). Working in the free loops of the foundation chain: 2 sc in the first loop, which holds the last 2 dc of Row 1 (corner), sc in next 10 loops, 3 sc in next loop, *sc in next 9 loops, sc3tog over next 3 loops, sc in next 9 loops, 3 sc in next loop; rep from * 5 more times, sc in next 10 loops, 2 sc in next loop (corner). Leave the 2 skipped ch beside it empty. (159 sc across the bottom) Working up the other side: 2 sc in the side of each row (152 sc). Join with sl st to first sc. (620 sc)
- Finishing: Fasten off and weave in all ends, going back and forth at least twice.
Washing a bulky ripple with a cream stripe
Follow the yarn label, since care depends on the fiber. Most bulky acrylics and blends can go in the machine on a gentle, cool cycle; superwash wool usually wants the wool setting. A front-loader is kinder than a top-loader with an agitator, which can stretch a heavy blanket out of shape.
For the first wash, add a color catcher sheet and use cold water. Taupe rarely bleeds much, but cream stripes sit right next to it in every wave, and a faint tint wouldn’t wash back out.
A wet bulky blanket is heavy, so don’t hang it over a line or a door. The weight pulls the rows long and flattens your points. Dry it flat on towels, gently pushing each peak and valley back into shape with your fingers, or tumble on low if the label allows. Store it folded on a shelf rather than hanging, for the same reason.
Oat Milk ripple questions from new crocheters
Can I make this crochet ripple blanket in worsted yarn?
Yes, but it comes out smaller. At a worsted gauge of about 14 dc and 8 rows over 4 in, one wave measures about 5½ in, so the throw numbers give you roughly 38 in across. Use the oversized numbers instead (ch 201, 100 rows) to land near 49 × 58 in. Make a swatch first, and plan on more yardage than the bulky version.
My row has 153 stitches instead of 155. Where did two go?
Look at the edges first. The most common slip is working 1 dc instead of 2 into the last stitch, or skipping the first stitch because it sits so close to the ch 2. If both edges have their 2 dc, count the 9s: a dc3tog started one stitch early steals from the next stretch.
Do I have to cut the yarn at every stripe?
Yes, for this one. Each color comes back every 12 rows, about 9 in up the side, and a strand carried that far would show and catch fingers. The good news is that every change lands on the same edge, so you can weave all the tails into that side, where the border covers them.
Should I block a ripple blanket?
A light blocking helps the points look sharp. Lay the blanket flat, mist it with water, and pin the first and last rows at each peak and valley. Let it dry completely. Keep steam and irons away from acrylic, which goes limp and shiny with heat.
Quick recap
- Swatch to 11 sts and 6 rows over 4 in in dc with a 6.5 mm (US K-10.5) hook.
- With taupe, loosely ch 157 and work Row 1: 7 valleys and 6 peaks (155 sts).
- Rep Row 2, changing color every 4 rows in the order taupe, oat, cream, until you have 76 rows ending in taupe.
- Without fastening off, work 1 round of sc around the blanket, following the waves (620 sc).
- Weave in the ends and wash the blanket as the yarn label says.
I hope this crochet ripple blanket ends up on your couch the way mine did, with a cup of something warm nearby. If your peaks start wandering, or you’d like a size I didn’t list, write to me and we’ll figure it out together.