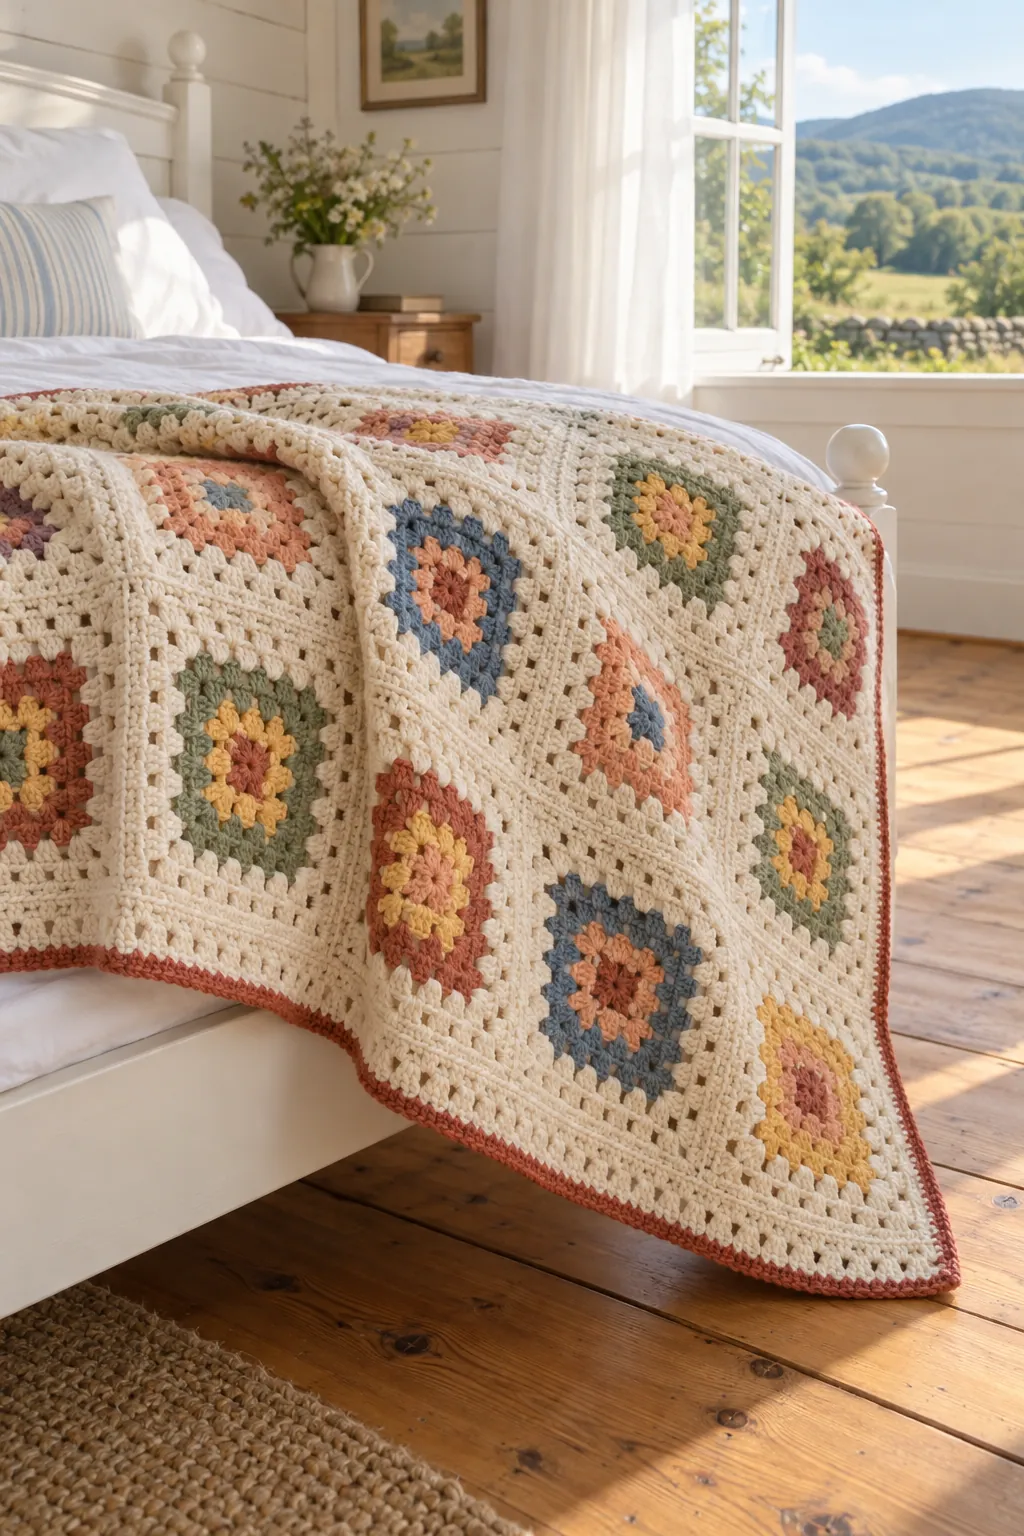
Walk through the craft hall of a Vermont county fair in August and you’ll usually find an afghan like this one hanging over a rail with a ribbon pinned to the corner: dozens of granny squares, every center a little different, all held together by the same cream. That’s the idea behind the County Fair Afghan, a scrappy granny square blanket that gives your leftover worsted a real job. Each square starts with three rounds in three different scrap colors. Four cream rounds finish it, and cream joins it to its neighbors.
That half skein of honey left over from a hat finally ends up on the bed. The cream does most of the work: it’s about three quarters of the yarn, it makes every seam and it forms the first two border rounds, before a last round of terracotta frames the piece. The pattern comes in throw, twin and queen sizes.
Can a newer crocheter handle this scrappy granny square blanket?
Yes, if you know a few basic stitches and don’t mind repetition. The squares use the chain, the slip stitch and the double crochet. A slip stitch is the smallest stitch there is: insert the hook, yarn over and pull straight through both the stitch and the loop on your hook. The border adds single crochet.
The building block is the granny cluster: three double crochet worked into the same space, so they fan out together like a little shell. Instead of working into the top of a stitch, you push the hook into the gap under a chain, which is the only new habit most beginners meet here. Corners are made with (3 dc, ch 2, 3 dc) in a single space, and a ch 1 sits between the clusters along each side. If notation with parentheses and brackets still feels foreign, the Beginner Guide walks through how to read a crochet pattern, abbreviations included.
Color changes only happen at the end of a round: you fasten off, then join the next color in a corner. The squares are joined with slip stitch seams, held right sides together, so the seam stays on the back. If you’d rather have a petal shape at the heart of every square, these worsted squares with an eight-petal center use the same yarn weight and hook.
Worsted scraps, one big cream, and what to leave out of the pile
Look for a number 4 on the label, the worsted symbol, and use a 5.0 mm (H-8) hook. Acrylic and acrylic-cotton blends both work well here. The blends breathe better in summer, but they’re heavier, and in this size weight adds up fast: a queen in plain acrylic comes to roughly 7 lb (3.2 kg).
Sort your scraps before you start. Leave out wool that isn’t labeled superwash, since it can felt in the wash right next to acrylic neighbors that don’t shrink at all. Skip chenille and anything very fuzzy too, since fuzz hides the ch-1 spaces. Some “worsted” yarns run thin. Hold each scrap next to your cream: if it’s clearly skinnier, save it for Round 1, where a small difference barely shows, and keep it out of Round 3, which sets the size of the colored center.
Buy all the cream at once from a single dye lot, because a lot change would show up as a patch of slightly yellower squares and seams. You’ll need about 2,000 [3,700, 4,900] yd. When you substitute, compare yardage per skein rather than the number of skeins.
Then make one full square before buying everything. It should measure 3 1/2 in (9 cm) after Round 3 and 7 1/2 in (19 cm) after Round 7. Half an inch matters more than it sounds: if your squares come out at 7 in, the queen finishes near 86 in instead of 92.
Giving each center its three jobs
Every square has three colored rounds, and each round plays a different part. Round 1 is the small dot in the middle. Round 2 is the first ring. Round 3 is the widest colored round and the one that touches the cream, so it draws the outline of the center. A darker or stronger color there gives each square a crisp edge. Pale shades like peach look their best in Round 1 or 2, tucked inside something deeper.
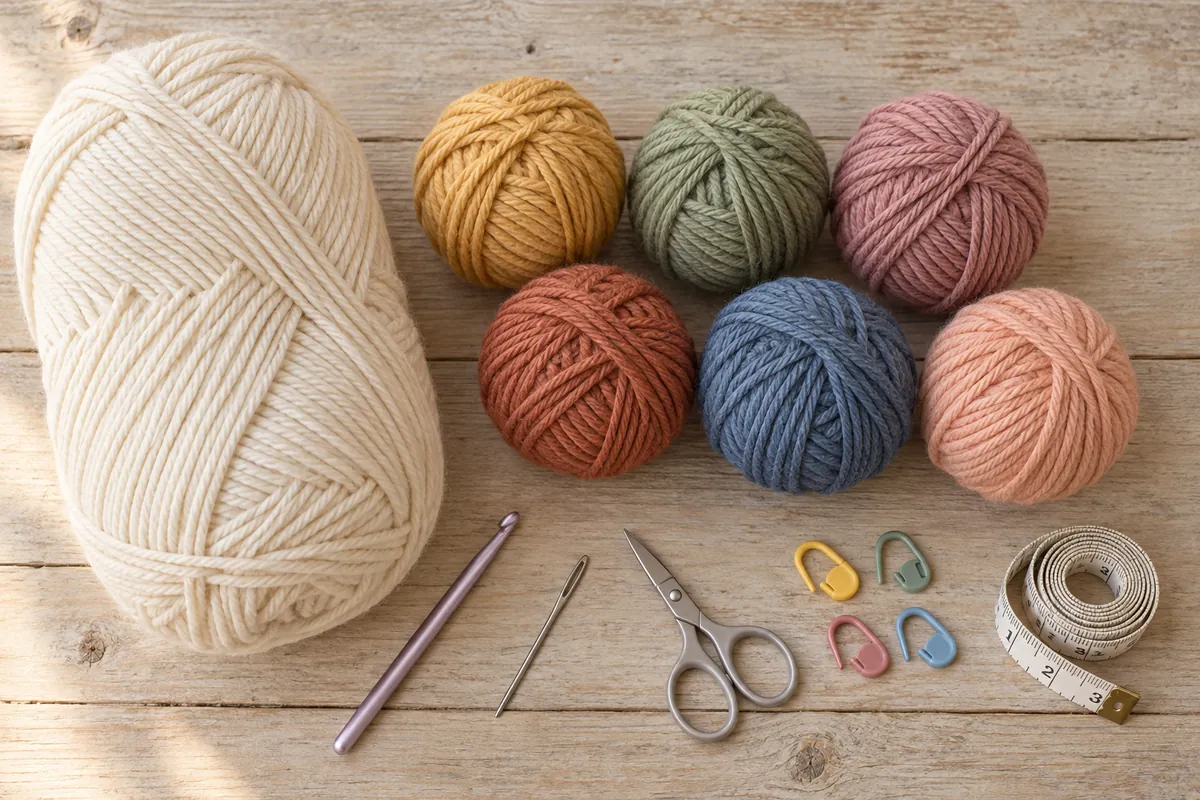
If you’re buying yarn instead of raiding your stash, the card lists honey, sage, dusty rose, denim, peach and terracotta. A few recipes to start from:
- Orchard row: peach center, honey ring, terracotta outside.
- Pea patch: honey center, sage ring, denim outside.
- Blue ribbon: honey center, dusty rose ring, denim outside.
Mix them freely. The one firm rule is about layout: two squares that share an edge never have the same Round 1 color. Once every square is done, lay them all out and take a phone photo. Switch it to black and white, and clumps of very light or very dark centers jump out. Swap squares until the grays look evenly spread.
The terracotta border round needs about 100 yd of a single color. If you’re working purely from scraps, use the darkest color you have that much of.
If choosing colors for every single square sounds more stressful than fun, a bulky granny with five planned colors and fixed recipes takes all of those decisions off your plate.
Throw, twin or queen: squares, seams and yarn for each size
Each square adds 7 1/2 in (19 cm), and the three-round border adds about 1 in (2.5 cm) on every side. All three sizes are written in the pattern card, in the order throw [twin, queen].
- Throw: 7 squares across and 8 down (56 squares), about 54 1/2 × 62 in (138.5 × 157.5 cm). 13 seams, 874 sc in the first border round. About 2,000 yd of cream and 550 yd of scraps, plus 100 yd for the edge.
- Twin: 9 across and 12 down (108 squares), about 69 1/2 × 92 in (176.5 × 233.5 cm). 19 seams, 1,222 sc in the first border round. About 3,700 yd of cream and 1,100 yd of scraps, plus 100 yd for the edge.
- Queen: 12 across and 12 down (144 squares), about 92 × 92 in (233.5 × 233.5 cm). 22 seams, 1,396 sc in the first border round. About 4,900 yd of cream and 1,450 yd of scraps, plus 100 yd for the edge.
On a standard twin mattress, 38 in wide, the twin hangs almost 16 in over each side. The queen gives a similar drop on a 60 in queen mattress. All yardages are estimates with some extra built in, so keep receipts for unopened cream skeins.
Getting every square to 7 1/2 inches and 27 stitches per edge
Check Round 3 before you go further. If the colored center is already bigger than 3 1/2 in, the finished square will be too, and it’s far easier to change hooks now than after forty squares.
Count one edge before seaming. A finished square has 21 dc and 6 ch-1 spaces along each side, so 27 stitches between the corners. A skipped cluster shows up as 23, and you’ll feel it when the seam runs out of stitches early.
Work over your tails. At the start of a new round, lay the tail of the previous color along the top of the stitches and work your first 6 to 8 double crochet around it. Each square leaves 8 ends, so a throw alone has 448, and hiding half of them as you go saves an evening of finishing.
Spread out the joins. Join each new color in a different corner from the round before. Four joins stacked in one corner make a lump you’ll feel through the seam.
Watch the seam tension. Slip stitches tighten easily, and a tight seam puckers the edges of the squares. If yours draw in, switch to a 5.5 mm (I-9) hook for the seams only.
Work in batches. Make all the Round 1s, then all the Round 2s, and you’ll see how your colors spread long before the layout stage.
US crochet terms
The pattern
Materials
- Worsted weight yarn (CYC #4 Medium), acrylic or acrylic-cotton blend, about 200 yd (183 m) per skein. Estimated yardage:
- Cream (MC): 2,000 [3,700, 4,900] yd (1,829 [3,383, 4,481] m), 10 [19, 25] skeins.
- Scrap yarn for Rounds 1–3 of the squares: about 550 [1,100, 1,450] yd (503 [1,006, 1,326] m) in total, in at least 6 colors.
- Or, if buying: honey, sage, dusty rose, denim and peach, 100 [200, 250] yd (91 [183, 229] m) each, 1 [1, 2] skeins each.
- Terracotta (border Round 3, plus squares if buying): 150 [300, 350] yd (137 [274, 320] m), 1 [2, 2] skeins. With scraps only: 100 yd (91 m) of one color for border Round 3.
- 5.0 mm (H-8) crochet hook.
- 5.5 mm (I-9) crochet hook, optional, for seams.
- Yarn needle, scissors and tape measure.
- 4 locking stitch markers.
Gauge
- About 4 granny clusters (3 dc and a ch-1 each) = 4 in (10 cm) across.
- Rounds 1–3 = 3 1/2 in (9 cm) square.
- One finished square (Rounds 1–7) = 7 1/2 in (19 cm) square, edge to edge.
Finished size
- Throw: about 54 1/2 × 62 in (138.5 × 157.5 cm), 7 × 8 squares.
- Twin: about 69 1/2 × 92 in (176.5 × 233.5 cm), 9 × 12 squares.
- Queen: about 92 × 92 in (233.5 × 233.5 cm), 12 × 12 squares.
- Measured flat after light blocking, border included.
Abbreviations
- beg beginning
- ch chain
- dc double crochet
- MC main color (cream)
- rep repeat
- RS right side
- sc single crochet
- sk skip
- sl st slip stitch
- sp(s) space(s)
- st(s) stitch(es)
- WS wrong side
Notes
- Sizes are written as throw [twin, queen]. A single number applies to all sizes.
- Squares are worked in rounds with the RS facing. Do not turn.
- A ch 3 at the start of a round always counts as 1 dc. A ch 1 at the start of a round never counts as a stitch.
- A cluster is 3 dc worked in the same space. Corners are (3 dc, ch 2, 3 dc) in one ch-2 sp.
- Each square uses 3 different scrap colors: one for Round 1, one for Round 2, one for Round 3. Rounds 4–7 are in MC.
- To join a new color: make a slip knot on the hook, insert the hook in the indicated sp and sl st. Join each new color in a different corner from the round before.
- Work the first 6 to 8 dc of each round over the tail of the previous color to cut down on weaving in.
- Layout rule: two squares that share an edge never have the same Round 1 color. Lay out all squares before joining.
- No foundation chain: resize by adding or removing whole squares. Each square adds about 7 1/2 in (19 cm). Border Round 1 has 29 sc per square along each side, minus 2.
- If slip stitch seams pucker, use the 5.5 mm (I-9) hook for seams.
Instructions
Granny square (make 56 [108, 144])
- Ring: with the first scrap color, ch 4, join with sl st in first ch to form a ring.
- Round 1: ch 3 (counts as dc), 2 dc in ring, ch 2, [3 dc in ring, ch 2] 3 times, join with sl st in top of beg ch-3. Fasten off. (12 dc: 4 clusters and 4 corner ch-2 sps)
- Round 2: join the second scrap color in any corner ch-2 sp. Ch 3, (2 dc, ch 2, 3 dc) in same sp, *ch 1, (3 dc, ch 2, 3 dc) in next ch-2 sp; rep from * 2 more times, ch 1, join with sl st in top of beg ch-3. Fasten off. (24 dc: 8 clusters; 6 dc and 1 ch-1 sp on each side)
- Round 3: join the third scrap color in any corner ch-2 sp. Ch 3, (2 dc, ch 2, 3 dc) in same sp, *ch 1, 3 dc in next ch-1 sp, ch 1, (3 dc, ch 2, 3 dc) in next ch-2 sp; rep from * 2 more times, ch 1, 3 dc in next ch-1 sp, ch 1, join with sl st in top of beg ch-3. Fasten off. (36 dc: 12 clusters; 9 dc and 2 ch-1 sps on each side)
- Round 4: join MC in any corner ch-2 sp. Ch 3, (2 dc, ch 2, 3 dc) in same sp, *[ch 1, 3 dc in next ch-1 sp] 2 times, ch 1, (3 dc, ch 2, 3 dc) in next ch-2 sp; rep from * 2 more times, [ch 1, 3 dc in next ch-1 sp] 2 times, ch 1, join with sl st in top of beg ch-3. Do not fasten off. (48 dc: 16 clusters; 12 dc and 3 ch-1 sps on each side)
- Round 5: sl st in each of next 2 dc and in corner ch-2 sp. Ch 3, (2 dc, ch 2, 3 dc) in same sp, *[ch 1, 3 dc in next ch-1 sp] 3 times, ch 1, (3 dc, ch 2, 3 dc) in next ch-2 sp; rep from * 2 more times, [ch 1, 3 dc in next ch-1 sp] 3 times, ch 1, join with sl st in top of beg ch-3. (60 dc: 20 clusters; 15 dc and 4 ch-1 sps on each side)
- Round 6: sl st in each of next 2 dc and in corner ch-2 sp. Work as Round 5, repeating the bracketed section 4 times on each side. (72 dc: 24 clusters; 18 dc and 5 ch-1 sps on each side)
- Round 7: sl st in each of next 2 dc and in corner ch-2 sp. Work as Round 5, repeating the bracketed section 5 times on each side. Fasten off. (84 dc: 28 clusters; 21 dc and 6 ch-1 sps on each side, 27 sts between corner sps)
- Check: the square measures about 7 1/2 in (19 cm). Weave in any remaining tails.
Joining
- Layout: arrange the squares RS up in 7 [9, 12] columns and 8 [12, 12] rows, following the layout rule in Notes.
- Seam method: hold 2 squares RS together with the edges matched. With MC, sl st through both corner ch-2 sps. Working through the back loops only of both squares (the outer loops), sl st in each dc and each ch across (27 sts), then sl st through both next corner ch-2 sps. (29 sl st per square edge)
- Horizontal seams: join Row 1 to Row 2 along their shared edge. Without fastening off, place the next pair RS together and continue the seam across the full width. Fasten off. (203 [261, 348] sl st per seam) Join each remaining pair of rows the same way. (7 [11, 11] horizontal seams)
- Vertical seams: join the columns the same way along their full length, working a sl st over each horizontal seam as you cross it. (232 [348, 348] sl st per seam; 6 [8, 11] vertical seams)
Border
- Round 1 (RS): join MC in the ch-2 sp at any blanket corner. Ch 1 (does not count), 3 sc in same sp. *Sc in each dc and each ch-1 sp across each square (27 sc per square). At each seam, sc in corner sp of the square you are leaving and sc in corner sp of the next square. At the next blanket corner, 3 sc in corner sp. Rep from * around, omitting the last 3 sc group. Join with sl st in first sc. Place a marker in the center sc of each 3-sc corner. (201 [259, 346] sc across top and bottom edges and 230 [346, 346] sc along each long side, between corner groups; 874 [1,222, 1,396] sc in total)
- Round 2: sl st in next sc (marked corner sc). Ch 3 (counts as dc), (dc, ch 2, 2 dc) in same st. *Dc in each sc across to next marked sc, (2 dc, ch 2, 2 dc) in marked sc; rep from * 2 more times, dc in each sc across, join with sl st in top of beg ch-3. Fasten off. (203 [261, 348] dc across top and bottom edges and 232 [348, 348] dc along each long side, between corner groups; 886 [1,234, 1,408] dc in total)
- Round 3: join terracotta in any corner ch-2 sp. Ch 1 (does not count), 3 sc in same sp. *Sc in each dc across to next corner ch-2 sp, 3 sc in corner sp; rep from * 2 more times, sc in each dc across, join with sl st in first sc. Fasten off. (207 [265, 352] sc across top and bottom edges and 236 [352, 352] sc along each long side, between corner groups; 898 [1,246, 1,420] sc in total)
Finishing
- Weave in all ends along stitches of the same color.
- Lay the blanket flat, mist with water, pat it square and let it dry completely.
Washing an afghan made from a dozen different scrap yarns
Wash the whole blanket for its most delicate scrap. If you’re unsure what some scraps are made of, use a gentle cold cycle with mild detergent, then tumble dry on low or dry flat.
Reds, rusts, pinks and deep blues are the colors most likely to bleed, and here they sit right next to cream. Before a scrap goes into a square, wet a snippet and press it onto a white paper towel. If any color comes off, leave that scrap out. A color-catching sheet in the drum is good insurance for the first wash.
A twin or queen holds a lot of water. Lift it out of the machine with both arms, and never hang it wet from a clothesline: the weight stretches the open granny rounds. Drape it over two drying racks or lay it flat on a clean sheet. To store it, fold it loosely and keep it on a shelf in a cotton bag rather than on a hanger.
Questions about the County Fair squares
How long does a scrap need to be for one round of this scrappy granny square blanket?
Round 1 takes about 2 yd, Round 2 about 3 yd and Round 3 about 4 yd, tails included. If a little ball looks borderline for Round 3, give it to Round 1 instead, where it only needs half as much.
What if a scrap runs out halfway around Round 3?
Pull the round out and save that scrap for a Round 1 or Round 2. A color switch partway around the outer ring reads as a mistake, so pick a longer scrap and work Round 3 again.
Should I block the squares before joining them?
It helps when your squares vary by more than about 1/4 in. Pin a few at a time to 7 1/2 in on a towel or foam board, mist them with water and let them dry. Matching sizes make the 27 stitches on each edge line up, so the seams lie flat.
Why do Rounds 5 to 7 start with slip stitches?
The cream rounds aren’t cut between rounds. After you join a round, the slip stitches carry the yarn across the top of 2 dc and into the corner space, where the next round starts. Keep them loose so they don’t pull the corner tight, and you’ll save two tails per round.
Can I make bigger squares instead of more of them?
You can add a Round 8 in cream, repeating the bracketed section 6 times per side. The square grows to about 8 1/2 in and uses roughly 9 1/2 yd more cream. Each edge then has 31 stitches, so every seam becomes 33 slip stitches and the border counts change. Recount Round 1 of the border as 31 sc per square, plus 2 sc at each seam.
Quick recap
- Make 56 [108, 144] squares: three rounds in three scrap colors, then four rounds in cream.
- Lay out the squares so no two touching squares share a Round 1 color, and check the layout in a black and white photo.
- Join the rows with continuous slip stitch seams, right sides together, then join the columns.
- Work one round of single crochet and one round of double crochet in cream around the whole blanket.
- Finish with a round of single crochet in terracotta, weave in the ends and block lightly.
Every center in your County Fair Afghan is a small record of earlier projects, and the cream makes all those leftovers look like they belong together. If a count in this scrappy granny square blanket doesn’t match what’s on your hook, or you’d like a second opinion on your layout, send a note through the Contact page.