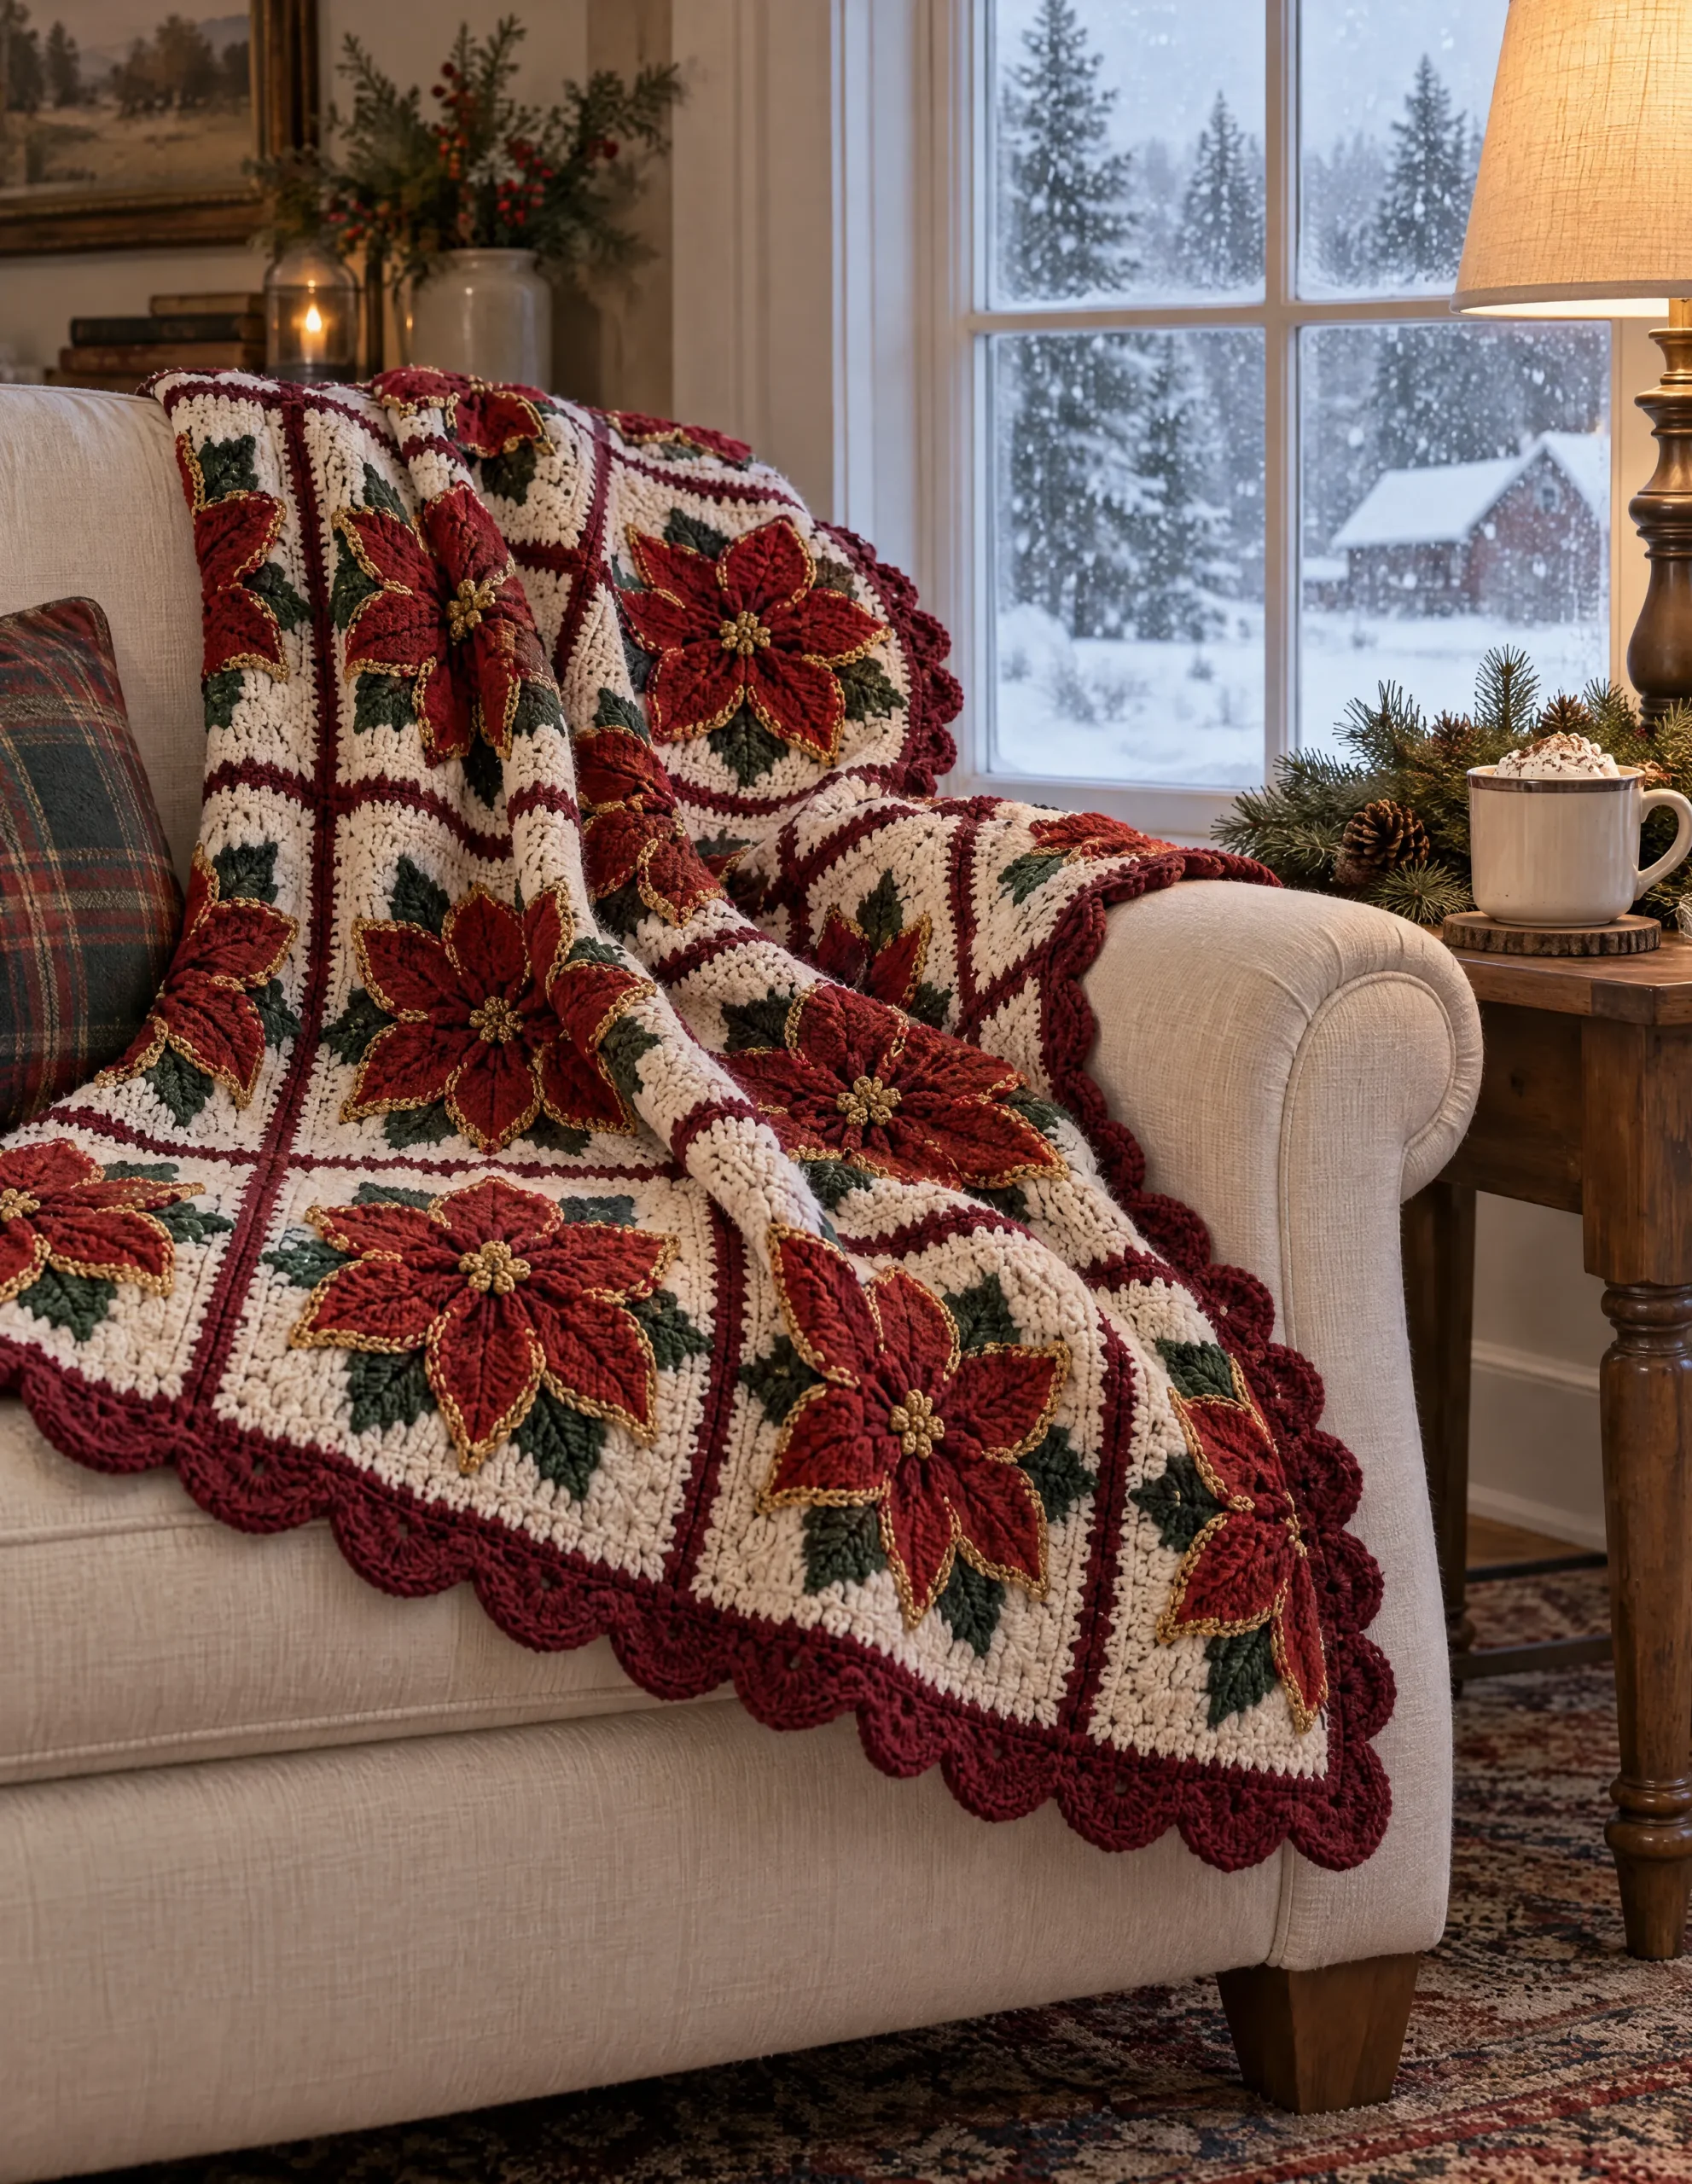
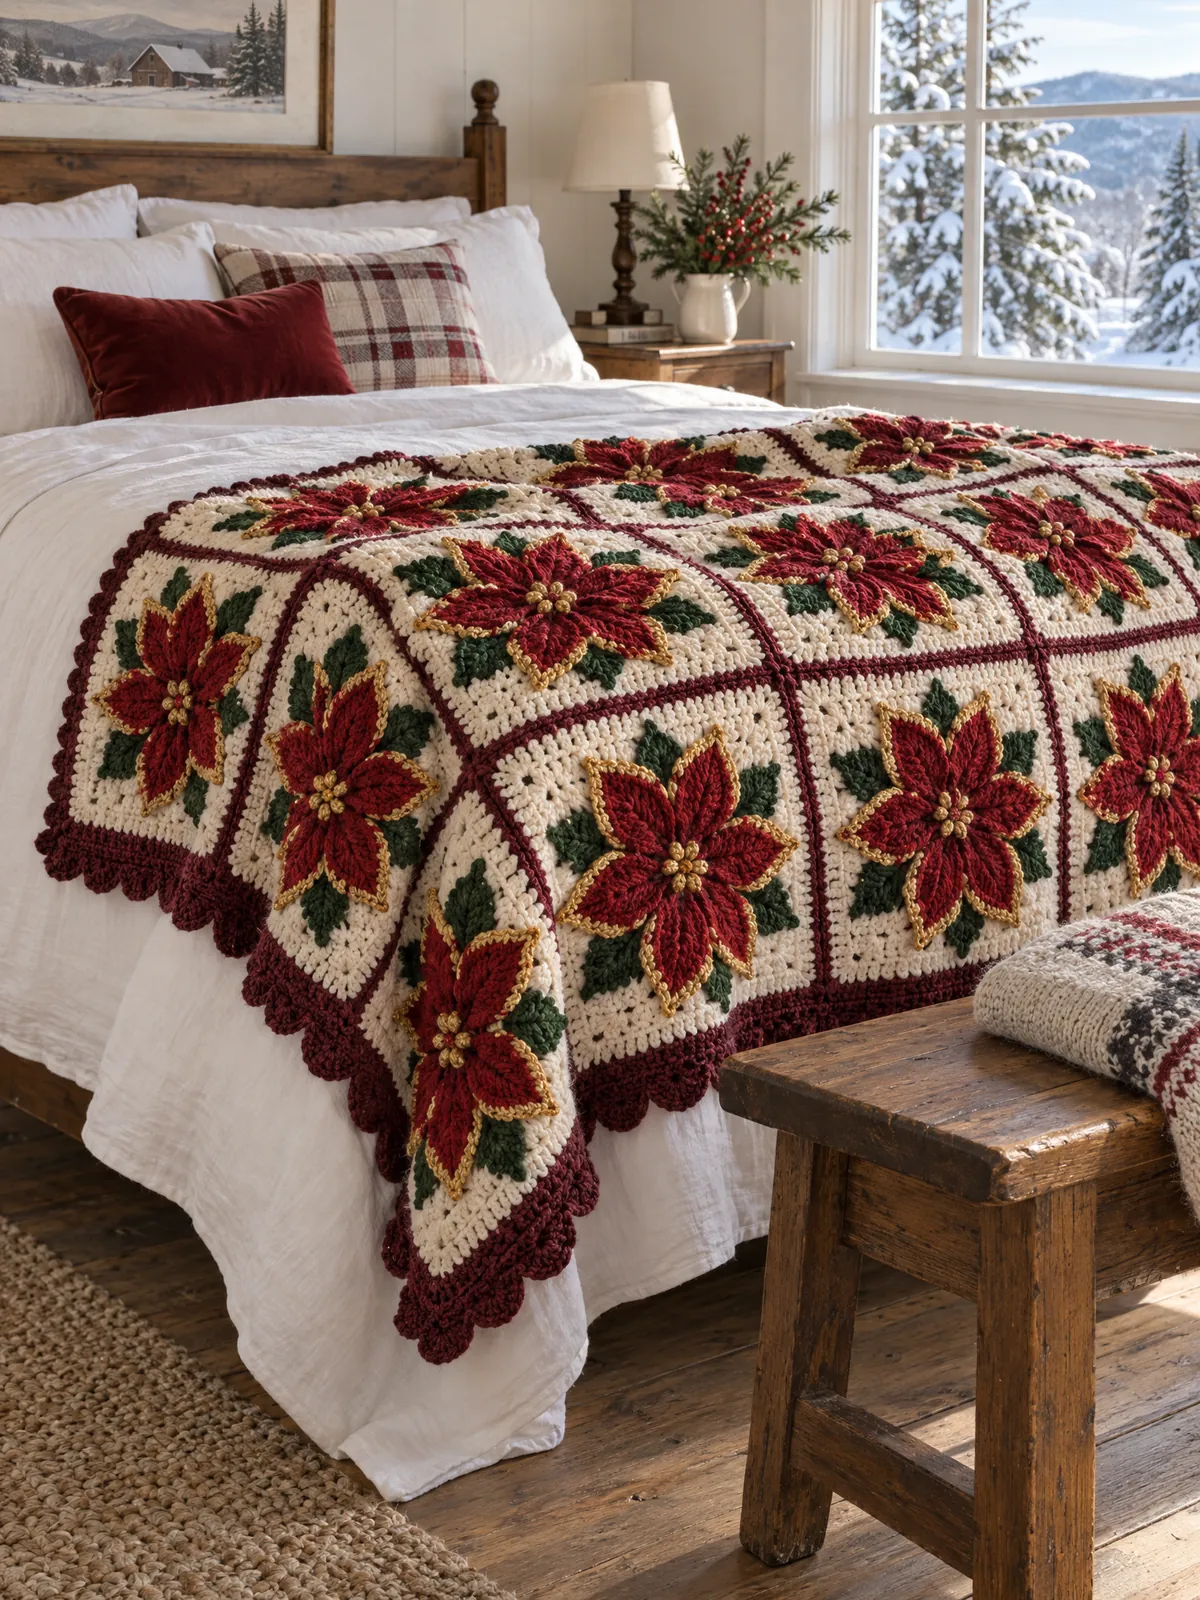
Picture the first real snow of December, the window gone white, and a poinsettia crochet blanket folded over the arm of your chair, every square holding its own red flower. The whole afghan comes from one 7 1/2 in (19 cm) square: a popcorn center, petals in two layers, eight pointed leaves and a cream ground that turns the round flower into a square with a burgundy frame.
You make the square 56, 108 or 156 times, sew the squares into a grid and finish with one round of fans. The pattern below gives every round with its count, the seam order and the exact number of fans along each edge, for a throw, a twin and a queen.
Is this poinsettia crochet blanket a good step after granny squares?
If you’ve made a few granny squares and want a motif with more shape, yes. The square is worked in joined rounds and never turned, and most of it uses stitches you already know: the chain, single crochet, half double crochet and double crochet. If an abbreviation in the card is new to you, the guide to reading a crochet pattern walks through them.
Three things make it Intermediate. Two rounds go behind the flower: you fold the petals toward you and anchor a round of chain loops into Round 1, then crochet the leaves straight off those anchors. You’ll also work popcorns, 4 double crochets closed into one round knob. And Round 8 uses treble crochet 2 together (tr2tog), a tall stitch that joins two leaves at their base. Each special stitch is written out in the Notes.
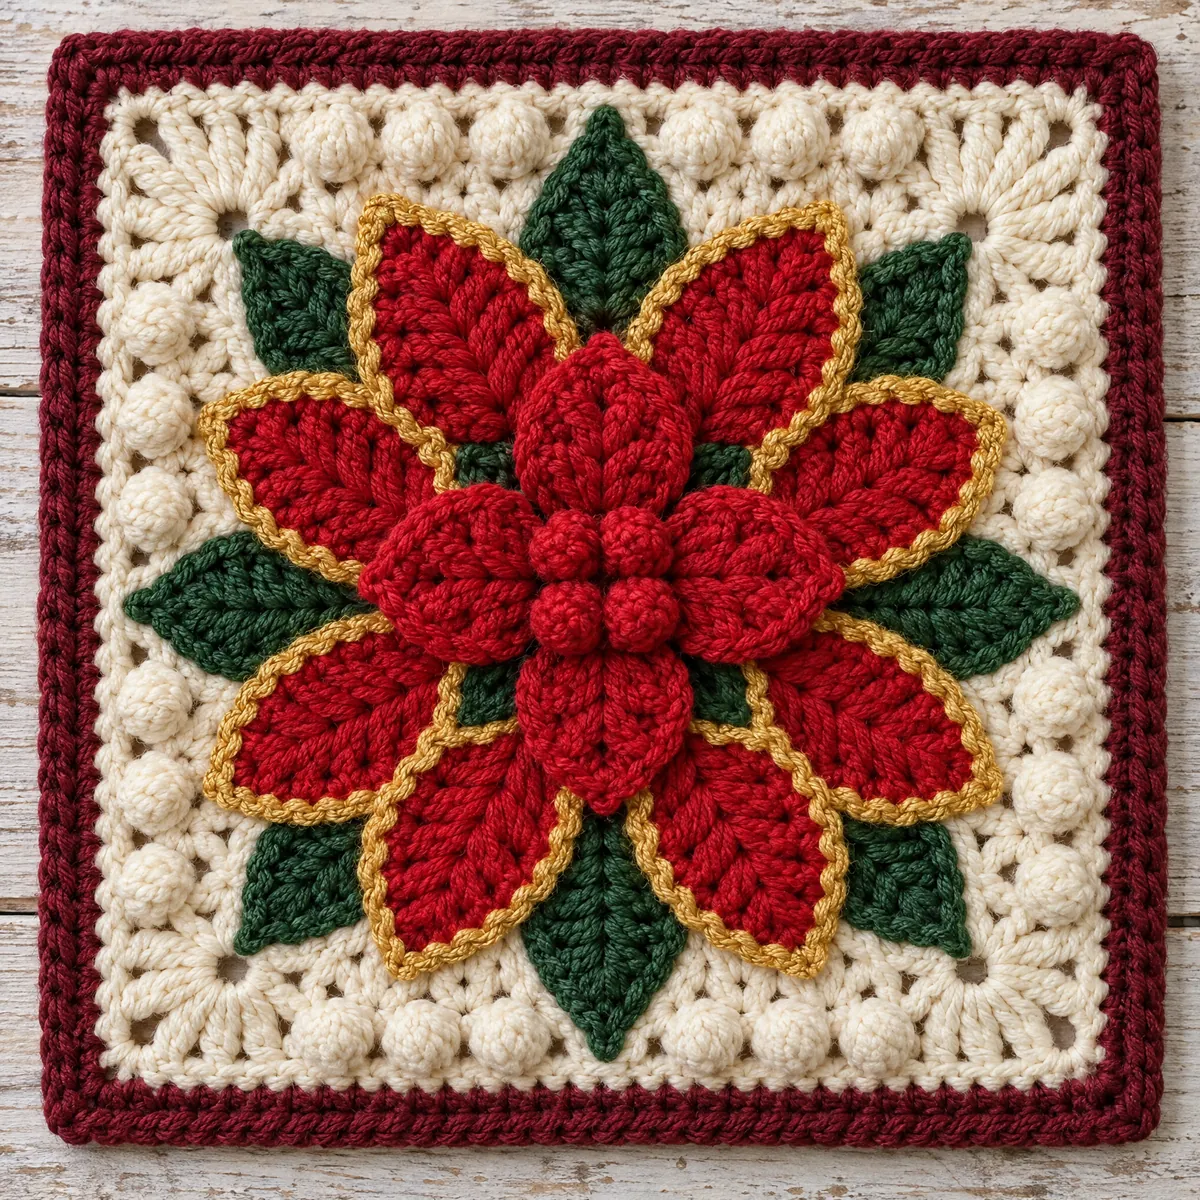
The front petals stay plain red, and the eight back petals get a single round of gold. That thin gold line is what lets you see two layers instead of one red blur.
Worsted wool or acrylic for crisp popcorns and petals
Look for a 4 on the label, with worsted or medium next to it. The amounts in the card assume skeins of about 200 yd (183 m) per 100 g and a 4.0 mm (G-6) hook. That hook is a little small for worsted on purpose: it keeps the popcorns firm and the petal tips pointed.
A wool or wool blend holds the shape of the petals well after blocking, and the leaves stay crisp. A soft acrylic works too and goes through the washer, which helps on a queen. Skip fuzzy or brushed yarns: the halo hides the gold edging and softens the popcorns into lumps.
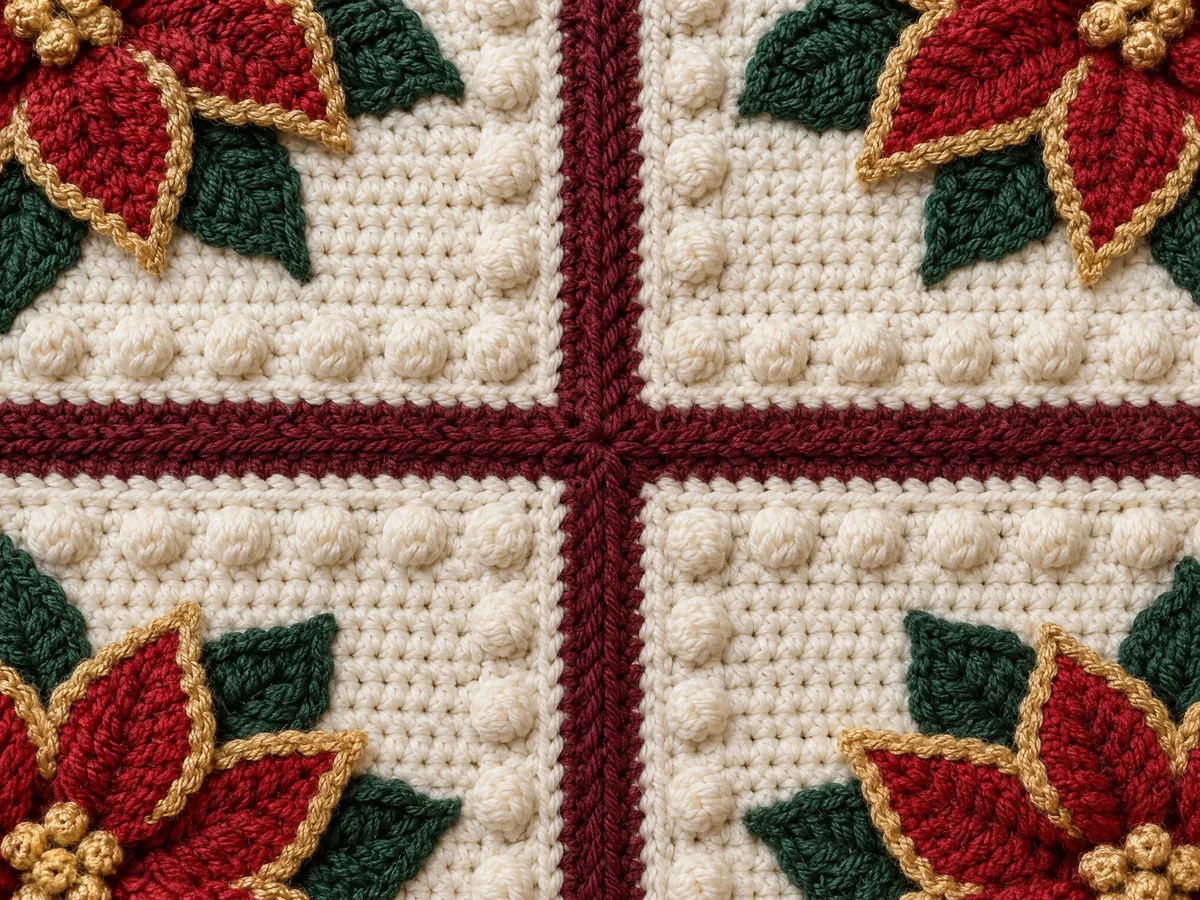
The cream background and the burgundy frame cover the most area. For the throw that’s about 2,000 yd of cream and 1,365 yd of burgundy, so buy each of them from one dye lot. A second lot of cream shows as a slightly different square in the middle of the grid. Block and measure your first square before you buy the rest: if it comes out bigger than 7 1/2 in, every size grows with it.
Red, gold and green, or a palette for every season
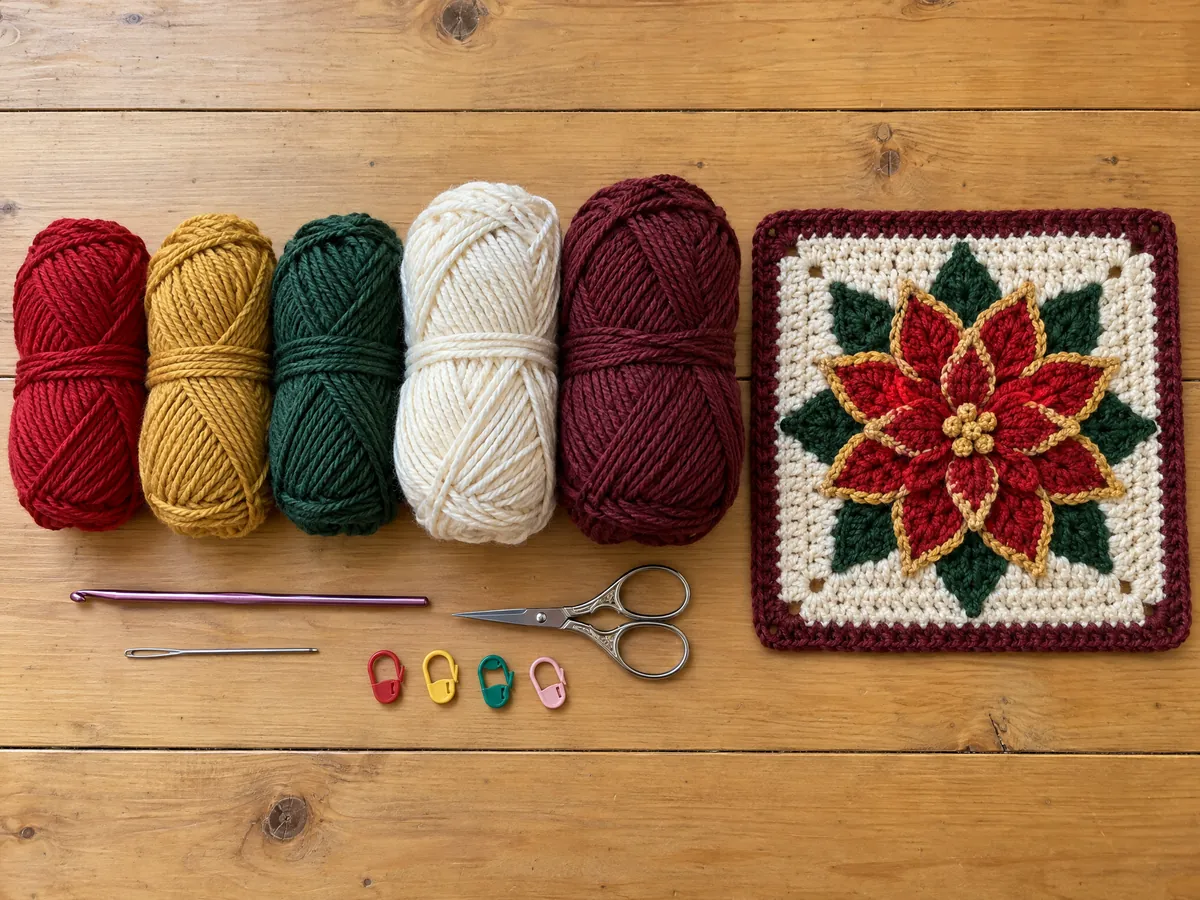
Each square uses five colors, called A to E in the card. A is the center and the petals, B the gold edging on the back petals, C the leaves, D the background and E the frame, the seams and the fan border. Choose D first, then pick an E that stands out clearly against it.
- Classic Christmas: A poinsettia red, B gold, C forest green, D cream, E burgundy, as written.
- Winter Cabin: A cranberry, B ivory, C pine green, D oatmeal, E charcoal.
- Garden Party: A rose pink, B blush, C sage, D sky blue, E charcoal, a flower blanket you can leave out long after the holidays.
Keep B lighter than A. If the edging color is as dark as the petals, the back layer disappears.
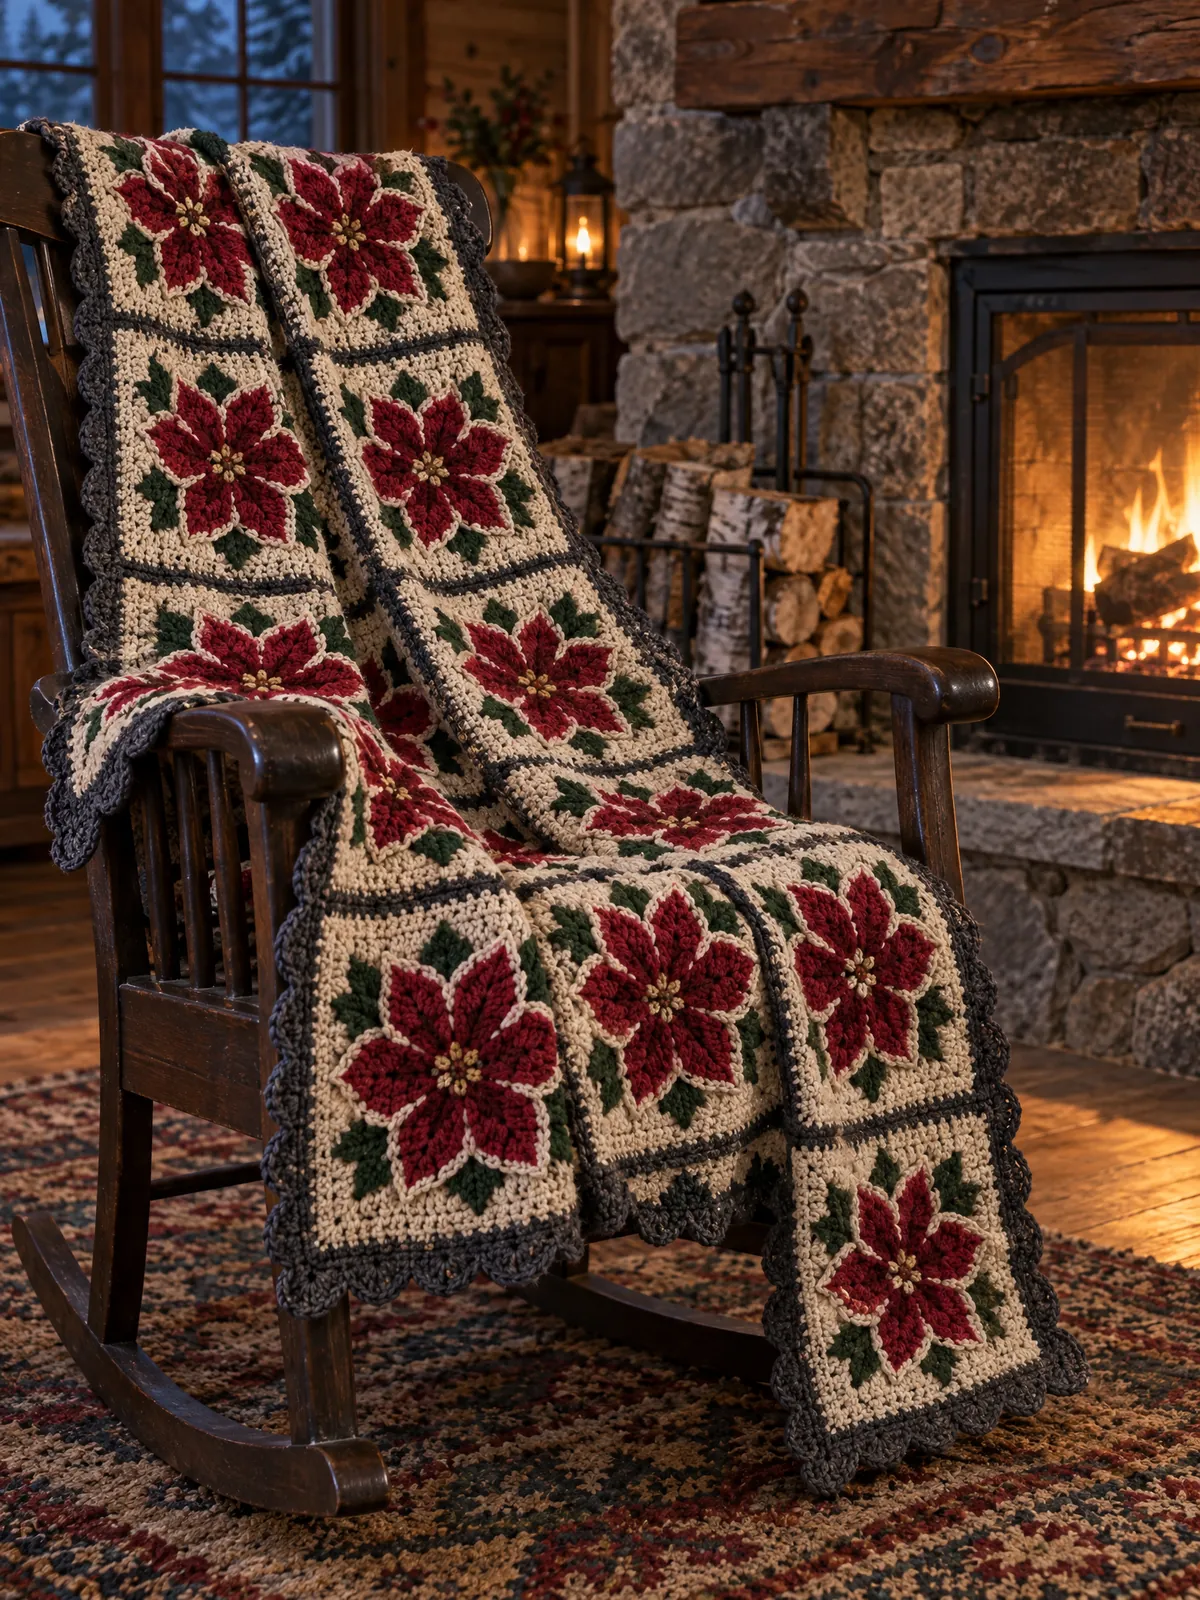
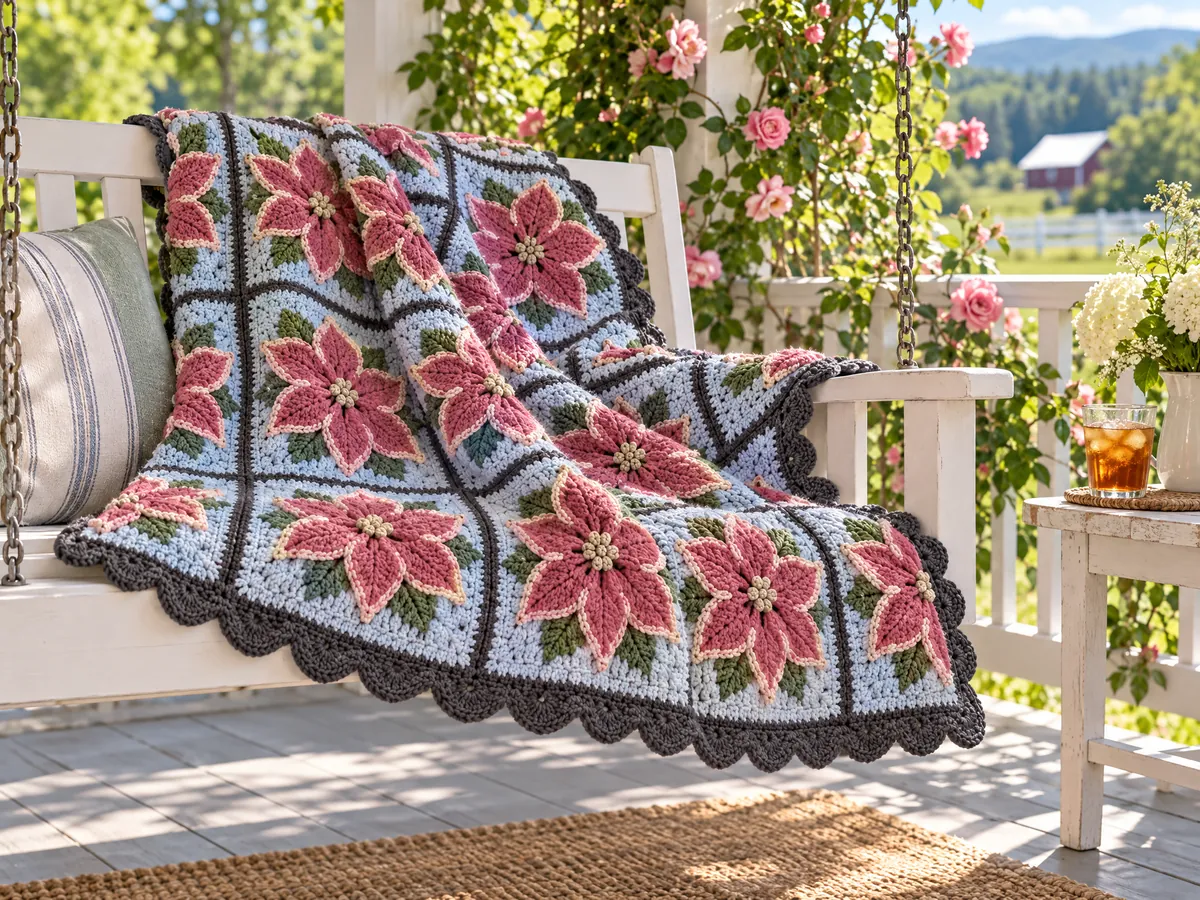
Throw, twin and queen from one 7 1/2-inch square
Every size uses the same square, so you can start crocheting before you decide. Only the number of squares and the border counts change. The card is written as Throw [Twin, Queen], and the sizes include about 1/2 in of border on each side.
- Throw: about 54 × 61 in (137 × 155 cm). 7 × 8 squares, 56 in all. 71 fans on each short edge and 81 on each long edge. About 4,922 yd (4,501 m): A 699 yd, B 159 yd, C 699 yd, D 2,000 yd, E 1,365 yd.
- Twin: about 69 × 91 in (174 × 231 cm). 9 × 12 squares, 108 in all. 92 and 123 fans. About 9,382 yd (8,579 m): A 1,300 yd, B 285 yd, C 1,300 yd, D 3,817 yd, E 2,680 yd.
- Queen: about 91 × 99 in (231 × 250 cm). 12 × 13 squares, 156 in all. 123 and 133 fans. About 13,478 yd (12,324 m): A 1,887 yd, B 432 yd, C 1,887 yd, D 5,498 yd, E 3,774 yd.
The width grows in steps of 7 1/2 in, which is why the throw lands at 54 in instead of a round 50. Six squares across would make a narrow throw.
Counting rounds, folding petals and sewing a neat grid
Round 3 is the round that confuses most people. Fold the four front petals toward you until you can see the popcorns of Round 1 behind them. The chain loops go behind the petals and are anchored twice per petal: once on a popcorn, once around the ch-3 space behind the middle of the petal. Those eight anchors come back in Round 6, where each leaf starts, so take a second to look at them.
Count at the end of every round: 24, 56, 104, 80, 60 and so on. Round 8 is the one to watch. It eats 13 stitches of Round 7 and makes 10 for each leaf, and the Notes spell out every stitch in order. If your count is off there, the corners of Round 10 won’t land on the points.
Put a marker in each corner stitch of Round 13 as soon as you finish it. When you sew, you match those markers first, and each edge takes exactly 31 whipstitches: corner, 29 stitches, corner. Sew the squares into columns, then join the columns with long seams. Where four squares meet, pass the needle through all four corner stitches before you go on.
For a gentler holiday project with cluster stitches, the Christmas coverlet built from granny clusters makes a good warm-up. If you’d rather join motifs as you crochet than sew them, the six-point star afghan shows how.
US crochet terms
The pattern
Materials
- Worsted weight yarn (#4), wool, wool blend or soft acrylic, about 200 yd (183 m) per 100 g skein, in 5 colors (estimate, seams included):
- A, Poinsettia Red (center and petals, Rnds 1–4): about 699 [1,300, 1,887] yd (639 [1,189, 1,725] m), 4 [7, 10] skeins
- B, Gold (petal edging, Rnd 5): about 159 [285, 432] yd (145 [261, 395] m), 1 [2, 3] skeins
- C, Forest Green (leaves, Rnds 6–7): about 699 [1,300, 1,887] yd (639 [1,189, 1,725] m), 4 [7, 10] skeins
- D, Cream (background, Rnds 8–11): about 2,000 [3,817, 5,498] yd (1,829 [3,490, 5,027] m), 10 [20, 28] skeins
- E, Burgundy (frame, seams and border): about 1,365 [2,680, 3,774] yd (1,248 [2,451, 3,451] m), 7 [14, 19] skeins
- 4.0 mm (G-6) crochet hook, or size needed to obtain gauge
- Yarn needle
- Scissors
- 4 stitch markers
Gauge
One square (Rnds 1–13) = 7 1/2 in (19 cm) square, measured edge to edge after blocking, with a 4.0 mm (G-6) hook. Make one square, block it and measure it before you go on: if it’s larger, use a smaller hook; if it’s smaller, use a larger hook. Estimate: your size may vary with your gauge.
Finished size
- Throw: about 54 × 61 in (137 × 155 cm), 7 × 8 squares
- Twin: about 69 × 91 in (174 × 231 cm), 9 × 12 squares
- Queen: about 91 × 99 in (231 × 250 cm), 12 × 13 squares
- Measured after blocking, border included (about 1/2 in / 1.3 cm on each side). Estimates based on the gauge above.
Abbreviations
- beg beginning
- beg pc beginning popcorn (see Notes)
- ch chain
- ch- refers to a chain or space already made (for example, ch-3 sp)
- dc double crochet
- hdc half double crochet
- pc popcorn (see Notes)
- rep repeat
- Rnd(s) round(s)
- RS right side
- sc single crochet
- sk skip
- sl st slip stitch
- sp(s) space(s)
- st(s) stitch(es)
- tr treble crochet
- tr2tog treble crochet 2 together (see Notes)
- WS wrong side
Notes
- Sizes are written as Throw [Twin, Queen]. A number given once applies to all sizes. The square is the same for every size.
- Every round is worked with the RS facing. Do not turn.
- The ch 1 at the start of a round does not count as a stitch. In the beg pc, the ch 3 counts as the first dc. In Rnd 10, the ch 4 counts as a tr. In the border, the ch 4 counts as a dc and a ch-1 sp.
- Beginning popcorn (beg pc): ch 3 (counts as the first dc), 3 dc in the same st or sp, drop the loop from the hook, insert the hook from front to back in the top of the ch-3, pick up the dropped loop and pull it through. Counts as 1 st.
- Popcorn (pc): 4 dc in the same st or sp, drop the loop from the hook, insert the hook from front to back under both top loops of the first dc of the group, pick up the dropped loop and pull it through. Counts as 1 st. No chain is made to close it.
- Treble crochet 2 together (tr2tog): yo twice, insert the hook in the first indicated st, yo and pull up a loop, [yo and pull through 2 loops] twice; yo twice, insert the hook in the second indicated st, yo and pull up a loop, [yo and pull through 2 loops] twice; yo and pull through all 3 loops on the hook. Counts as 1 st.
- Fan: (dc, ch 1, dc, ch 1, dc, ch 1, dc) in the same st: 4 dc and 3 ch-1 sps. Corner fan: (dc, ch 1, dc, ch 1, dc, ch 1, dc, ch 1, dc) in the same st: 5 dc and 4 ch-1 sps.
- Rnds 3 and 6 are worked behind the flower, into earlier rounds. Fold the petals toward you so you can see where the hook goes. The places where Rnd 3 is fixed to Rnd 1 are called anchors.
- In Rnd 8, each repeat uses 13 sts of Rnd 7 and makes 10 sts, in this order: 3 sc all in the center sc of the leaf tip; 1 hdc in the 3rd sc of the tip and 1 hdc in the 1st sc of the side; 1 dc in the 2nd sc; the 3rd and 4th sc are skipped; the tr2tog is worked over the 5th sc (the last sc of this leaf) and the 1st sc of the next leaf; the 2nd and 3rd sc of the next leaf are skipped; 1 dc in the 4th sc; 1 hdc in the 5th sc and 1 hdc in the 1st sc of the next tip.
- Join each new color with a sl st where the round says, and work over the tails for the first few stitches so fewer ends are left to weave in.
- Count your stitches at the end of every round. Each count is given in parentheses.
- Yardage and sizes are estimates based on the gauge above.
Instructions
Square (make 56 [108, 156])
The flower (Rnds 1–5):
- Rnd 1 (RS): With A, ch 4; join with a sl st in the first ch to form a ring. Beg pc in the ring, ch 3, *pc in the ring, ch 3; rep from * 2 more times; join with a sl st in the top of the beg pc. (4 pc, 4 ch-3 sps)
- Rnd 2: *(Sc, 4 dc, sc) in the next ch-3 sp; rep from * 3 more times; join with a sl st in the first sc. The popcorns are not worked into. (4 petals: 24 sts)
- Rnd 3: Fold the petals toward you and work behind them. Sl st in the top of the pc of Rnd 1 just behind the join. *Ch 4, sc around the ch-3 sp of Rnd 1 behind the center of the next petal (between its 2nd and 3rd dc), ch 4**, sc in the top of the next pc of Rnd 1, between 2 petals; rep from * 3 more times, ending the last rep at **; join with a sl st in the first sl st. (8 ch-4 loops; 8 anchors: 4 behind the petals, 4 on the popcorns)
- Rnd 4: *(Sc, 5 dc, sc) in the next ch-4 loop; rep from * 7 more times; join with a sl st in the first sc. The anchors are not worked into. Fasten off A. The 8 new petals sit behind the first 4. (8 petals: 56 sts)
- Rnd 5: Join B with a sl st in the first sc of any petal of Rnd 4. Ch 1, sc in the same st and in each st around; join with a sl st in the first sc. Fasten off B. (56 sc)
The leaves (Rnds 6–7):
- Rnd 6: Fold the flower toward you. Join C with a sl st in any anchor of Rnd 3 that sits behind the center of a front petal. *Ch 7, sc in the 2nd ch from the hook, hdc in each of the next 2 ch, dc in each of the next 3 ch (leaf made), sc in the next anchor of Rnd 3; rep from * 7 more times, working the last sc as a sl st in the first sl st. (8 leaves)
- Rnd 7: Ch 1. *Work 5 sc evenly spaced along the first side of the next leaf, 3 sc in the tip (the skipped ch at the end of the leaf), 5 sc evenly spaced along the second side of the leaf; rep from * 7 more times; join with a sl st in the first sc. The anchors between the leaves are not worked into. Fasten off C. (104 sc: 13 sc per leaf)
The background (Rnds 8–11):
- Rnd 8: Join D with a sl st in the center sc of the 3-sc tip of any leaf. Ch 1, 3 sc in the same st, *hdc in each of the next 2 sts, dc in the next st, sk the next 2 sts, tr2tog over the next st (the last sc of this leaf) and the first sc of the next leaf, sk the next 2 sts, dc in the next st, hdc in each of the next 2 sts**, 3 sc in the next st (the center sc of the next tip); rep from * 6 more times, then rep from * to ** once; join with a sl st in the first sc. (80 sts: 24 sc, 32 hdc, 16 dc, 8 tr2tog)
- Rnd 9: Ch 1, *sc in each of the next 3 sc (the first one in the same st as the join), hdc in each of the next 2 hdc, dc in each of the next 3 sts, hdc in each of the next 2 hdc; rep from * 7 more times; join with a sl st in the first sc. (80 sts: 24 sc, 32 hdc, 24 dc)
- Rnd 10: Sl st in the next sc (the center sc of a point). Ch 4 (counts as tr), (2 tr, ch 1, 3 tr) in the same st (corner made), *ch 1, sk the next 3 sts, pc in the next dc, [ch 1, pc in the next dc] twice, ch 1, sk the next 2 hdc, sc in the next sc, sl st in the next sc, sc in the next sc, ch 1, sk the next 2 hdc, pc in the next dc, [ch 1, pc in the next dc] twice, ch 1, sk the next 3 sts**, (3 tr, ch 1, 3 tr) in the next sc (the center sc of the next point: corner made); rep from * 2 more times, then rep from * to ** once; join with a sl st in the top of the beg ch-4. (60 sts: 24 tr, 24 pc, 8 sc, 4 sl st; 36 ch-1 sps: 4 at the corners, 32 along the sides)
- Rnd 11: Ch 1, sc in the same st as the join and in each st and each ch-1 sp around, working (2 sc, ch 2, 2 sc) in each corner ch-1 sp; join with a sl st in the first sc. Fasten off D. (108 sc and 4 corner ch-2 sps: 27 sc on each side between the corner sps)
The frame (Rnds 12–13):
- Rnd 12: Join E with a sl st in any corner ch-2 sp. Ch 1, 3 sc in the same sp, *sc in each of the next 27 sc, 3 sc in the next corner ch-2 sp; rep from * 2 more times, sc in each of the next 27 sc; join with a sl st in the first sc. (120 sc: on each side, 1 corner st and 29 sc between the corner sts)
- Rnd 13: Ch 1, sc in each sc around, with no extra stitches at the corners; join with a sl st in the first sc. Fasten off E. Place a marker in the sc worked into each corner st (the center sc of each 3-sc corner of Rnd 12). (120 sc)
Block the square to 7 1/2 in (19 cm) and check your gauge before you make the rest.
Joining
Lay out the squares 7 [9, 12] across and 8 [12, 13] down (width × length). With E and a yarn needle, sew the squares together with a whipstitch:
- Step 1: Hold two squares with the RS together, edges lined up, marked corner sts matched.
- Step 2: Start in a corner st: pass the needle through both corner sts, then a second time through the same place to lock the yarn.
- Step 3: Insert the needle from front to back under both loops of the next st of the front square and of the matching st of the back square, bring the yarn over the top of the edges, and repeat. Each edge takes 31 whipstitches: corner st, 29 sts, corner st.
- Step 4: End with a locking stitch in the corner sts and weave the tail along the seam on the WS.
- Order: sew the squares of each column into a strip of 8 [12, 13] squares first, then sew the 7 [9, 12] strips together with long seams. Where 4 squares meet, pass the needle through the 4 corner sts before going on, and never join new yarn at that point. Pull each stitch snug, not tight.
Border
Along each outer edge, count the stitches between the two corner sts of the afghan, including the corner sts of the squares at every seam: 215 [277, 370] sts on each short edge (top and bottom) and 246 [370, 401] sts on each long edge (sides). At a seam, the corner st of each square is worked like any other st.
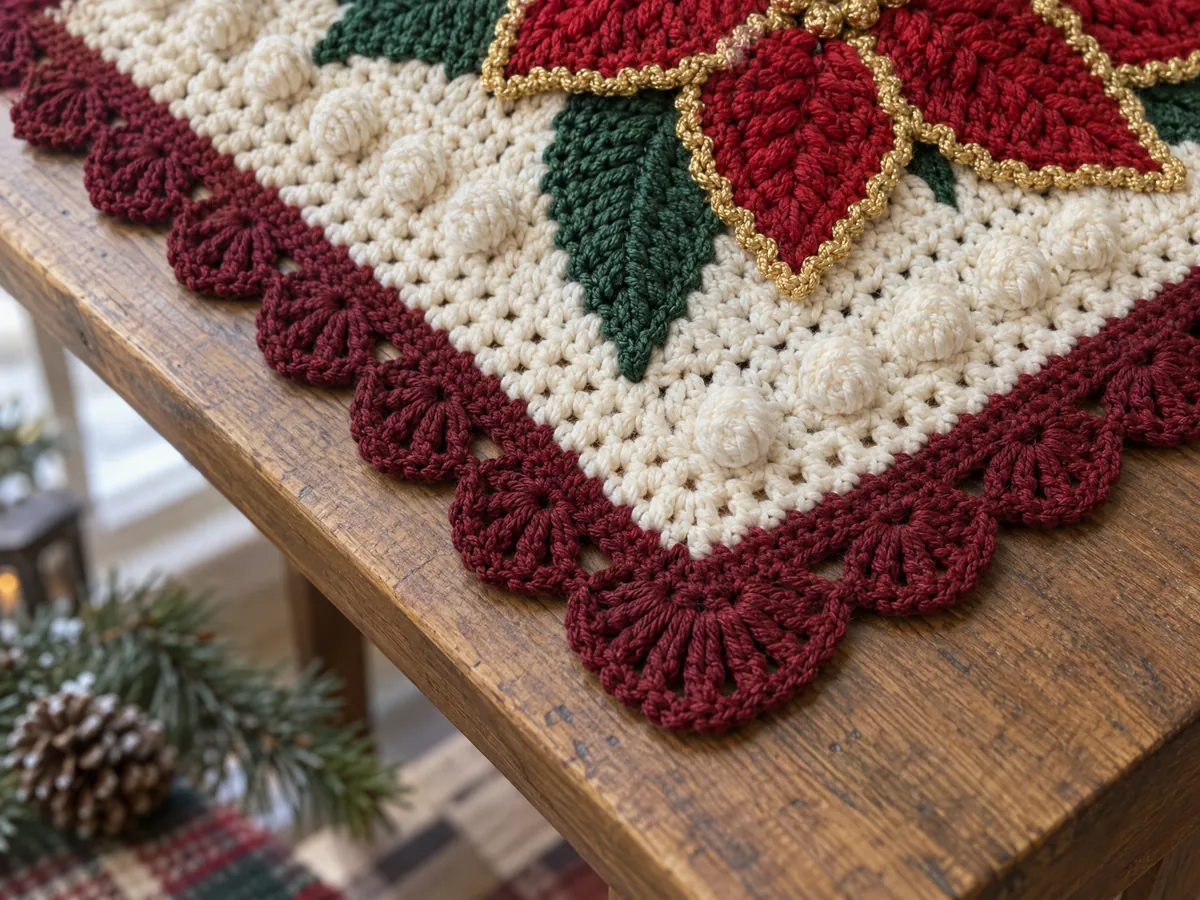
- Border round: With the RS facing, join E with a sl st in an outer corner st of the afghan, at the start of a short edge. Ch 4 (counts as dc and ch 1), [dc, ch 1] 3 times, dc in the same st (corner fan made). *[Sk the next 2 sts, fan in the next st] 71 [92, 123] times, sk the next 2 [1, 1] sts, corner fan in the next st (a corner st of the afghan), [sk the next 2 sts, fan in the next st] 81 [123, 133] times, sk the next 3 [1, 2] sts**, corner fan in the next st (a corner st of the afghan); rep from * to ** once more; join with a sl st in the 3rd ch of the beg ch-4. Fasten off. (1,236 [1,740, 2,068] dc and 928 [1,306, 1,552] ch-1 sps: 4 corner fans, 71 [92, 123] fans on each short edge and 81 [123, 133] fans on each long edge)
The number of stitches skipped before each corner changes with the size so that every edge ends exactly at its corner st. Check it as you reach each corner.
Finishing
- Weave in all remaining ends on the WS, following a seam or the back of a round of the same color.
- Lay the afghan flat, pin it to the finished size and mist it (wool or wool blend) or steam it lightly from above without touching it (acrylic). While it’s damp, shape the tips of the petals and leaves and open each fan of the border. Let it dry completely before you unpin it.
Washing a five-color poinsettia afghan
Check every label before the first wash, since five colors can mean five different fibers. For wool, hand wash in cool water with a wool wash, squeeze gently without wringing and dry flat. For machine-washable yarns, use a gentle cycle in a large laundry bag and dry flat, or tumble dry on low if all the labels allow it.
Deep reds can bleed onto a cream background the first time they get wet. Wash a scrap of A with a scrap of D before you start, or add a color-catcher sheet to the first wash. Store the afghan folded on a shelf, never hung, so the fan border keeps its scallops, and never press acrylic with a hot iron.
Poinsettia afghan questions about squares, seams and fans
Can a poinsettia crochet blanket stay out after the holidays?
Yes. The Garden Party palette turns the flowers rose pink on a sky blue ground with sage leaves, and nothing in the pattern is tied to Christmas. Keep the frame color darker than the background so the squares still read as a grid.
How do I know which anchor to start the leaves on?
Look behind the flower for the sc that sits behind the middle of a front petal, around the ch-3 space of Round 1. Join the green there. The next anchor sits on a popcorn, between two petals, and the leaves alternate between the two kinds all the way around.
Why does the number of skipped stitches before a corner change with the size?
The fans sit on every third stitch, and each edge has a different number of stitches depending on how many squares it crosses. Skipping 1, 2 or 3 stitches before the corner lets every edge end exactly at its corner stitch.
Can I join the squares with crochet instead of sewing?
You can join them with slip stitches or single crochet through the back loops, using the same 31 stitches per edge. The seam will stand up a little more on one side than a whipstitch, and it takes a bit more burgundy, so plan an extra skein of E.
Quick recap
- Crochet one square in 13 rounds: popcorn center, front petals, back petals with gold edging, leaves, cream background and burgundy frame.
- Block it to 7 1/2 in (19 cm) and check your gauge.
- Make 56 [108, 156] squares for the Throw [Twin, Queen].
- Sew them into columns, then sew the columns together with burgundy whipstitches.
- Finish with one round of fans, following the counts for your size.
Choose your five colors, block that first square, and your poinsettia crochet blanket is on its way, one flower at a time. If a round or a count puzzles you, ask through the Contact page.