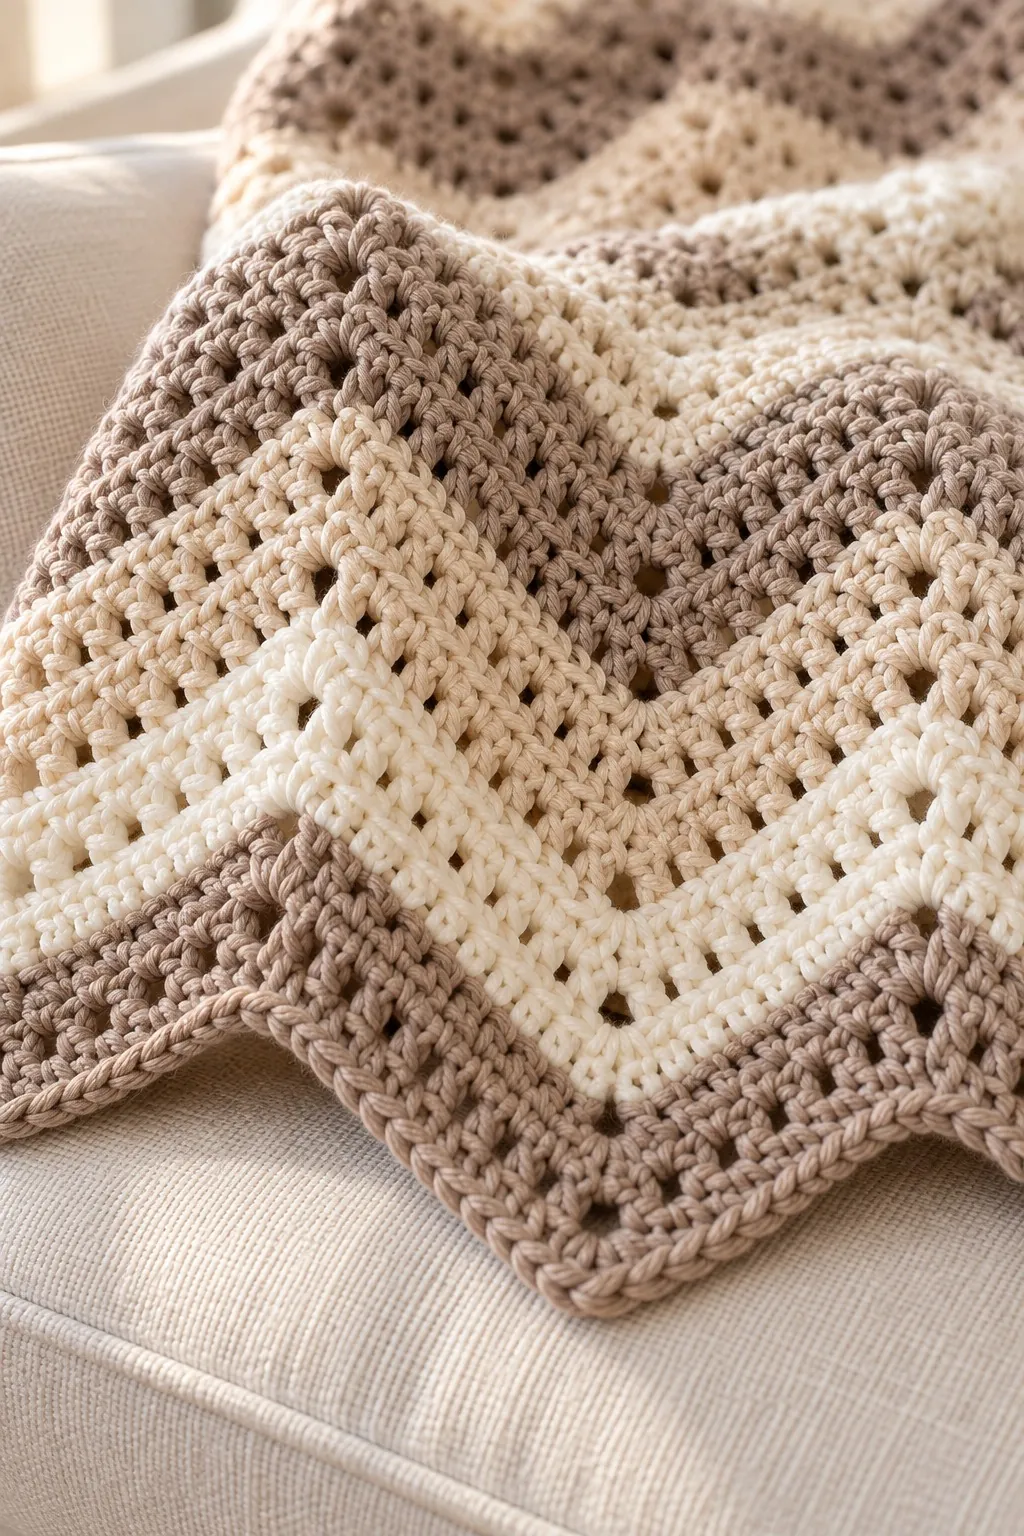
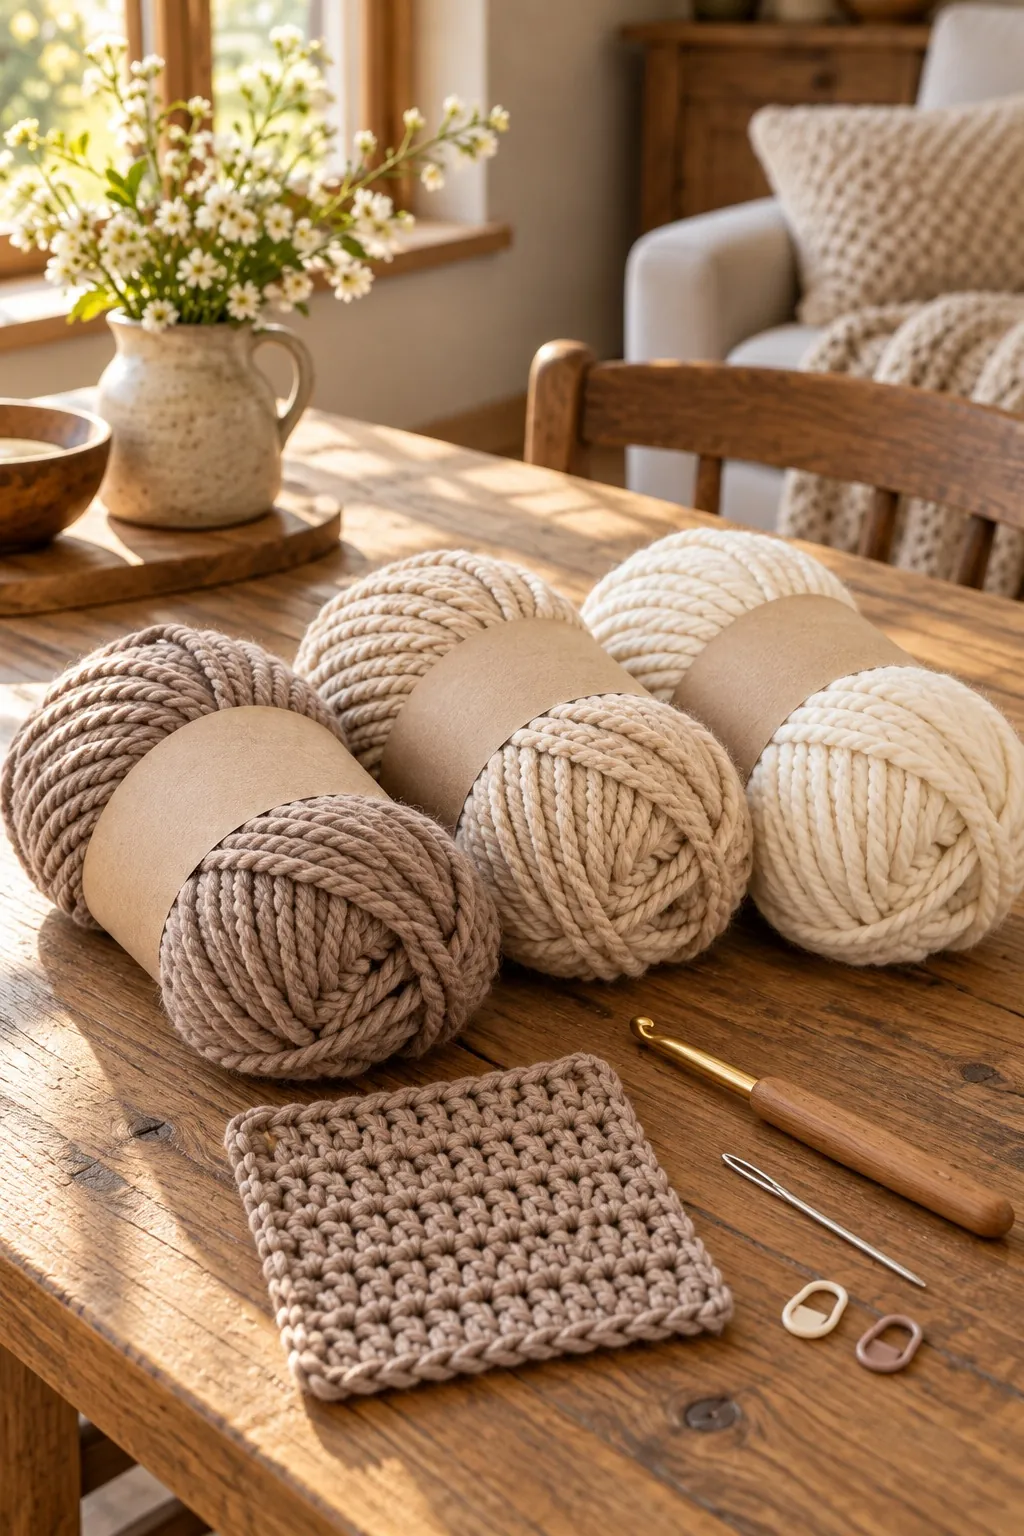
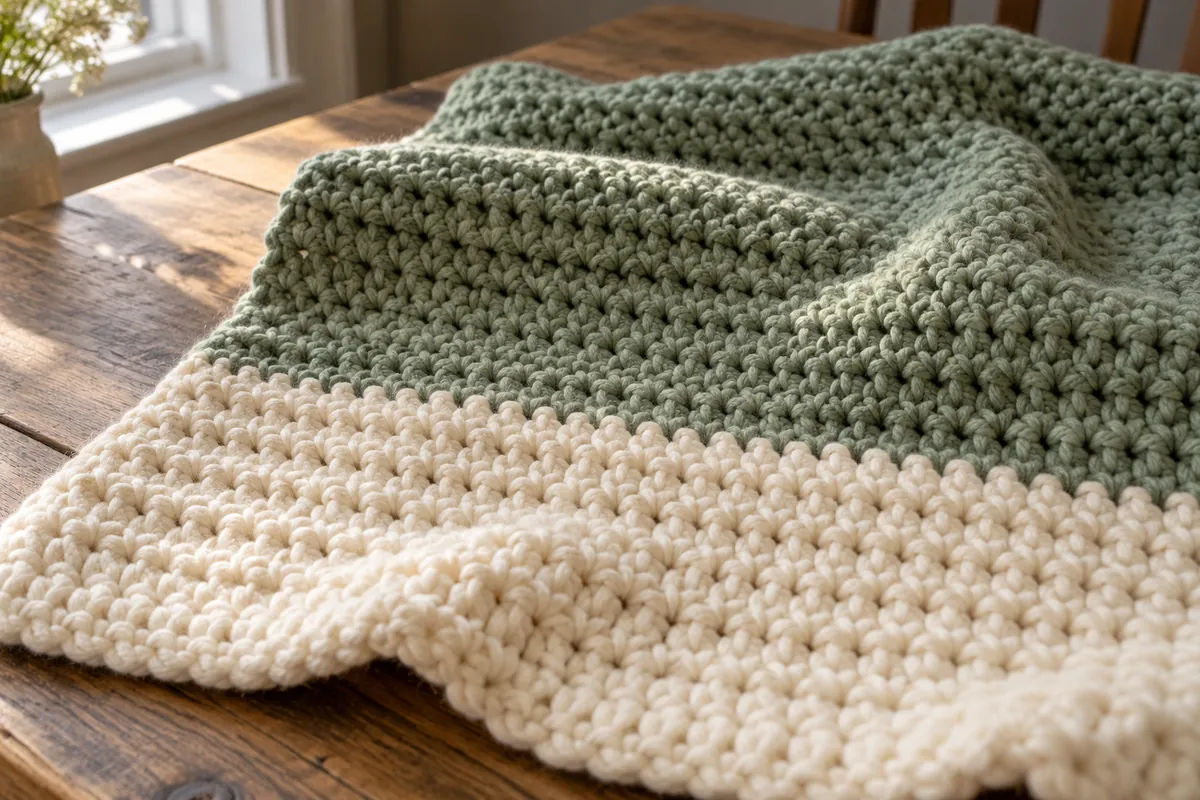
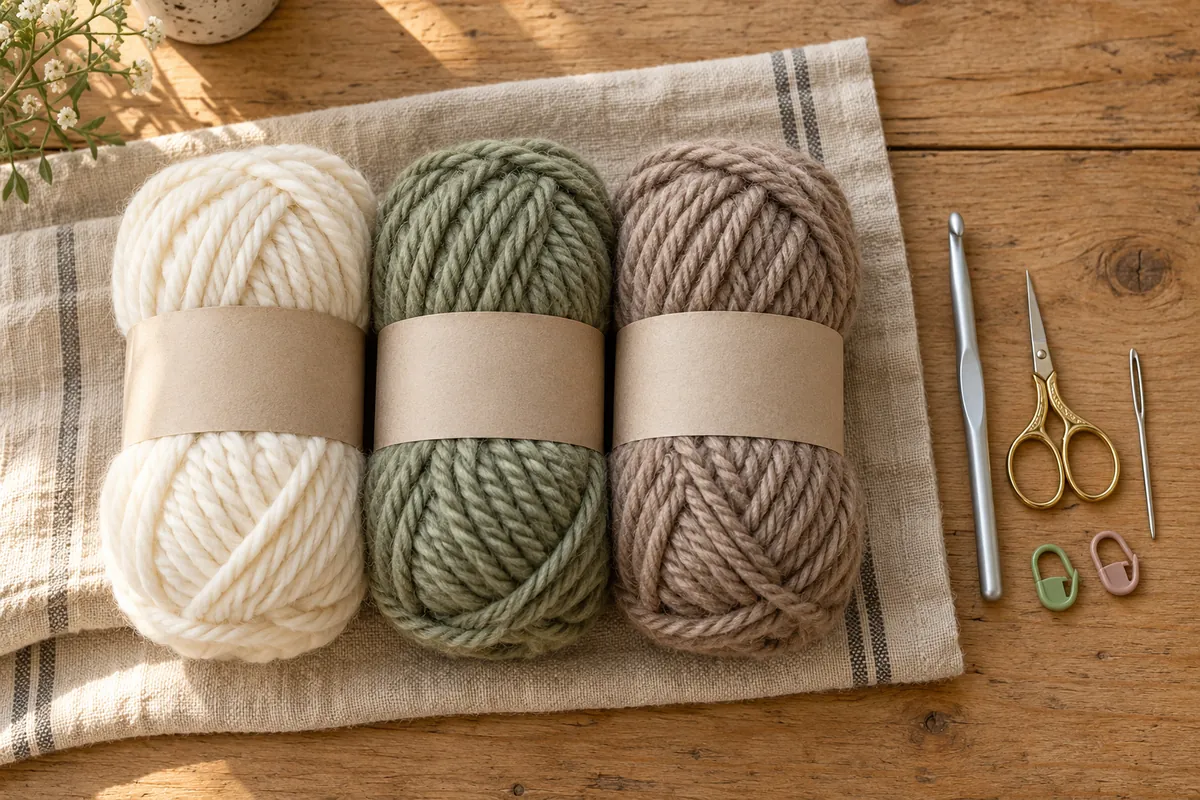
Most mornings my coffee gets a splash of oat milk, and there’s a moment before I stir it when the cup is all soft browns and cream. That’s where this blanket got its colors and its name. The Oat Milk Ripple Blanket is a crochet ripple blanket in three quiet shades, taupe, oat and cream, worked in bulky yarn so the zigzags grow fast and the finished throw has real weight on your lap.
The whole thing is double crochet. Each row climbs to a peak and dips into a valley, and after four rows you switch to the next color. The pattern is written for a throw of about 50 × 58 in (127 × 148 cm), with a baby size, a lap size and an oversized version below.
Is this crochet ripple blanket a good next step after your first one?
It is, if you’ve already made one plain blanket and feel at home with a chain and a double crochet. The edging is one round of single crochet, closed with a slip stitch: insert your hook, yarn over, and pull the loop through the stitch and the loop on your hook in one motion.
Two moves make the waves. A peak is 3 double crochet worked into one stitch. A valley is a double crochet three together (dc3tog): you start a double crochet in each of the next 3 stitches, stopping each one with 2 loops left on the hook, then pull through all 4 loops at once, so three stitches become one. Between them sit 9 plain double crochet. The row grows by 2 at every peak and shrinks by 2 at every valley, so the count stays at 155 from bottom to top.
That’s why I’d call it easy rather than beginner. Nothing is hard, but you do need to count to 9 and notice where you are. Patterns mark the start of the repeat with an asterisk and close it with rep from *. If that shorthand still trips you up, the Beginner Guide shows you how to read a crochet pattern, and Row 2 will make sense after that.
Bulky yarn for ripples with crisp points
Look for the number 5 on the label. Bulky yarn with a 6.5 mm (US K-10.5) hook gives a double crochet fabric that’s thick enough to keep you warm but still bends over the arm of a sofa. Ripples need that drape. A stiff fabric makes the points stick out like little cardboard corners.
Smooth, plied yarn works best. Acrylic is affordable and washable, an acrylic and wool blend feels warmer, and superwash wool is lovely if you don’t mind the price for 1,600 yards. I’d stay away from plush or velvet yarns here. Their pile hides the stitches, and a dc3tog you can’t see is a dc3tog you’ll miscount.
Choose all three colors from the same yarn line. Different brands can have different thicknesses even with the same number on the label, and a slightly thinner cream would make every third stripe narrower. Buy each color in one dye lot, because two lots of oat side by side can show up as two different stripes.
Bulky skeins range a lot in length, so compare yards, not skeins. Then make the swatch from the pattern card before you chain 157. If you get 12 stitches over 4 in instead of 11, each wave shrinks and the throw comes out about 3 in narrower. If you’d rather practice with bulky yarn on something with no counting at all, my one-color throw in moss stitch uses the same yarn weight.
Taupe, oat and cream: stripe order is the whole trick
The three colors go in a fixed order: taupe (A), oat (B), cream (C), then back to taupe. Taupe is the darkest, so it outlines the blanket: it opens the first stripe, closes the last one and makes the border. Oat sits in the middle, and cream gives the light band that makes each chevron pop. Because the order always goes dark, middle, light, your eye reads the waves as one long gradient that resets every 12 rows.
A few other trios that would work the same way:
Oat Milk: taupe, oat and cream, as in the photo.
Maple sugar: cinnamon, honey and ivory, for a warmer fall throw.
Lake morning: slate blue, misty blue and white.
Sage and stone: deep sage, pale gray and cream.
Cocoa rose: cocoa brown, dusty pink and natural.
Here’s the practical part. Lay your three skeins side by side and take a black and white photo with your phone. If the middle and light colors turn into the same gray, the ripple will look muddy from across the room. Swap one of them for a shade that’s clearly lighter or darker.
Oat Milk sizes, from a baby blanket to an oversized throw
Every size uses the same gauge, the same 22-stitch wave and the same 4-row stripes. The chain is always 22 × the number of waves + 3, and the number of stripes is always one more than a multiple of 3, so the blanket starts and ends with taupe. The pattern card is written for the throw. Yardage is an estimate with a small margin, rounded up to the next 50 yd.
Baby, about 36 × 40 in (91 × 102 cm): ch 113, 111 sts (5 waves), 52 rows (13 stripes); border 436 sc; about 350 yd (320 m) taupe, 250 yd (229 m) oat and 250 yd (229 m) cream.
Lap, about 43 × 49 in (109 × 125 cm): ch 135, 133 sts (6 waves), 64 rows (16 stripes); border 528 sc; about 450 yd (411 m) taupe, 350 yd (320 m) oat and 350 yd (320 m) cream.
Throw, about 50 × 58 in (127 × 148 cm): ch 157, 155 sts (7 waves), 76 rows (19 stripes); border 620 sc; about 600 yd (549 m) taupe, 500 yd (457 m) oat and 500 yd (457 m) cream.
Oversized, about 64 × 77 in (162 × 195 cm): ch 201, 199 sts (9 waves), 100 rows (25 stripes); border 804 sc; about 1,000 yd (914 m) taupe, 850 yd (777 m) oat and 850 yd (777 m) cream.
The oversized one covers the top of a twin bed with a little to spare. The baby size is for stroller rides and supervised floor time; babies under 12 months shouldn’t sleep with a loose blanket. If you want a smaller baby gift without any shaping, my peach and cream striped baby blanket in plain single crochet is a gentler place to start.
Keeping 7 valleys and 6 peaks lined up, row after row
Chain loosely. Row 1 pulls the chain into zigzags, and a tight chain makes the bottom edge pucker. If your chains run small, make them with an 8 mm (US L-11) hook.
Mark the first peak. Clip a stitch marker into the center dc of the first peak on Row 1 and move it up every row or two. If your next peak doesn’t land right above it, stop and count back to the last valley.
Count in nines. Every stretch between a peak and a valley is 9 dc. Counting to 9 over and over is much easier than counting to 155.
Find the valley by its middle. The middle leg of each dc3tog goes into the top of the dc3tog below it, which looks like a small knot where three stitches meet.
Ignore the ch 2. It doesn’t count, so never work into it. Your first 2 dc go into the very first stitch, right at the base of the chain.
Change colors on the same side. Every stripe is 4 rows, so each new color starts at the same edge, and all your tails end up on one side.
Measure after 8 rows. One wave should be about 7 in (18 cm) from peak to peak. That’s your best early warning if your gauge has drifted.
US crochet terms
The pattern
Materials
Yarn: bulky weight (#5) yarn in acrylic, an acrylic-wool blend or superwash wool, about 1,600 yd (1,463 m) in total
Color A, taupe: about 600 yd (549 m), one dye lot (for example, 5 skeins of about 150 yd / 137 m each)
Color B, oat: about 500 yd (457 m), one dye lot (for example, 4 skeins of about 150 yd / 137 m each)
Color C, cream: about 500 yd (457 m), one dye lot (for example, 4 skeins of about 150 yd / 137 m each)
Hook: 6.5 mm (US K-10.5)
Optional: 8 mm (US L-11) hook for the foundation chain
Swatch: ch 15. Dc in 3rd ch from hook and in each ch across (13 dc). Ch 2 (does not count), turn, dc in each st across. Work 8 rows in all and measure 4 in (10 cm) across the middle.
In the ripple: one 22-st wave measures about 7 in (18 cm) from peak to peak, and 4 rows measure about 3 in (7.5 cm) straight up.
Too many sts per 4 in: try a larger hook. Too few: try a smaller one.
Finished size
About 50 × 58 in (127 × 148 cm) with the border, before blocking, length measured straight up the blanket
Body before the border: about 49¼ × 57¾ in (125 × 147 cm)
Abbreviations
ch chain
dc double crochet
dc3tog double crochet 3 together
sc single crochet
sc3tog single crochet 3 together
sl st slip stitch
st(s) stitch(es)
yo yarn over
rep repeat
Notes
dc3tog: [yo, insert hook in next st, yo, pull up a loop, yo, draw through 2 loops] 3 times, yo, draw through all 4 loops on hook. Counts as 1 st.
sc3tog: [insert hook in next st or loop, yo, pull up a loop] 3 times, yo, draw through all 4 loops on hook. Counts as 1 st.
The ch 2 at the start of each row does not count as a st. Never work into it.
Every row has 155 sts: 7 valleys (dc3tog) and 6 peaks (3 dc in one st), with 9 dc between each peak and valley, and 2 dc in the first and last st.
Peaks sit above peaks: work the 3 dc into the center dc of the peak below. Valleys sit above valleys: the middle leg of each dc3tog goes into the dc3tog below.
Stripes: 4 rows of each color in the order A, B, C. You’ll work 7 stripes in A and 6 each in B and C.
To change color, work the last dc of the row until 2 loops remain on the hook, drop the old color, yo with the new color and pull through. Cut the old color, leaving a 6 in (15 cm) tail. All color changes fall on the same side edge.
The border uses 3 sc at the top corners, which come to a point, and 2 sc at the bottom corners, which are shallow.
To change the size, chain 22 × the number of waves + 3, and work 4 × (a multiple of 3, plus 1) rows. The border then has 22 × waves + 3 sc across the top, 22 × waves + 5 sc across the bottom, and 2 sc per row on each side.
Instructions
Body
Foundation: With A, loosely ch 157.
Row 1: 2 dc in 3rd ch from hook, *dc in next 9 ch, dc3tog over next 3 ch, dc in next 9 ch, 3 dc in next ch; rep from * 5 more times, dc in next 9 ch, dc3tog over next 3 ch, dc in next 9 ch, 2 dc in last ch. (155 sts: 7 valleys and 6 peaks)
Row 2: Ch 2 (does not count as a st), turn. 2 dc in first st, *dc in next 9 sts, dc3tog over next 3 sts, dc in next 9 sts, 3 dc in next st; rep from * 5 more times, dc in next 9 sts, dc3tog over next 3 sts, dc in next 9 sts, 2 dc in last st. (155 sts)
Rows 3–4: Rep Row 2. At the end of Row 4, change to B. (155 sts)
Rows 5–76: Rep Row 2, working 4 rows of each color in this order: B, C, A. Change color at the end of every 4th row. Work this 12-row sequence 6 times in all, ending with 4 rows of A. Do not fasten off. (76 rows, 155 sts)
Border
Round 1: With A, ch 1, turn. Working across Row 76: 3 sc in first st (corner), sc in next 9 sts, sc3tog over next 3 sts, *sc in next 9 sts, 3 sc in next st, sc in next 9 sts, sc3tog over next 3 sts; rep from * 5 more times, sc in next 9 sts, 3 sc in last st (corner). (157 sc across the top) Working down the side: 2 sc in the side of each row (152 sc). Working in the free loops of the foundation chain: 2 sc in the first loop, which holds the last 2 dc of Row 1 (corner), sc in next 10 loops, 3 sc in next loop, *sc in next 9 loops, sc3tog over next 3 loops, sc in next 9 loops, 3 sc in next loop; rep from * 5 more times, sc in next 10 loops, 2 sc in next loop (corner). Leave the 2 skipped ch beside it empty. (159 sc across the bottom) Working up the other side: 2 sc in the side of each row (152 sc). Join with sl st to first sc. (620 sc)
Finishing: Fasten off and weave in all ends, going back and forth at least twice.
Washing a bulky ripple with a cream stripe
Follow the yarn label, since care depends on the fiber. Most bulky acrylics and blends can go in the machine on a gentle, cool cycle; superwash wool usually wants the wool setting. A front-loader is kinder than a top-loader with an agitator, which can stretch a heavy blanket out of shape.
For the first wash, add a color catcher sheet and use cold water. Taupe rarely bleeds much, but cream stripes sit right next to it in every wave, and a faint tint wouldn’t wash back out.
A wet bulky blanket is heavy, so don’t hang it over a line or a door. The weight pulls the rows long and flattens your points. Dry it flat on towels, gently pushing each peak and valley back into shape with your fingers, or tumble on low if the label allows. Store it folded on a shelf rather than hanging, for the same reason.
Oat Milk ripple questions from new crocheters
Can I make this crochet ripple blanket in worsted yarn?
Yes, but it comes out smaller. At a worsted gauge of about 14 dc and 8 rows over 4 in, one wave measures about 5½ in, so the throw numbers give you roughly 38 in across. Use the oversized numbers instead (ch 201, 100 rows) to land near 49 × 58 in. Make a swatch first, and plan on more yardage than the bulky version.
My row has 153 stitches instead of 155. Where did two go?
Look at the edges first. The most common slip is working 1 dc instead of 2 into the last stitch, or skipping the first stitch because it sits so close to the ch 2. If both edges have their 2 dc, count the 9s: a dc3tog started one stitch early steals from the next stretch.
Do I have to cut the yarn at every stripe?
Yes, for this one. Each color comes back every 12 rows, about 9 in up the side, and a strand carried that far would show and catch fingers. The good news is that every change lands on the same edge, so you can weave all the tails into that side, where the border covers them.
Should I block a ripple blanket?
A light blocking helps the points look sharp. Lay the blanket flat, mist it with water, and pin the first and last rows at each peak and valley. Let it dry completely. Keep steam and irons away from acrylic, which goes limp and shiny with heat.
Quick recap
Swatch to 11 sts and 6 rows over 4 in in dc with a 6.5 mm (US K-10.5) hook.
With taupe, loosely ch 157 and work Row 1: 7 valleys and 6 peaks (155 sts).
Rep Row 2, changing color every 4 rows in the order taupe, oat, cream, until you have 76 rows ending in taupe.
Without fastening off, work 1 round of sc around the blanket, following the waves (620 sc).
Weave in the ends and wash the blanket as the yarn label says.
I hope this crochet ripple blanket ends up on your couch the way mine did, with a cup of something warm nearby. If your peaks start wandering, or you’d like a size I didn’t list, write to me and we’ll figure it out together.
Snowfall Moss Stitch Throw
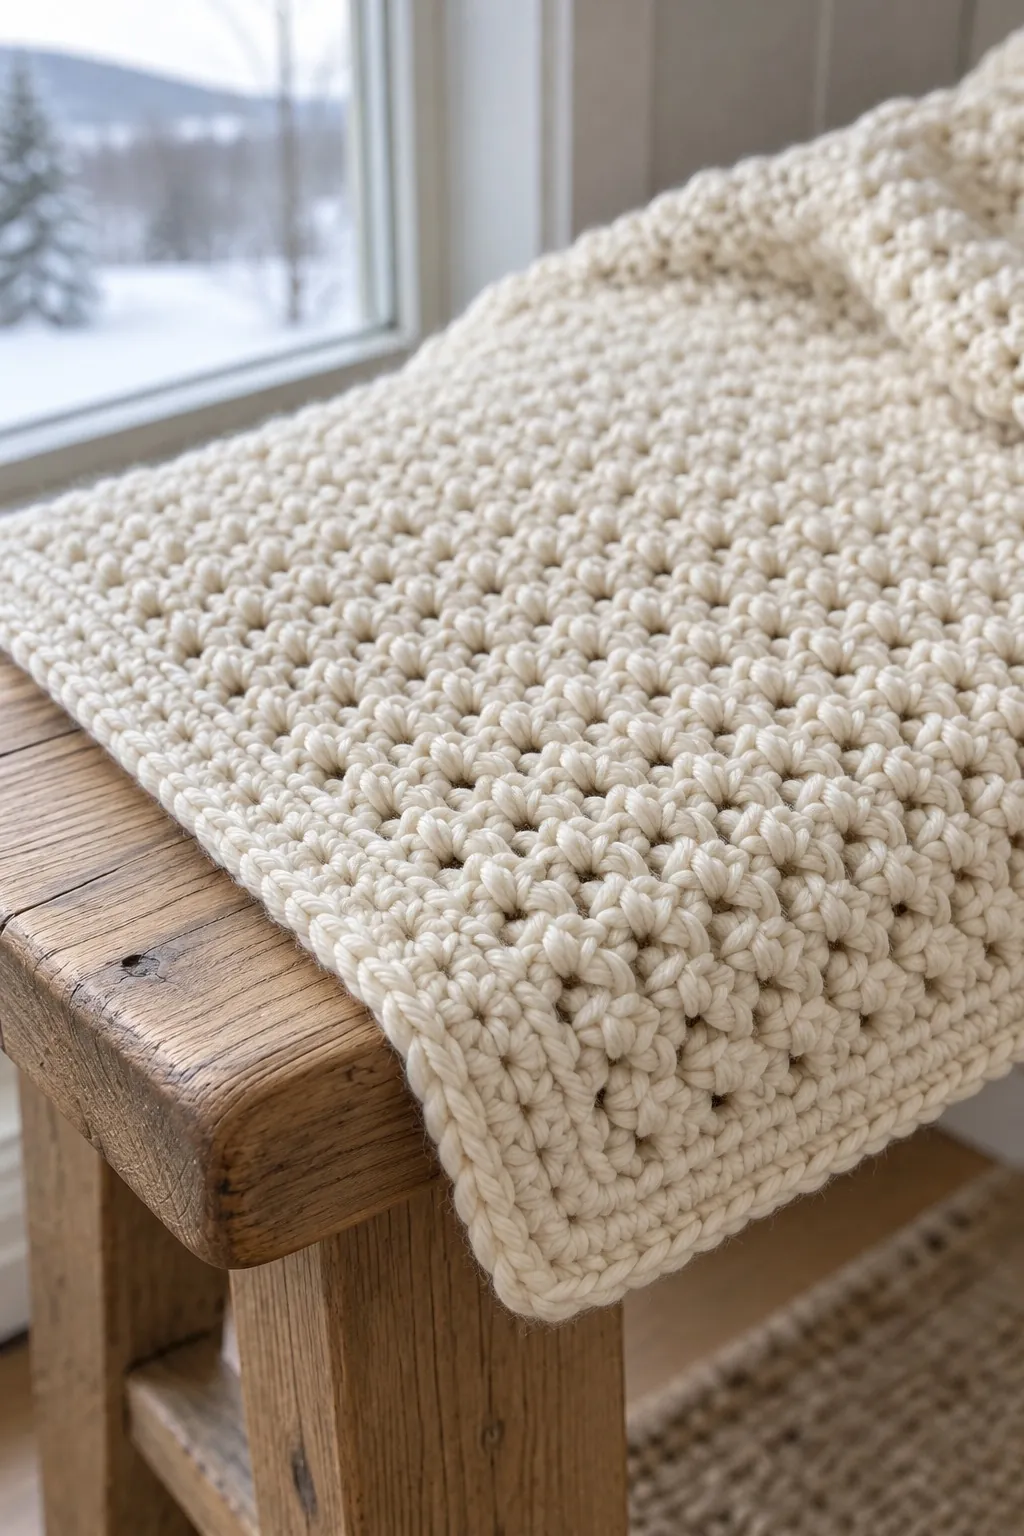
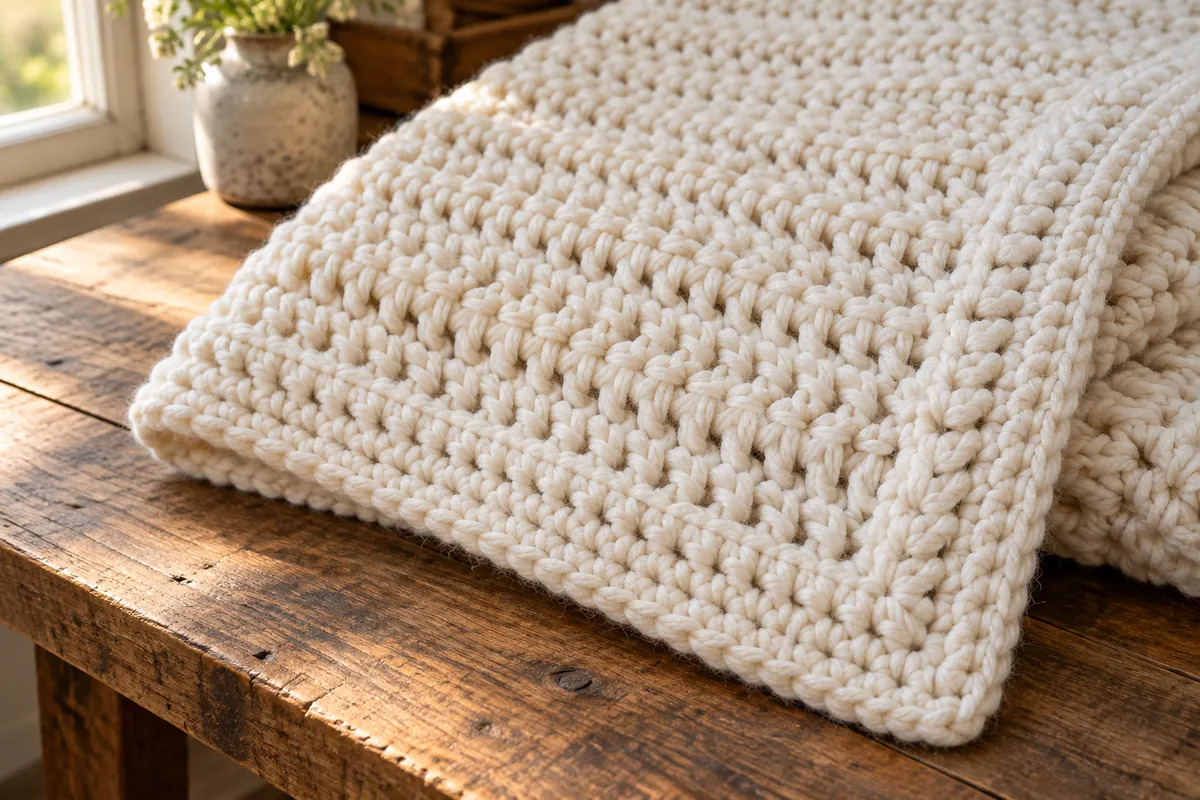
The first real snow in Vermont always shows up before I’ve found my mittens, and that’s the week I start reaching for anything cream and squishy. This moss stitch crochet blanket came out of that mood. It’s one color from edge to edge, worked in bulky yarn, and all of its charm lives in the texture: row after row of tiny staggered bumps, a bit like fresh snow on a porch rail.
You only need two stitches and a two-row repeat. Once your hands learn it, you can keep going while you talk, or while you watch the flakes come down with a second cup of coffee. The throw in the pattern is about 50 × 60 in (127 × 152 cm), big enough to cover your legs on the couch or fold across the foot of a bed, and there are three more sizes below if you’d rather start small or go big.
Is this moss stitch crochet blanket a good first big project?
If you can make a chain and a single crochet, yes. The chain and single crochet are the only stitches in the body, and the border is two plain rounds of single crochet. The only other move is a slip stitch to close each border round: insert your hook, yarn over, and pull the loop through the stitch and the loop on your hook in one go.
Here’s how the moss stitch works. On the first row you single crochet, chain 1, skip a chain, and single crochet again, all the way across. From then on, every single crochet lands in a ch-1 space from the row below, and every chain 1 sits on top of a single crochet. That half-step shift lines the bumps up diagonally, like bricks in a wall, and it keeps the fabric flat, which really matters on a blanket this size. You may also see it called linen stitch or granite stitch.
What’s new for most beginners is the counting. In this pattern a ch-1 space counts as a stitch, just like a single crochet, so every row of the throw has 147 stitches. If notation like ch-1 sp or the asterisks still look like a secret code, the Beginner Guide shows how to read a crochet pattern, and Row 2 will make a lot more sense afterward. And if you’d like to meet the stitch on something smaller first, the plaid pattern built from little moss stitch squares uses it one square at a time.
Picking a bulky cream yarn that keeps every bump crisp
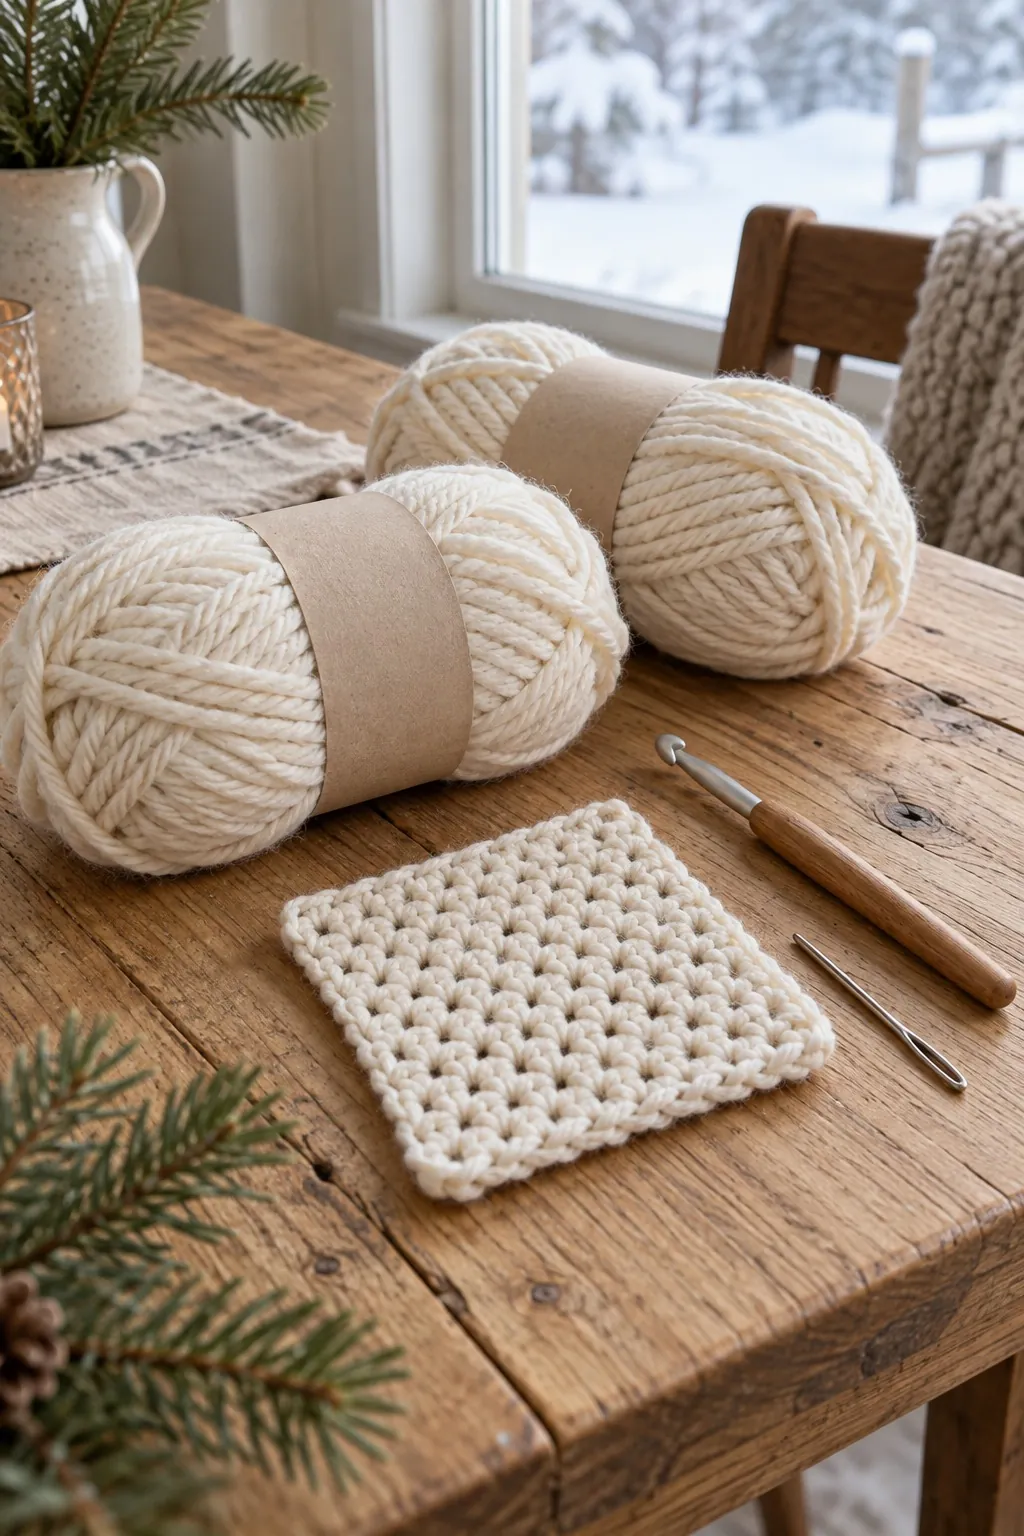
Look for the number 5 on the label, the bulky weight symbol, with a recommended hook somewhere around 6.5 to 9 mm. I use an 8 mm (L-11) hook here, a size bigger than many people would grab for plain single crochet. Moss stitch is dense, and the larger hook keeps it soft enough to drape over a bench or around your shoulders.
Smooth, plied yarn shows the stitch best. Soft acrylic is easy to wash and kind to your budget, and a wool and acrylic blend adds warmth and a little bounce. I’d skip fuzzy or velvety chenille-style yarns for this one. The fuzz blurs the bumps, and slippery chenille makes the ch-1 spaces hard to find and harder to count.
Because the whole throw is one color, the dye lot matters more than usual. Buy all your skeins at once and check that every label shows the same lot number. Two batches of cream can look identical in the store and still leave a visible line across the blanket in daylight.
To substitute, compare by yardage, never by skein count, since bulky skeins run anywhere from about 100 to more than 200 yd. Then make the 17-stitch swatch from the pattern card. If you get 13 stitches over 4 in instead of 12, your throw comes out about 4 in narrower, so those twenty minutes are worth it. And if you’re tempted to go thicker, don’t just switch this pattern to super bulky yarn: the one-color super bulky throw in half double crochet is written for that weight.
One soft shade: why Snowfall works best in light solids
In a one-color blanket, the color has a single job: catching light on all those bumps so the texture shows from across the room. Pale, solid shades do that best. Dark colors and variegated yarns swallow moss stitch, and you end up with something that just looks like plain fabric.
Here are a few one-color versions I’d happily make:
Snowfall cream: the warm ivory in the photo, lovely with wood floors and a jute rug.
Birch gray: a pale heathered gray that forgives dog hair and the odd coffee drip.
Frost blue: a very light, icy blue for a bedroom, or a sweet baby size.
Oatmeal tweed: a beige with darker flecks, which add depth without hiding the stitch.
One practical tip: hold a skein up to a window before you buy. Under store lighting, cream can lean yellow or gray, and you’ll mostly be looking at this blanket by daylight.
Snowfall sizes, from baby blanket to queen bed
Every size uses the same gauge of 12 stitches and 13 rows over 4 in. The chain is always an even number, the body has one stitch fewer than the chain, and the row count is always odd so the top edge matches the bottom. The pattern card is written for the throw. Yardage is an estimate, about half a yard per square inch of finished blanket, rounded up to the next 50 yd.
Baby, about 30 × 36 in (76 × 91 cm): ch 88, 87 sts, 113 rows; border 404 sc, then 412 sc; about 550 yd (503 m).
Throw, about 50 × 60 in (127 × 152 cm): ch 148, 147 sts, 191 rows; border 680 sc, then 688 sc; about 1,550 yd (1,417 m).
Twin, about 66 × 90 in (168 × 229 cm): ch 196, 195 sts, 289 rows; border 972 sc, then 980 sc; about 3,000 yd (2,743 m).
Queen, about 90 × 90 in (229 × 229 cm): ch 268, 267 sts, 289 rows; border 1,116 sc, then 1,124 sc; about 4,100 yd (3,749 m).
For any size, the first border round has the number of body stitches plus 4 across the top and bottom, corners included, and the number of rows minus 2 along each side. The second round adds 8. Be honest with yourself about the big ones: with 267 stitches per row in bulky yarn, the queen sits heavy on your lap toward the end and takes most of a winter.
Keeping 147 stitches and straight edges for 191 rows
Chain loosely. A tight foundation pulls the bottom edge in, and you’ll only notice once the border is on. If your chains are snug, make them with a 9 mm hook and switch to the 8 mm for Row 1.
Count bumps, not chains. At the end of a row, count only the single crochets: 74 on odd rows, 75 on even rows. That’s far quicker than counting all 147 stitches.
Mind the doubled edge. Even rows start and end with two single crochets side by side. Forget one and the edge leans inward; add an extra into the turning chain and the blanket slowly widens.
Leave the turning chain alone. The ch 1 from the start of the previous row sits right next to the last single crochet. It doesn’t count, so don’t work into it.
Find the spaces by feel. Each ch-1 space is a small gap between two bumps. Your hook should slide in without splitting the yarn.
Measure every 26 rows. That’s about 8 in (20 cm) at the right gauge. If you’re getting there in fewer rows, your tension is loosening as you relax, and the throw will be longer than planned.
Join new skeins at the edge. Leave 6 in (15 cm) tails at the start of a row and weave them along the side later. The border hides them.
US crochet terms
The pattern
Materials
Yarn: bulky weight (#5) yarn in soft acrylic or a wool-acrylic blend, about 1,550 yd (1,417 m) in total
Color: cream or ivory, all from the same dye lot (for example, 11 skeins of about 150 yd / 137 m each)
Hook: 8 mm (US L-11)
Optional: 9 mm (US M/N-13) hook for the foundation chain
12 sts and 13 rows = 4 in (10 cm) in moss stitch, counting each sc and each ch-1 sp as 1 st
Swatch: ch 18 and work Rows 1–3 of the body (17 sts), then rep Rows 2 and 3 until the swatch measures about 5 in (13 cm). Measure 4 in (10 cm) across the middle.
Too many sts per 4 in: try a larger hook. Too few: try a smaller one.
Finished size
About 50 × 60 in (127 × 152 cm) with the border, before blocking
Body before the border: about 49 × 59 in (124 × 150 cm)
Abbreviations
ch chain
sc single crochet
sl st slip stitch
sk skip
sp(s) space(s)
st(s) stitch(es)
rep repeat
Notes
The ch 1 at the start of each row does not count as a st. Never work into it.
Each sc counts as 1 st and each ch-1 sp counts as 1 st. Every body row has 147 sts.
Odd rows begin and end with 1 sc and have 74 sc. Even rows begin and end with 2 sc side by side and have 75 sc. The doubled sc keep the side edges straight.
From Row 2 on, every sc is worked into a ch-1 sp, except the first and last sc of each row, which go into the edge sc.
Moss stitch looks the same on both sides, so the body has no right or wrong side.
Join a new skein at the start of a row, leaving 6 in (15 cm) tails to weave in along the side edge.
To change the width, chain any even number; the body has 1 st fewer than the chain. To change the length, work any odd number of rows. Border Round 1 then has (sts + 4) sc across top and bottom, corners included, and (rows − 2) sc along each side; Round 2 adds 8 sc.
Instructions
Body
Foundation: Loosely ch 148.
Row 1: Sc in 2nd ch from hook, *ch 1, sk next ch, sc in next ch; rep from * across. (74 sc and 73 ch-1 sps: 147 sts)
Row 2: Ch 1, turn. Sc in first sc, sc in next ch-1 sp, *ch 1, sk next sc, sc in next ch-1 sp; rep from * to last sc, sc in last sc. (75 sc and 72 ch-1 sps: 147 sts)
Row 3: Ch 1, turn. Sc in first sc, *ch 1, sk next sc, sc in next ch-1 sp; rep from * to last 2 sc, ch 1, sk next sc, sc in last sc. (74 sc and 73 ch-1 sps: 147 sts)
Rows 4–191: Rep Rows 2 and 3 another 94 times, ending with a Row 3. (191 rows; body measures about 49 × 59 in / 124 × 150 cm)
Border
Round 1: Do not fasten off. Ch 1, turn. Working across the last row: 3 sc in first sc (corner), sc in each sc and ch-1 sp across to last sc (145 sc), 3 sc in last sc (corner). Working down the side: sc in the end of each row from Row 190 to Row 2 (189 sc). Working in the free loops of the foundation chain: 3 sc in the loop at the base of the first sc of Row 1 (corner), sc in each free loop across to the loop at the base of the last sc of Row 1 (145 sc), 3 sc in that loop (corner); the single extra ch at the end of the foundation stays empty. Working up the other side: sc in the end of each row from Row 2 to Row 190 (189 sc). Join with sl st to first sc. (680 sc: 151 across top and bottom, corners included, and 189 along each side)
Round 2: Ch 1, do not turn. Sc in same st as join, 3 sc in next sc (corner), [sc in each sc to center sc of next corner, 3 sc in center sc] 3 times, sc in each remaining sc. Join with sl st to first sc. (688 sc: 155 across top and bottom, corners included, and 189 along each side)
Finishing: Fasten off and weave in all ends.
Washing a one-color cream throw in bulky yarn
Check the yarn label first, because care depends on the fiber. Most acrylics can go in the machine on a cold, gentle cycle, inside a large mesh laundry bag or a zipped pillowcase, then lie flat or tumble on low. A wool blend usually wants a cool hand wash with a little wool wash: press the water out without wringing, roll the throw in a towel, and dry it flat.
Bulky moss stitch holds a surprising amount of water. Lift a wet throw with both arms under it, never by one corner, or the weight will stretch it out of shape.
Cream shows everything. Spot clean small marks right away with cool water and a drop of mild soap, dabbing instead of rubbing so the bumps don’t fuzz. Between seasons, store it folded on a shelf rather than hanging over a rail, since a heavy blanket slowly grows longer under its own weight. A sweater comb takes care of any pills on the spots that get the most use.
Snowfall questions from first-time moss stitchers
Is a moss stitch crochet blanket warm enough for a Vermont winter?
Yes. Moss stitch is one of the densest fabrics you can make with single crochet, because each row fills in the ch-1 spaces of the row before. In bulky yarn it keeps drafts out well. A wool blend feels warmest, and acrylic is still cozy and simpler to wash.
Why is my blanket getting narrower as I go?
You’re most likely losing a stitch at one edge, usually the second single crochet at the start or end of an even row. Count the single crochets every few rows, 74 on odd rows and 75 on even rows, and you’ll catch the slip within a row or two.
Can I use worsted weight yarn instead?
You can, but it becomes a different blanket. Worsted moss stitch on a 5.5 mm hook usually lands around 16 to 18 stitches per 4 in, so the same width needs roughly 200 to 220 stitches and many more rows. Make a swatch, multiply your stitches per inch by the width you want, round to an odd number, and chain one more.
How do I make the throw longer without starting over?
Keep repeating Rows 2 and 3 before you start the border, and stop after a Row 3 so the total stays odd. Every 26 extra rows add about 8 in (20 cm) and roughly 200 yd (183 m) of yarn at the throw width. The side counts of the border grow with the rows: rows minus 2 on each side.
Does moss stitch have a right side?
Not really. Both faces show the same staggered bumps, which is handy for a throw that gets tossed over a bench. The only small difference is at the border, where the slip stitch joins sit on the side that faced you.
Quick recap
Swatch to 12 sts and 13 rows over 4 in with an 8 mm (L-11) hook.
Loosely ch 148 and work Row 1 in sc and ch-1 spaces (147 sts).
Rep Rows 2 and 3 until you have 191 rows, ending with a Row 3.
Work 2 rounds of sc around the edge, with 3 sc in each corner (680, then 688 sc).
Weave in the ends and wash the throw as the yarn label says.
I hope this moss stitch crochet blanket keeps you warm long after the first snowfall. If a row count stops making sense, or you’d like a size I haven’t listed, send me a note and we’ll figure it out together.
Cabin Plaid Blanket
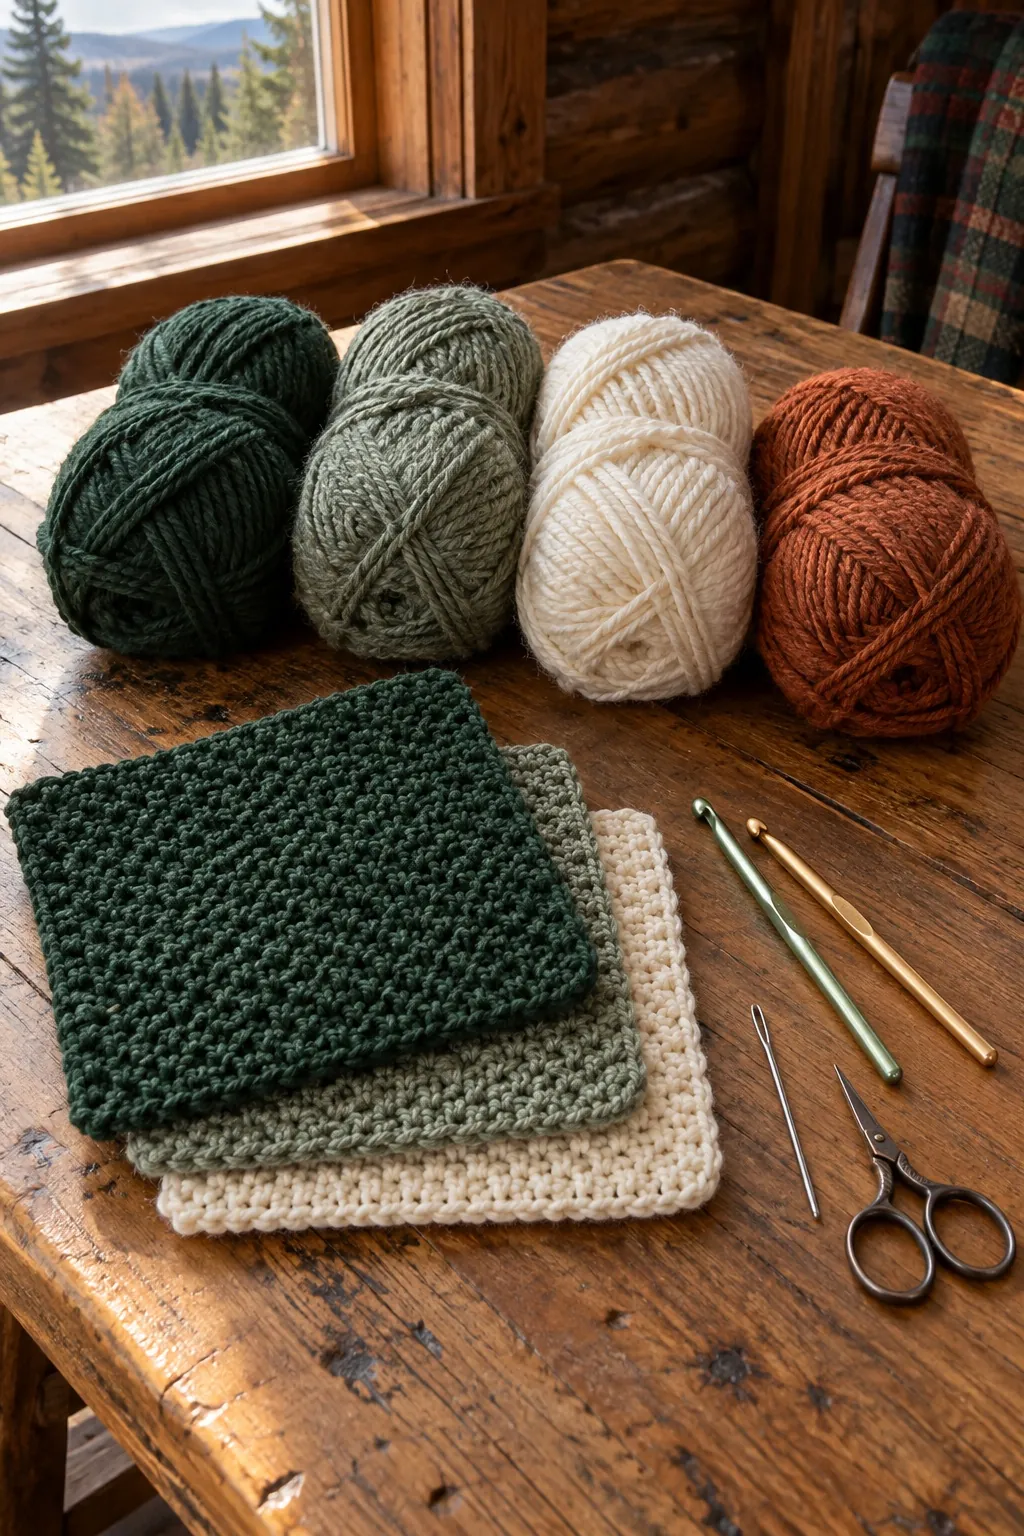
Picture a log cabin in the Vermont woods in late October, a flannel shirt hanging by the door, and a blanket on the bed in the same colors. That’s the idea behind this crochet plaid blanket: deep forest green, a soft heathered sage and bright cream checks, crossed by thin rust lines like the overcheck on a well-worn flannel.
It looks woven, but it’s really 56 small squares, each one a single color, worked in moss stitch with nothing harder than chains and single crochet. The rust lines are the seams: joining the squares with slip stitches on the front draws the plaid. I love a project that fits in a tote bag, and one square fits nicely into a long coffee break.
Is this crochet plaid blanket the right step after your first blanket?
Yes, if one blanket is already behind you and you’re happy to repeat a small square many times. Nothing here is harder than single crochet. What’s new is keeping 56 squares the same size and joining them in the right order. You’ll use three stitches. Each square starts with chains, the moss stitch and the border are all single crochet, and the seams are slip stitches: insert the hook, yarn over, and pull the loop straight through the fabric and the loop on your hook, without adding any height.
Moss stitch isn’t in the Stitch Library yet, so here’s how it works. You make a single crochet, chain 1, skip the next stitch, and single crochet again. On the next row, each new single crochet goes into the little ch-1 space below it, and you chain over the single crochets. Every row shifts by one stitch, so the bumps sit in a brick pattern, a lot like woven cloth. You may also see it called linen stitch or granite stitch.
The counting trips most people up at first: each single crochet counts as one stitch, and so does each ch-1 space, for 29 stitches per row. Odd rows have 15 sc and 14 spaces. Even rows have 16 sc and 13 spaces, because they start and end with two single crochets side by side, and those doubled edge stitches are what keep the sides of each square straight. If abbreviations like sk and ch-1 sp still slow you down, the Beginner Guide shows how to read a crochet pattern one line at a time.
The one new technique is the slip stitch join. You fold two squares with their wrong sides together and slip stitch through both edges, which leaves a small raised chain on the right side.
Worsted weight #4 for 56 squares that line up
Look for the number 4 on the label, often with “worsted” or “medium.” A 5.5 mm hook, a little bigger than most worsted labels suggest, opens the moss stitch just enough for the throw to drape.
A soft acrylic or acrylic and wool blend is the easy choice: warm, machine washable, and easy to find in a heathered sage. Those flecks of gray and cream make the middle squares look like the spot where a dark stripe and a light stripe cross.
The biggest trap with this pattern is mixing brands. Two worsted yarns with the same label number can differ in thickness, and a cream square in a thinner yarn comes out smaller than its forest green neighbor. Across eight rows of squares, the grid stops lining up. Buy all four colors from the same yarn line, and buy each color in one go so the skeins share a dye lot, the batch number printed on the label.
Your first square is your gauge swatch. Make it, then measure: it should be about 7 1/4 in (18.5 cm) on each side. If it’s bigger, switch to a smaller hook; if it’s smaller, go up a size. A DK yarn would give squares closer to 6 in with the same counts, so don’t substitute a lighter weight without redoing the math.
Forest, sage, cream and rust: what each shade does in the plaid
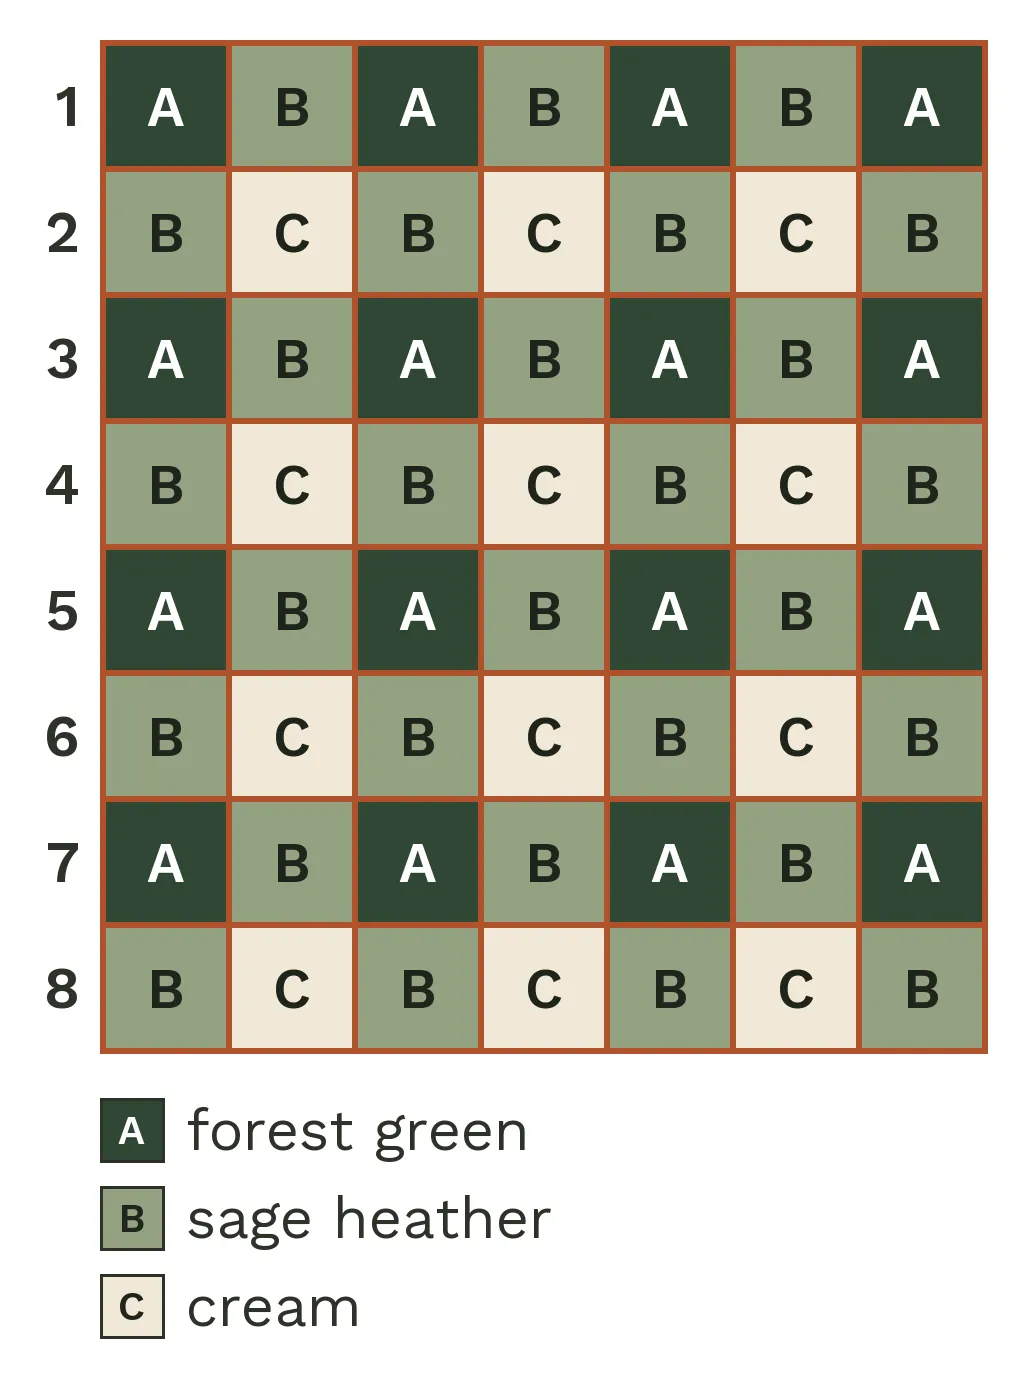
Forest green fills 16 dark squares and the border, so it frames the throw. Sage is the busy one: 28 squares, exactly half the blanket, between every dark and light square. Cream gives you 12 bright squares, the light checks of the flannel. Rust never makes a square, but it runs through every row and column of seams, and that’s what turns a checkerboard into plaid.
A few combinations that keep the same balance:
Cabin Plaid: forest green, sage heather and cream, with rust seams.
Harbor Fog: navy, gray heather and white, with mustard seams.
Cranberry Bog: burgundy, oatmeal heather and ivory, with forest green seams.
Woodstove: charcoal, light gray heather and cream, with red seams.
Before you buy, photograph the three square colors side by side in black and white mode on your phone. You should see three clearly different grays; if two match, the plaid flattens out. The seam color needs to stand out against all three, or the lines vanish on the squares that match it.
Cabin Plaid square counts, from baby to queen
Every size uses the same square: ch 30, 33 rows, about 7 1/4 in. Only the grid changes, with dark rows (forest, sage, forest…) alternating with light rows (sage, cream, sage…). The pattern is written for the throw.
Baby, about 38 × 39 in (97 × 98 cm): 5 × 5 squares, 25 in all (9 forest, 12 sage, 4 cream), 4 horizontal and 4 vertical seams. Border Round 1: 600 sc, 147 along each edge between the corners. Yarn: about 600 yd forest, 600 yd sage, 200 yd cream and 100 yd rust (1,370 m in all).
Throw, about 53 × 61 in (134 × 154 cm): 7 squares across and 8 down, 56 in all (16 forest, 28 sage, 12 cream), 7 horizontal and 6 vertical seams. Border Round 1: 900 sc, 207 along the top and bottom and 237 along each side. Yarn: about 1,000 yd forest, 1,400 yd sage, 600 yd cream and 150 yd rust (2,880 m in all).
Twin, about 67 × 90 in (171 × 229 cm): 9 across and 12 down, 108 in all (30 forest, 54 sage, 24 cream), 11 horizontal and 8 vertical seams. Border Round 1: 1,260 sc, 267 along the top and bottom and 357 along each side. Yarn: about 1,800 yd forest, 2,700 yd sage, 1,200 yd cream and 300 yd rust (5,490 m in all).
Queen, about 89 × 90 in (226 × 229 cm): 12 across and 12 down, 144 in all (36 forest, 72 sage, 36 cream), 11 seams each way. Border Round 1: 1,440 sc, 357 along each edge. Yarn: about 2,150 yd forest, 3,600 yd sage, 1,800 yd cream and 450 yd rust (7,320 m in all).
For the border, every square edge takes 29 sc and every seam 1, and the corner stitches move into the 3-sc groups: each edge gets 30 sc per square, minus 3.
The yardage is an estimate: about 45 yd per square, the border added to the forest, about 1 1/2 in of rust per seam slip stitch, then 10% extra (15% for rust), rounded up to the nearest 50 yd.
The baby size works for the stroller, floor play or a toddler’s nap. Babies under 12 months should sleep with no loose blankets. If you’d rather make a baby blanket in one piece, Maple Lane’s single crochet stripes are worked in bulky yarn.
Keeping 56 squares the same size and the rust ridges flat
Read the edges, not every stitch. Even rows begin and end with two sc side by side, odd rows with sc, ch 1. A wrong edge usually means a skipped first ch-1 space or a forgotten last sc.
Mark the right side. Keep the foundation tail at the bottom left when Row 1 faces you (bottom right if you’re left-handed), so you know which way up each square goes.
Measure every fifth square. Tension drifts in front of a movie. Redo any square more than 1/4 in off your first one.
Block the squares in batches. Pin a few to 7 1/4 in on a towel, mist them, and let them dry. Moss stitch corners like to curl, and matching squares make the seams far easier.
Weave in tails as you go. The throw has 112 square tails, and a whole weekend of them at the end is no fun.
Loosen up for the seams. Tight slip stitches make the seams shorter than the squares, and the throw puckers. The 6 mm hook keeps each ridge as long as the edge it joins.
Lay everything out first. Arrange all 56 squares on the floor, take a photo, and keep it beside you while you join.
US crochet terms
The pattern
Materials
Worsted weight yarn (weight 4), a soft, washable acrylic or acrylic and wool blend, all four colors from the same yarn line: about 3,150 yd (2,880 m) in total.
A, forest green: about 1,000 yd (914 m)
B, sage heather: about 1,400 yd (1,280 m)
C, cream: about 600 yd (549 m)
D, rust: about 150 yd (137 m)
Yardage is an estimate with about 10% extra. With 200 yd (183 m) skeins: 5 of A, 7 of B, 3 of C and 1 of D.
5.5 mm (I-9) crochet hook, for the squares and border
6 mm (J-10) crochet hook, for the seams
Yarn needle
Scissors
Stitch markers or scraps of yarn
Gauge
16 sts and 18 rows = 4 in (10 cm) in moss stitch, counting each sc and each ch-1 sp as 1 st.
One square (29 sts and 33 rows) measures about 7 1/4 in (18.5 cm) wide and 7 1/3 in (18.5 cm) tall. Make one square and measure it before you go on: if it’s bigger, try a smaller hook; if it’s smaller, try a bigger hook.
Finished size
About 53 × 61 in (134 × 154 cm) including the border, after light blocking: 7 squares across and 8 squares down.
Abbreviations
ch chain
ch-1 sp chain-1 space
rep repeat
RS right side
sc single crochet
sk skip
sl st slip stitch
sp(s) space(s)
st(s) stitch(es)
WS wrong side
Notes
Moss stitch: each sc and each ch-1 sp counts as 1 st. Every row of a square has 29 sts.
The ch 1 at the beginning of each row does not count as a stitch.
Odd rows begin and end with 1 sc (15 sc and 14 ch-1 sps). Even rows begin and end with 2 sc side by side (16 sc and 13 ch-1 sps).
Row 1 is the RS. Keep the foundation tail at the bottom left when the RS faces you (bottom right if you crochet left-handed).
Leave 6 in (15 cm) tails and weave each one into a square of its own color.
Place every square with its foundation chain at the bottom, so all the rows run the same way.
Border side edges: on each square, work 29 sc over its 33 row ends: (sc in next 7 row ends, sk next row end) 4 times, sc in last row end. On the corner squares, the 3-sc corner group takes the place of the sc in the corner.
Instructions
Squares
Make 56 squares: 16 in A, 28 in B and 12 in C.
Foundation: Ch 30.
Row 1 (RS): Sc in 2nd ch from hook, *ch 1, sk next ch, sc in next ch; rep from * across. (15 sc, 14 ch-1 sps: 29 sts)
Row 2: Ch 1, turn. Sc in first sc, sc in next ch-1 sp, *ch 1, sk next sc, sc in next ch-1 sp; rep from * to last sc, sc in last sc. (16 sc, 13 ch-1 sps: 29 sts)
Row 3: Ch 1, turn. Sc in first sc, *ch 1, sk next sc, sc in next ch-1 sp; rep from * to last 2 sts, ch 1, sk next sc, sc in last sc. (15 sc, 14 ch-1 sps: 29 sts)
Rows 4–33: Rep Rows 2 and 3 fifteen more times. Fasten off. (29 sts)
Layout
Lay the squares RS up in 8 rows of 7, foundation chains at the bottom. Rows of squares are numbered from the top.
Rows of squares 1, 3, 5 and 7: A, B, A, B, A, B, A.
Rows of squares 2, 4, 6 and 8: B, C, B, C, B, C, B.
Joining
All seams are worked with D and the 6 mm hook. Fold along the seam line so the two pieces are WS together and the RS faces out: each seam then forms a raised ridge on the RS. Keep your slip stitches loose.
Horizontal seams: Fold along the line between rows of squares 1 and 2. Make a slip knot on the hook. Working through both layers, sl st in each st of the first pair of squares, joining the top edge of the lower square to the foundation edge of the upper square (29 sl sts). *Ch 1, sl st in each st of the next pair of squares (29 sl sts); rep from * to the end. Fasten off. (203 sl sts and 6 ch) Rep between each pair of rows of squares, for 7 seams.
Vertical seams: Fold along the line between the first and second columns of squares. Make a slip knot on the hook. Working through both layers, sl st in each row end (33 sl sts on each square) and 1 sl st in the ch where each horizontal seam crosses. Fasten off. (271 sl sts) Rep between each pair of columns, for 6 seams.
Border
Work with A and the 5.5 mm hook, RS facing.
Round 1: Join A with a sl st in the top right corner st, ch 1 (does not count as a st), 3 sc in the same st (corner). Working across the top, sc in each st and 1 sc in each seam to the last st, 3 sc in the last st (corner). Working down the side, sc in the row ends as given in Notes, with 1 sc in each seam. Work the bottom edge into the foundation chains like the top edge, and the second side like the first, with 3 sc in each corner. Sl st in the first sc to join. (207 sc along the top and bottom and 237 sc along each side between the corner groups: 900 sc)
Rounds 2–4: Ch 1 (does not count as a st), sc in each sc around, working 3 sc in the center sc of each corner. Sl st in the first sc to join. (908 sc, then 916 sc, then 924 sc)
Finishing
Finishing: Fasten off and weave in the remaining ends. Lay the throw flat, mist it lightly with water and let it dry.
Washing a plaid where forest green sits next to cream
Dark greens and rusts bleed more easily than most colors, and here they touch cream on every side. Before you join anything, wash one forest square, one rust swatch and one cream square together in a bowl of cool water. If the cream picks up any tint, wash the throw with a color-catcher sheet every time.
Most acrylic worsted can go in the machine. Wash the throw on its own, cold and gentle, and follow the most delicate of your four labels. Tumble on low only if all four allow it, and finish it flat while still a little damp so the squares settle back into line. Lift it out of the washer with both arms rather than by one corner, and store it folded, not hung.
Questions about joining a plaid from squares
Can I make this crochet plaid blanket in one piece instead of squares?
Not with this pattern. A plaid in one piece means changing colors in the middle of every row and carrying several strands, which is a bigger step than a first blanket needs. Squares keep every piece in a single color, and the rust seams draw the plaid for you. If you’d rather skip joining altogether, a striped throw worked in one piece is a gentler start.
Why is my square a little taller than it is wide?
It’s meant to be very slightly taller: 33 rows come to about 7 1/3 in, against 7 1/4 in across, and blocking evens that out. If yours is more than 1/2 in off, change the number of rows, keeping it odd so the top edge matches Row 1. The border side counts change with it.
What do the seams look like on the back?
On the WS, each seam shows as a flat line of rust stitches instead of a ridge. The plaid still reads from the back, just more softly, so the throw isn’t fully reversible. Keep the RS up on the bed or the sofa.
Can I join the squares in sage instead of rust?
Yes. You’ll lose the overcheck lines, and the throw turns into a softer three-color check. Forest green seams give a bolder, darker grid.
Quick recap
Make 56 moss stitch squares of 29 sts and 33 rows: 16 in forest green, 28 in sage and 12 in cream.
Lay them out in 8 rows of 7, alternating dark rows and light rows, foundation edges at the bottom.
Join the 7 horizontal seams in rust slip stitch, through both layers, with the RS facing out.
Join the 6 vertical seams, with 1 sl st over each crossing.
Work 4 rounds of single crochet in forest green, then weave in the ends.
Once your crochet plaid blanket is finished, spread it over the bed like a cabin quilt and enjoy seeing all 56 squares together for the first time. If a square or a seam gives you trouble along the way, write to me through the Contact page and tell me where you’re stuck.
Fireside Chunky Throw
Some winter evenings in Vermont, all I want is a fire going and something heavy across my knees. This chunky crochet throw is my answer to those nights. It’s one color of super bulky yarn, worked in half double crochet on a 10 mm hook, and it covers a lap after just a few evenings.
I keep mine folded over the armchair closest to the fireplace from October until the snow melts. There are no stripes to plan and no color changes, so the only ends to weave in come from joining new skeins. If you’ve been waiting for a first blanket that won’t take all winter, start here.
Is a chunky crochet throw in super bulky yarn a good first blanket?
Yes. The stitches are big enough that you always know where your hook goes, and after Row 1 every row is the same: 80 half double crochet stitches, 66 times over.
You’ll use three stitches. The foundation is a row of 82 chains. Every row of the body is half double crochet, and both border rounds are single crochet. Each border round closes with a slip stitch: insert the hook, yarn over, and pull the yarn through the stitch and the loop on your hook in one motion. If “hdc” and “sl st” still look like code, the Beginner Guide section on how to read a crochet pattern decodes them.
Two parts may be new: joining a fresh skein, which you’ll do several times, and the border. Its first round travels along the row-ends (the side edges of the rows), then along the underside of the foundation chain. In this yarn each row-end is too big to miss, so it’s a good place to learn.
Keep your loops relaxed, too. Super bulky yarn pulled tight turns stiff, and the guide to holding the hook and yarn helps if you’re still finding your grip.
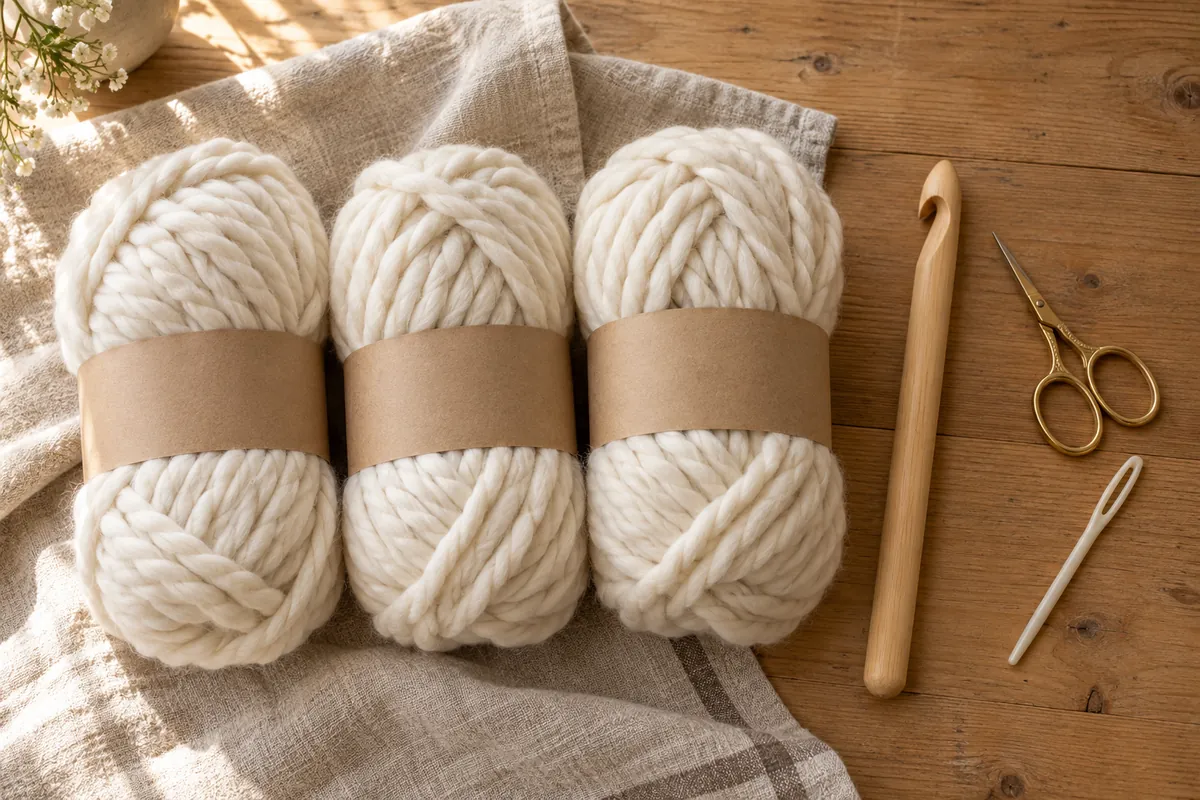
Super bulky, weight 6: finding the right yarn for the Fireside throw
Look for the number 6 and the words “super bulky” on the label. Don’t mix it up with weight 7, often sold as jumbo. Jumbo yarn is much thicker, and on a 10 mm hook it makes a crowded, stiff throw.
Choose a soft, washable acrylic or acrylic blend: a wet wool throw this size is a lot to lift out of a sink. For a first try, I’d skip chenille and velvet-style yarns. They hide the stitches, so counting to 80 turns into guesswork.
Since the whole throw is one color, buy every skein at once and check that they share the same dye lot, the batch number on the label. In plain ivory, a slightly different batch would show as a band across the middle.
Skein sizes in super bulky vary a lot from one brand to the next, so let the label do the math. Divide 950 yd by the yards in one skein, round up, and add one spare. With 100 yd skeins, that’s 10 skeins plus 1.
No super bulky in your shade? Two strands of bulky (weight 5) held together come out at roughly the same thickness, but you’ll need about 950 yd of each strand. Either way, check your gauge, how many stitches and rows fit in 4 in. A 4 in square holds only 7 stitches, so chain 16 and work 10 rows of 14 hdc instead: it should measure about 8 × 8 in.
One shade, no stripes: choosing a color for big stitches
With a single color, the texture does all the work, and light shades show the rows of half double crochet best. A few one-color ideas:
Fireside ivory: the original, bright and soft, though it shows a spilled coffee right away.
Oatmeal heather: a flecked beige that forgives small marks.
Cranberry: a deep red that looks warm against brick or dark wood.
Moss green: earthy and calm, lovely on a gray sofa.
Charcoal: striking, but harder on the eyes while you work.
For a first blanket, stay with a light or medium shade. On charcoal, finding the top of each hdc under a lamp takes real squinting, 80 times a row.
If one color feels too plain, my three-color striped throw keeps the same half double crochet body and adds wide bands of cream, sage and taupe in bulky yarn.
Fireside counts for a baby, throw, twin or queen blanket
The pattern is written for the throw. For another size, change the foundation chain and the number of rows; the rows and border are worked the same way.
Baby, about 30 × 36 in (76 × 91 cm): ch 51 (49 hdc), 43 rows. Border Round 1: 234 sc, with 64 sc along each side. Yarn: about 400 yd (365 m).
Throw, about 48 × 56 in (122 × 142 cm): ch 82 (80 hdc), 67 rows. Border Round 1: 368 sc, with 100 sc along each side. Yarn: about 950 yd (870 m). This is the size written in the pattern.
Twin, about 66 × 91 in (168 × 231 cm): ch 114 (112 hdc), 111 rows. Border Round 1: 564 sc, with 166 sc along each side. Yarn: about 2,125 yd (1,945 m).
Queen, about 90 × 92 in (229 × 234 cm): ch 156 (154 hdc), 113 rows. Border Round 1: 654 sc, with 169 sc along each side. Yarn: about 2,950 yd (2,700 m).
In Round 1, the top and bottom edges each take the number of hdc plus 4 (3 sc in both corner stitches, 1 sc in each stitch between). Each side gets 3 sc for every 2 row-ends, plus 1 in the last one. Round 2 adds 2 sc at each corner: 242, 376, 572 and 662 sc.
Every size has an odd number of rows on purpose: the side repeat (sc, then 2 sc) ends with a single sc in the last row-end, which only works out with an odd count.
I scaled the throw’s 950 yd to the area of each size, so the amounts are estimates with the same extra built in. For the twin and queen, buy a couple of spare skeins, and work the second half at a table, where the heavy finished part can rest.
Holding on to 80 stitches when every hdc is this big
Big stitches are easy to see, and just as easy to miscount. These habits keep the Fireside throw square:
Watch the ch 2. In super bulky, it looks almost like a real stitch. It doesn’t count, so if you work into it on the next row, you’ll have 81.
Mark every 20th chain. A scrap of contrasting yarn at 20, 40, 60 and 80 makes recounting the 82 chains quick.
Check your size after Row 5. Five rows should be about 4 in tall and close to 46 in wide. More than an inch off? Change hooks now.
Look at the skein before each row. If it looks too small to finish 80 stitches, join the next one at this edge.
Split thick tails before weaving them in. If your yarn is made of plies (thinner strands twisted together), untwist each tail into two bundles and weave them in opposite directions. They vanish far better than one fat tail.
US crochet terms
The pattern
Materials
Super bulky weight yarn (weight 6) in ivory, in a soft, washable acrylic or acrylic blend: about 950 yd (870 m) in total.
Yardage is an estimate with a little extra built in. Super bulky yarns vary a lot, so buy one extra skein if you can.
10 mm (N/P-15) crochet hook
Scissors
Yarn needle with a large eye
2 stitch markers
Gauge
7 hdc and 5 rows = 4 in (10 cm) in half double crochet.
Gauge isn’t critical for a throw, but it changes the finished size and how much yarn you’ll use. If your square has more stitches than this, try a bigger hook. If it has fewer, try a smaller hook.
Finished size
About 48 × 56 in (122 × 142 cm), including the border. The body measures about 46 × 54 in before the border.
Abbreviations
ch chain
hdc half double crochet
sc single crochet
sl st slip stitch
st(s) stitch(es)
rep repeat
Notes
The ch 2 at the beginning of each row does not count as a stitch. Work your first hdc into the very first stitch of the row.
Place a stitch marker in the first and last stitch of each row, and check that you have 80 hdc at the end of every row.
Joining a new skein: try to join at the end of a row. Work the last hdc of the row until you have 3 loops on your hook, then yarn over with the new skein and pull it through all 3 loops. Leave 6 in (15 cm) tails to weave in later.
Super bulky stitches are easy to count, so it’s a great project to practice keeping straight edges.
Want a different width? Chain any number you like, plus 2. Every 7 hdc adds about 4 in (10 cm).
Instructions
Body
Foundation: Ch 82.
Row 1: Hdc in the 3rd ch from the hook and in each ch across. Turn. (80 hdc)
Row 2: Ch 2 (does not count as a stitch), hdc in each st across. Turn. (80 hdc)
Rows 3–67: Rep Row 2. At the end of Row 67, do not fasten off. (80 hdc)
Border
The border is worked in rounds, straight after Row 67.
Round 1: Ch 1, turn. 3 sc in the first st (corner), sc in each st across to the last st, 3 sc in the last st (corner). Working down the side, *sc in the next row-end, 2 sc in the next row-end; rep from * to the last row-end, sc in the last row-end (100 sc along the side). Working along the opposite side of the foundation chain, into the base of the Row 1 stitches: 3 sc in the base of the first stitch (corner), sc in the base of each of the next 78 stitches, 3 sc in the base of the last stitch (corner). The 2 skipped chains at the end of the foundation chain are not worked. Working up the other side, work the row-ends exactly as for the first side (100 sc along the side). Sl st in the first sc to join. (368 sc)
Round 2: Ch 1 (does not count as a stitch), sc in the first st, 3 sc in the next st (the center of the corner), *sc in each st to the next corner center, 3 sc in the corner center; rep from * 2 more times, sc in each remaining st. Sl st in the first sc to join. (376 sc)
Finishing
Finishing: Fasten off and weave in all ends with your yarn needle. Super bulky tails are thick, so weave them in a little farther than usual, about 3 in (8 cm), changing direction once.
Blocking (optional): Wash the throw following the yarn label and let it dry flat. It helps the edges lie straight.
Washing a heavy super bulky throw without stretching it
Check your label, but most acrylic super bulky yarns can be machine washed. Wash the throw on its own, cold and gentle, in a large front-loader if you can, since it fills a small washer quickly.
Wet, it weighs far more than it did dry. Lift it out with both arms underneath instead of pulling it by a corner, because the weight of the soaked fabric can stretch the stitches. If the label allows the dryer, use low heat and take the throw out while it’s still a little damp, then lay it flat to finish. Otherwise, spread it over a drying rack or across two chairs and turn it once.
Ivory shows marks, so dab spills right away with cool water, without rubbing. Store it folded, not hung, so its weight doesn’t pull it out of shape.
Questions about the Fireside throw
Can I make this chunky crochet throw with weight 7 jumbo yarn?
Not with these counts. Jumbo yarn is much thicker than super bulky, so 80 stitches would come out far wider, and the fabric would be stiff on a 10 mm hook. If you love jumbo yarn, use the hook on its label, make a gauge swatch, and work out a new chain from your own stitches per inch, plus 2.
My border ripples, or it pulls in. What went wrong?
Ripples usually mean too many stitches along the sides, and pulling in means too few. Count one side first: on the throw, it should be 100 sc for 67 row-ends. If the count is right and the border still waves, work it again with a smaller hook.
How do I make the throw longer without making it wider?
Keep the 82-chain foundation and add rows. Every 5 rows adds about 4 in (10 cm), and you’ll need about 70 yd (65 m) more yarn for each 5 rows. Stop on an odd row so the border repeat works out: 77 rows, for example, gives about 64 in finished, with 115 sc along each side in Round 1.
Is it normal for my hands to get tired with a 10 mm hook?
Yes, at first. A big hook and heavy yarn need a lighter grip than you might expect, so try holding the hook loosely and resting every few rows. Let the blanket sit on your lap or a table instead of hanging from the hook, because its weight pulls on your wrist as it grows.
Quick recap
Chain 82 and work Row 1 in half double crochet, starting in the 3rd chain from the hook: 80 stitches.
Repeat Row 2 up to Row 67, with a ch 2 that doesn’t count and 80 hdc in every row.
Join each new skein at the end of a row, leaving 6 in tails.
Without fastening off, work border Round 1 in single crochet, with 3 sc in each corner: 368 sc.
Work Round 2 for 376 sc, then fasten off and weave in the tails.
Once your chunky crochet throw is done, fold it over the arm of your favorite chair and claim the first evening under it. If a row or a count gives you trouble along the way, write to me through the Contact page and tell me which row you’re on.
Sunday Morning Throw
Some blankets are for show. This one lives on my couch, usually half tangled around my feet while the coffee cools. The Sunday Morning Throw is an easy striped crochet blanket made of one stitch only, half double crochet, in wide bands of cream, sage and taupe.
Each stripe is 9 rows of bulky yarn, so you see real progress every evening. By the time you’re bored of one color, it’s time to switch.
Is this easy striped crochet blanket right for a first project?
If you can chain and make a half double crochet, yes. The body never changes: 120 stitches, row after row, from the first stripe to the last. The border at the end is plain single crochet.
Here’s what you’ll use, with a link to each stitch in the Stitch Library:
New to pattern shorthand like “hdc” or “rep”? The section on reading a pattern in the Beginner Guide explains every abbreviation you’ll meet here.
The one skill that might be new is the color change. You’ll do it 12 times, always at the very end of a row, and after the second or third time your hands will know it by heart.
Choosing a bulky yarn for the Sunday Morning stripes
The throw is written for bulky yarn, weight 5 on the label. What matters most here is that all three colors come from the same yarn line. Two different brands of “bulky” can be surprisingly different in thickness, and a thinner sage stripe would pull the edges in.
Buy all your cream at once. Color A makes up more than half the blanket, and skeins from different dye lots can be a shade apart. On a light cream, you’d see the difference in the middle of a stripe.
For a blanket that lives on the couch and gets dragged around, I reach for a soft acrylic or acrylic blend that can go in the washing machine. A wool blend feels lovely in winter but often needs hand washing, which is a lot to ask of a 50 × 60 in throw.
No bulky yarn at your local store? Two strands of worsted weight held together work well. Crochet a 4 in square first and compare it with the gauge in the pattern before you commit.
Picking your own three stripe colors
The stripes follow a simple order: A, B, A, C, and repeat. Color A shows up in 7 of the 13 stripes, so it sets the mood of the whole blanket. I’d keep it the lightest of your three, so the accent colors pop against it.
A few combinations that work with this stripe order:
Farmhouse: cream, sage green and taupe, like the one in the photos.
Cabin weekend: oatmeal, rust and deep forest green.
Lake house: white, soft denim blue and sandy beige.
Rose garden: warm white, dusty pink and light gray.
Quiet modern: ivory, oatmeal and charcoal.
Before you buy, lay the three skeins side by side in daylight. If B and C look almost the same, the pattern of the stripes gets lost.
Sizing the throw for a crib, a couch or a bed
The pattern is written for the throw, but the stripe order stays the same in every size. Change the chain count and the number of stripes, and always finish with a Color A stripe. Each stripe stays 9 rows tall.
Baby, about 30 × 34 in (76 × 86 cm): ch 72 (70 hdc), 7 stripes (63 rows). Border Round 1: 336 sc. Yarn: Color A about 375 yd (345 m), Color B about 150 yd (140 m), Color C about 100 yd (90 m).
Throw, about 50 × 60 in (127 × 152 cm): ch 122 (120 hdc), 13 stripes (117 rows). Border Round 1: 598 sc. Yarn: Color A about 1,000 yd (915 m), Color B about 400 yd (365 m), Color C about 400 yd (365 m). This is the size in the pattern below.
Twin, about 66 × 88 in (168 × 224 cm): ch 162 (160 hdc), 19 stripes (171 rows). Border Round 1: 840 sc. Yarn: Color A about 1,800 yd (1,650 m), Color B about 800 yd (730 m), Color C about 650 yd (595 m).
Queen, about 90 × 88 in (229 × 224 cm): ch 222 (220 hdc), 19 stripes (171 rows). Border Round 1: 960 sc. Yarn: Color A about 2,400 yd (2,195 m), Color B about 1,100 yd (1,005 m), Color C about 900 yd (825 m).
In every size, Rounds 2 and 3 of the border each add 8 stitches, 2 in each corner. The yarn amounts are estimates with some extra built in. For the twin and queen sizes, an extra skein of each color is a good idea.
If you’d like something smaller and softer for a nursery, the Maple Lane baby blanket uses the same striped idea in single crochet.
Keeping 120 stitches and straight edges, row after row
Wobbly edges are the most common worry with a first blanket, and almost always the cause is a stitch lost or gained at the ends of a row. A few habits keep this throw neat:
Clip a marker into the first and last stitch of every row. The first hdc goes right at the base of the ch 2. The last one goes into the stitch the marker was in.
Count to 120 at the end of each row, at least for the first stripe. Once the rhythm settles, counting every few rows is enough.
Measure after Row 6. The blanket should be about 48 in wide. If it’s 50 in or 45 in, change your hook size now rather than at Row 80.
Make your foundation chain loose. A tight chain makes the bottom edge narrower than the rest. Chaining with a 7 mm hook, then switching to 6.5 mm for Row 1, fixes it.
Weave in tails at the end of each stripe. There are 26 in total. Doing two at a time feels like nothing; doing all 26 at the end feels like a chore.
Would you rather skip the color changes completely? The Fireside throw is worked in one color of super bulky yarn and grows even faster.
US crochet terms
The pattern
Materials
Bulky weight yarn (weight 5) in 3 colors, in a soft, washable acrylic or acrylic blend:
Color A (cream): about 1,000 yd (915 m)
Color B (sage green): about 400 yd (365 m)
Color C (taupe): about 400 yd (365 m)
Yardage is an estimate with a little extra built in. Yarns vary, so buy one extra skein of Color A if you can.
6.5 mm (K-10.5) crochet hook
Scissors
Yarn needle
2 stitch markers
Gauge
10 hdc and 8 rows = 4 in (10 cm) in half double crochet.
Gauge isn’t critical for a throw, but it changes the finished size and how much yarn you’ll use. If your square has more stitches than this, try a bigger hook. If it has fewer, try a smaller hook.
Finished size
About 50 × 60 in (127 × 152 cm), including the border. The body measures about 48 × 58 in before the border. Baby, twin and queen sizes are listed in the online version of this pattern at easycrochetblanket.com.
Abbreviations
ch chain
hdc half double crochet
sc single crochet
sl st slip stitch
st(s) stitch(es)
rep repeat
Notes
The ch 2 at the beginning of each row does not count as a stitch. Work your first hdc into the very first stitch of the row.
Place a stitch marker in the first and last stitch of each row, and check that you have 120 hdc at the end of every row.
To change colors: work the last hdc of the row until you have 3 loops on your hook. Pick up the new color, yarn over and pull it through all 3 loops. Cut the old color, leaving a 6 in (15 cm) tail.
Weave in the tails as you go, or crochet over them on the next row. With 26 tails in total, your future self will thank you.
Want a different width? Chain any number you like, plus 2. Every 10 hdc adds about 4 in (10 cm).
Instructions
Body
Foundation: With Color A, ch 122.
Row 1 (A): Hdc in the 3rd ch from the hook and in each ch across. Turn. (120 hdc)
Row 2 (A): Ch 2 (does not count as a stitch), hdc in each st across. Turn. (120 hdc)
Rows 3–9 (A): Rep Row 2. At the end of Row 9, change to Color B. (120 hdc)
Rows 10–18 (B): Rep Row 2. At the end of Row 18, change to Color A. (120 hdc)
Rows 19–27 (A): Rep Row 2. At the end of Row 27, change to Color C. (120 hdc)
Rows 28–36 (C): Rep Row 2. At the end of Row 36, change to Color A. (120 hdc)
Rows 37–45 (A): Rep Row 2. At the end of Row 45, change to Color B. (120 hdc)
Rows 46–54 (B): Rep Row 2. At the end of Row 54, change to Color A. (120 hdc)
Rows 55–63 (A): Rep Row 2. At the end of Row 63, change to Color C. (120 hdc)
Rows 64–72 (C): Rep Row 2. At the end of Row 72, change to Color A. (120 hdc)
Rows 73–81 (A): Rep Row 2. At the end of Row 81, change to Color B. (120 hdc)
Rows 82–90 (B): Rep Row 2. At the end of Row 90, change to Color A. (120 hdc)
Rows 91–99 (A): Rep Row 2. At the end of Row 99, change to Color C. (120 hdc)
Rows 100–108 (C): Rep Row 2. At the end of Row 108, change to Color A. (120 hdc)
Rows 109–117 (A): Rep Row 2. Do not fasten off. (120 hdc)
Border
The border is worked in Color A, in rounds, straight after Row 117.
Round 1: Ch 1, turn. 3 sc in the first st (corner), sc in each st across to the last st, 3 sc in the last st (corner). Working down the side, *sc in the next row-end, 2 sc in the next row-end; rep from * to the last row-end, sc in the last row-end (175 sc along the side). Working along the opposite side of the foundation chain, into the base of the Row 1 stitches: 3 sc in the base of the first stitch (corner), sc in the base of each of the next 118 stitches, 3 sc in the base of the last stitch (corner). The 2 skipped chains at the end of the foundation chain are not worked. Working up the other side, work the row-ends exactly as for the first side (175 sc along the side). Sl st in the first sc to join. (598 sc)
Round 2: Ch 1 (does not count as a stitch), sc in the first st, 3 sc in the next st (the center of the corner), *sc in each st to the next corner center, 3 sc in the corner center; rep from * 2 more times, sc in each remaining st. Sl st in the first sc to join. (606 sc)
Round 3: Ch 1, sc in the first 2 sts, 3 sc in the next st (the center of the corner), *sc in each st to the next corner center, 3 sc in the corner center; rep from * 2 more times, sc in each remaining st. Sl st in the first sc to join. (614 sc)
Finishing
Finishing: Fasten off and weave in all remaining ends with your yarn needle.
Blocking (optional): Wash the throw following the yarn label and let it dry flat. It helps the stripes and edges lie nice and even.
Washing a throw with cream and colored stripes
Cream sitting right next to sage and taupe means the first wash deserves a little care. Wash the finished throw on its own, in cold water on a gentle cycle, and toss in a color catcher sheet if you have one. If any dye is going to run, it happens in that first wash.
After that, follow your yarn label. Most acrylics are happy in the machine and can tumble dry on low. A throw this size takes a while to dry flat, so if your label allows the dryer, low heat is your friend. Fold it rather than hanging it over a door: the weight of 117 rows can stretch the stitches over time.
Sunday Morning Throw FAQ
Can I make this easy striped crochet blanket with worsted weight yarn?
You can, but with the same stitch count it will come out noticeably smaller, since worsted stitches are thinner. Use a 5.5 mm hook, make a gauge square, and add stitches to your foundation chain until it measures about 48 in. Or hold two strands of worsted together and follow the pattern as written.
Why does my blanket get wider as I go?
An extra stitch at the start or end of a row is the usual cause. The ch 2 at the beginning doesn’t count, so if you also work a stitch into the top of it on the next row, you gain one. Markers in the first and last stitches solve this quickly.
Can I carry the yarn up the side instead of cutting it?
Not easily with this stripe order. Each stripe is 9 rows, an odd number, so the color changes happen on alternating sides of the blanket. The cream would also have to travel 9 rows between stripes, which leaves long, loose strands on the edge. Cutting and weaving in gives a much tidier border.
How long does the throw take?
Most people finish the throw in 3 to 4 weekends, depending on how much time they have. The baby size is a nice project for one or two weekends.
Can I make it in one color?
Yes. Work all 117 rows in a single color and skip the color changes. You’ll need about 1,800 yd (1,650 m) for the throw, roughly the three colors added together.
Quick recap
Chain 122 with Color A and work Row 1 in half double crochet: 120 stitches.
Repeat Row 2 for every row of the body, counting 120 stitches each time.
Change color every 9 rows, in the order A, B, A, C, for 13 stripes in total.
Finish with 3 rounds of single crochet in Color A, with 3 stitches in each corner.
Weave in your 26 tails and give the throw its first gentle wash on its own.
I hope this easy striped crochet blanket ends up on your couch, too. If you have a question along the way, you can always reach me through the Contact page.